Showing posts with label Avery Elle. Show all posts

Wednesday, 26 February 2025

Uniko Celebrating 13 Years - Introducing...Stencil Layering Organic Blooms and Organic Blooms Clear Stamps

Happy Wednesday

Welcome to day three of the Uniko new release introductions and today the team are introducing a new layering stencil set and co-ordinating stamp set.

You can use these independently and also together where you use the stencils to colour the stamped images.

For my first card I've used just the stencil set, together with a greeting from the stamp set...


I simply used the stencils to create the floral design directly on the card base.  I then used a curved die to cut the corner piece where I stamped the sentiment.  I added some co-ordinating sprinkles to finish the card.

Materials used:
  • Stencils: Uniko - Layering Organic Blooms
  • Stamps: Uniko - Organic Blooms
  • Ink: Altenew - Wisteria, Ultraviolet, Andromeda, Minty Mint, Sweet Leaf; Versafine Clair - Nocturne
  • Die: Avery Elle - Dotted Borders Die
  • Accents: Little Things from Lucy's Cards - Sprinkles: Wisteria


And now my second card where I used just the stamp set...


On a die cut panel I stamped the flowers and leaves, using some masking.  I then coloured the image with Copic markers.  I stamped the sentiment, also from the set, onto a vellum strip and heat embossed in white before adhering this from the edge of the panel.  The panel was then adhered flat to the card base.


Materials used:
  • Stamps: Uniko - Organic Blooms
  • Ink: Memento - Tuxedo Black; VersaMark
  • Coloured with Copics
  • Embossing Powder: Brutus Monroe - Alabaster
  • Die: Create a Smile - Cool Cuts Scalloped Rectangles

And I have one more where I've combined the stencil set with the stamp set...


I stamped a row of the flowers, masking so I could overlap them.  I then used the stencils to ink blend each flower, also using the masks where there were overlaps.  I kept this one really simple and just added a sentiment and nothing more.

Materials used:
  • Stamps: Uniko - Organic Blooms
  • Stencils: Uniko - Layering Organic Blooms
  • Ink: Memento - Tuxedo Black; Altenew - Rubellite, Pink Diamond, Maple Yellow, Citrus Burst; Versafine Clair - Nocturne


I hope you're enjoying all these introductions this week, I'll be back tomorrow with the final introduction before revealing the entire release on Friday, when the products will be available to purchase.

Thanks again for taking a look, I appreciate your visit.



Friday, 15 July 2022

Uniko Brand Ambassador Inspiration - Festive Friday using Rustic Wreath


Good morning, or should I say Happy Festive Friday!

I'm over on the Uniko blog today with some Christmas inspiration.  I can't say I've ever been this early with my Christmas makes (but I always aim to be!) so it's a first for me.  And following the "Christmas in July" tradition, Bev is offering 10% off some Christmas goodies at the Uniko shop, here.

Today I have three makes, all using the Rustic Wreath Clear Stamp Set, along with a few other Christmas products.  You can find all the details of how these were made over on the Uniko blog post, here.

So first up is a project using the stamp set, purely stamped in a traditional design...


Materials used:
  • Stamps: Uniko - Rustic Wreath
  • Ink: Altenew - Everygreen, Forest Glades, Mocha, Mangrove Root, Crimson; VersaMark
  • Embossing Powder: Wow! - Metallic Gold Rich
  • Die: Create a Smile - Cool Cuts Double Stitched Rectangles

For this next card I've combined the Rustic Wreath Clear Stamp Set with a couple of other products from the Uniko Christmas range...


Materials used:
  • Stencil: Uniko - Christmas Folk Snowflake Stencil
  • Stamps: Uniko - Rustic Wreath, Pattern Building Christmas Tree (sentiment)
  • Ink: Distress Ink - Old Paper; VersaMark
  • Embossing Powder: Wow! - Metallic Gold Rich
  • Die: Create a Smile - Cool Cuts Double Stitched Rectangles

My final card combines the Rustic Wreath set with stamps from two other festive sets...


Materials used:
  • Stamps: Uniko - Rustic Wreath, Rustic Christmas, Big & Bold Merry
  • Ink: Altenew - Crimson; Versafine Clair - Nocturne; VersaMark
  • Embossing Powder: Wow! - Metallic Gold Rich
  • Die: Avery Elle - Dotted Borders

Well, that's all from me today.  I hope I've provided you with some inspiration for your festive projects.

It's scorching in the UK right now, seems very odd talking about Christmas in the middle of a heatwave!  

Stay safe (and cool!) everyone.


Wednesday, 23 February 2022

Uniko February 2022 Release - Introducing...Background Blocks Cogs, Background Blocks Splatters and Everyday Sentiments

Hi there

Welcome to the first of the introductions for Uniko's 10th Birthday Release. 

I'll get straight to it, I'm sure you'd rather see the products in action than have me waffling on!  And don't forget to pop on over to the Uniko blog where you will find more inspiration from the rest of the team too.

First up is the new Background Blocks Cogs stamp and I've used a sentiment from the new Everyday Sentiments set...


Masculine cards are the kind I find most difficult so I had to have a think and plan this one out.  I decided on layered emboss resist.  I've only used this technique a handful of times but the effects are great.  I masked off a central rectangle and then blended with a few earthy tones of Distress Ink.  After making sure the ink was completely dry and adding some anti-static powder, I stamped the cogs image with VersaMark ink,removed the masks and heat embossed in clear.  I replaced the masks and then blended over the entire background with a darker shade, which then reveals the previous ink colours trapped underneath the embossing.  The sentiment was stamped in a brown shade below.


Materials used:
  • Stamps: Uniko - Background Blocks Cogs, Everyday Sentiments
  • Ink: Distress Ink - Pumice Stone, Rusty Hinge, Brushed Corduroy, Frayed Burlap; VersaMark; Altenew - Moon Rock
  • Embossing Powder: Wow! - Clear Gloss
  • Die: Create a Smile - Cool Cuts Double Stitched Rectangles


And for my second make I used the new Background Blocks Splatters stamp and another from Everyday Sentiments...


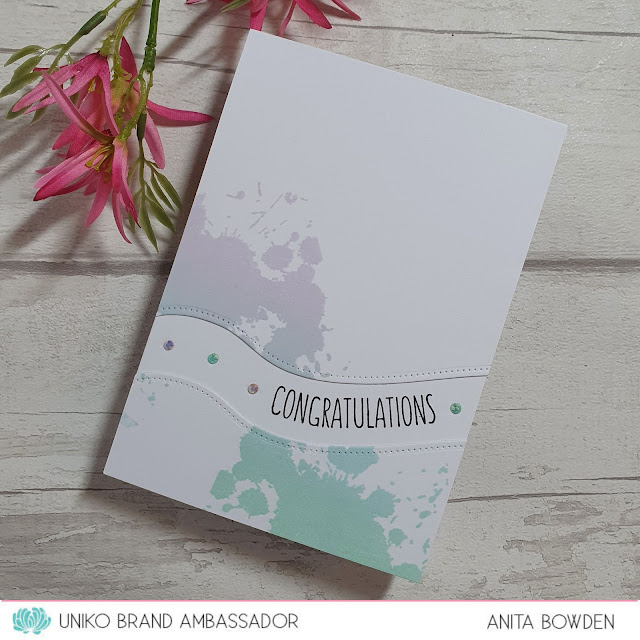
I began with a panel the same size as my card base and stamped the image twice, once with lilac fading into blue ink, and again with blue fading into green ink, to create a continuous flow of colour.  I then used a border die to cut a section away.  The two panels were then adhered to the card base and the sentiment stamped between, curved slightly to follow the shape of the die cuts.


Materials used:
  • Stamps: Uniko - Background Blocks Splatters, Everyday Sentiments
  • Ink: Altenew - Soft Lilac, Sea Glass, Mountain Mist; Versafine Clair - Nocturne
  • Die: Avery Elle - Dotted Border Dies
  • Accents: Little Things from Lucy's Cards - Jewels: Shimmering Pool Mix and Grape Mix


Thanks so much for stopping by today.  I'll be back tomorrow morning to share more makes using more products from this new release.

(AD - some products kindly gifted for Design Team purposes)


Saturday, 9 May 2020

Less is More Challenge #419

Hi guys

Another fortnight has whizzed by so it's new challenge day at Less is More.  And this time we have a Colour challenge for you...


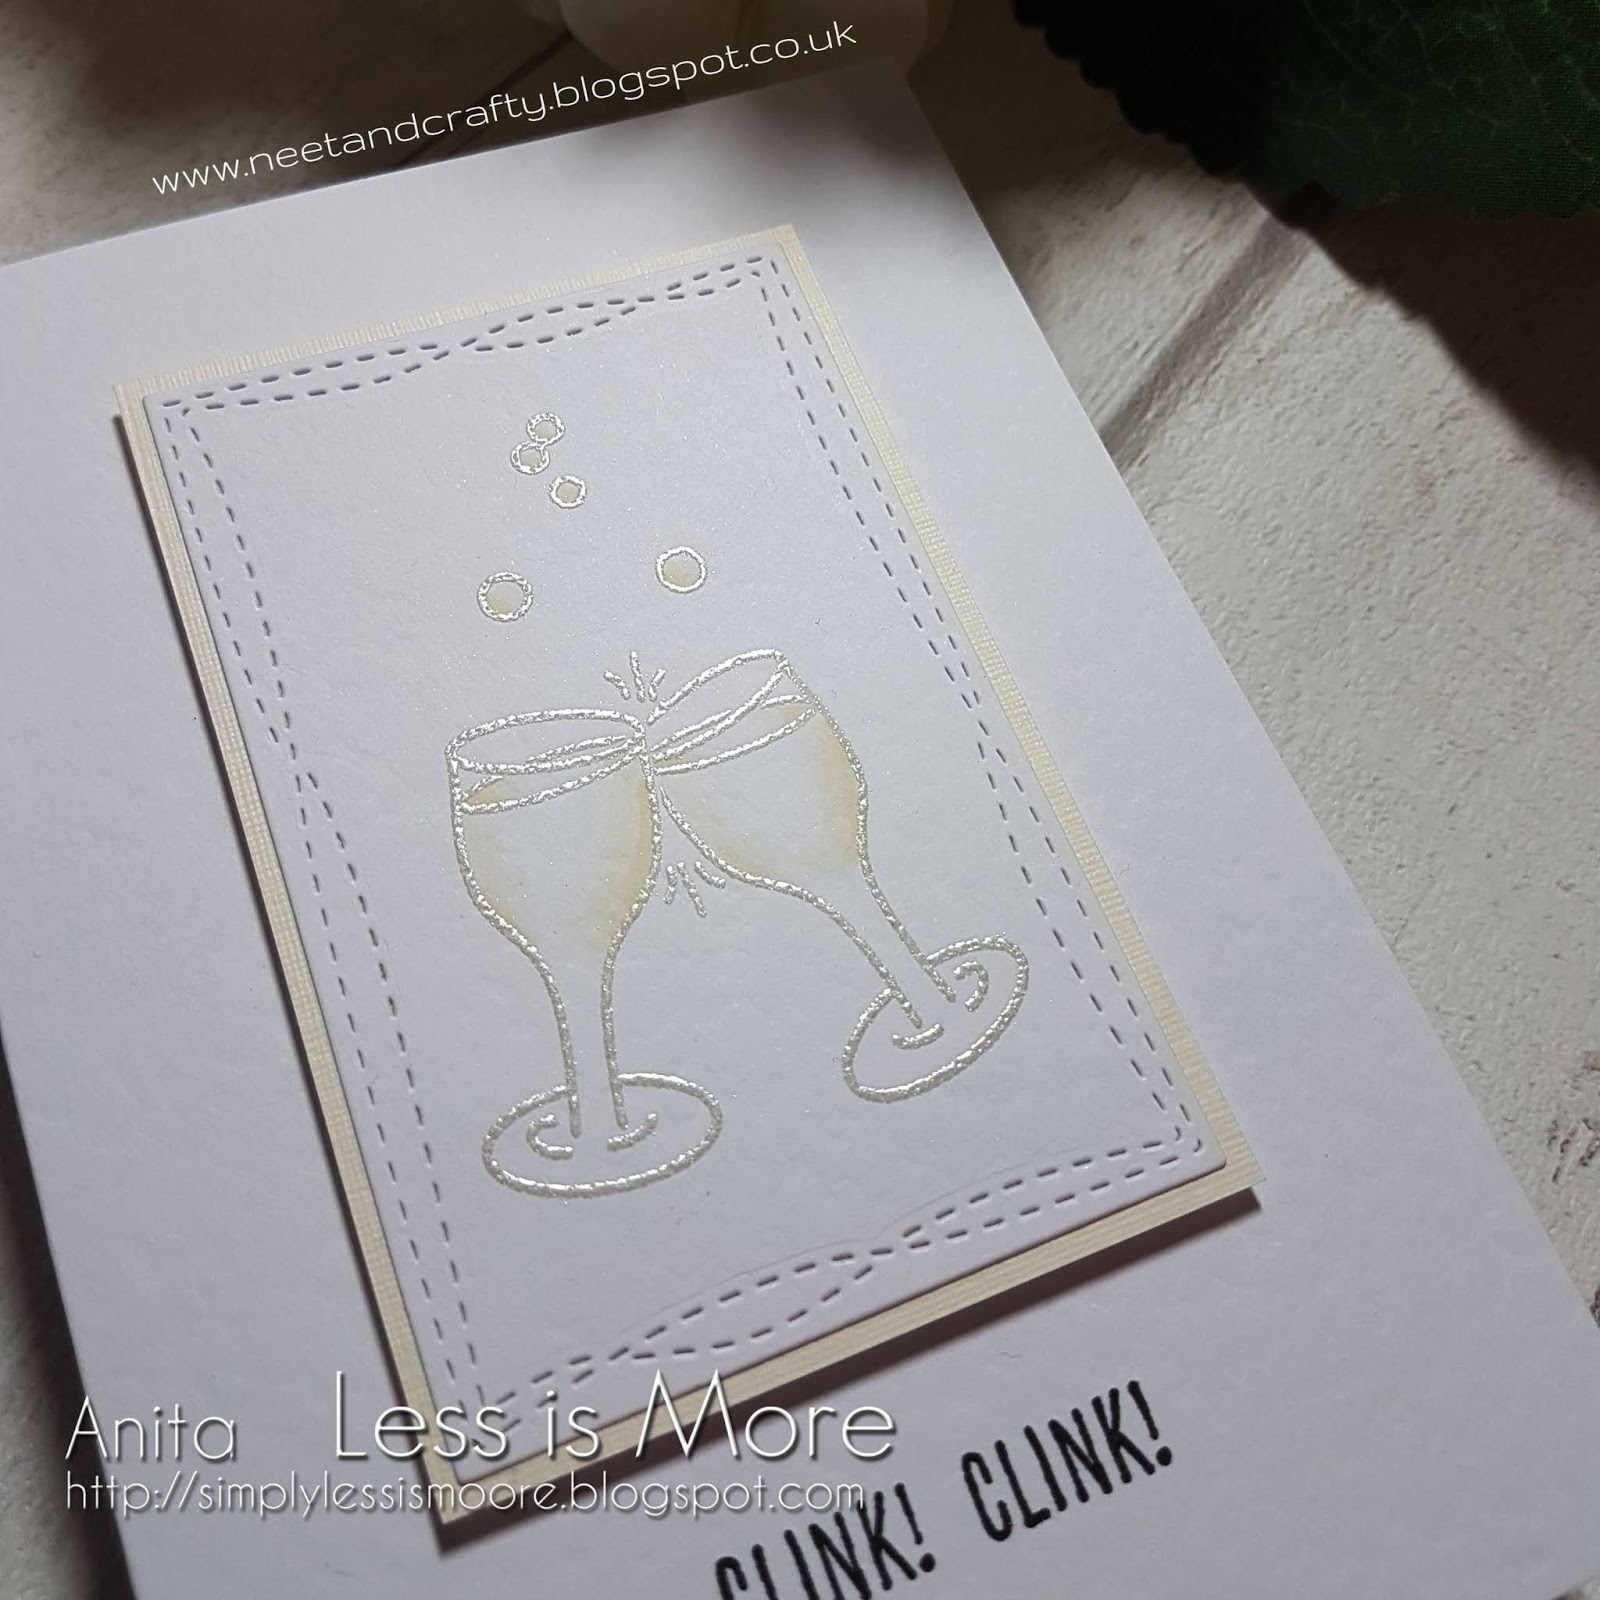
A bit of trial and error was required for this one and it took three attempts for me to make this card, but I got there in the end, I think!


The problem I had was achieving a cream hue for my focal image.  The first ink I tried was far too yellow and the second one I tried was too beige, so I had to try a few ink colours and embossing powder combos before I got this result.  I used hammered cardstock for the base and image panel although it's difficult to catch on camera.  I used a stitched rectangle die for my image panel and stamped and embossed the glasses and bubbles.  I then added some colour using ProMarkers.  This was then mounted onto a mat of cream linen cardstock and both were popped up onto the base using fun foam.  I finished with a sentiment stamped in black.


Materials used:

  • Die: MFT Die-namics - Wonky Stitched Rectangle Stax
  • Stamps: Avery Elle - Sip Sip Hooray; Reverse Confetti - Clink
  • Ink: Versa Color - Vanilla; Versafine - Onyx Black
  • Embossing Powder: Wow! - White Pearl
  • Coloured with ProMarkers
  • Cardstock from stash

Challenge entries:

Crafty Cardmakers - Challenge #256 - Celebrations


Thanks so much for visiting.  And don't forget that we had new members joining the Design Team last time so there's lots of inspiration over at the main Less is More challenge blog, here.

Friday, 27 March 2020

Magnolias for Mother's Day

Hi guys

Just popping by to share the card I made for my lovely mum for Mother's Day last weekend.


Some patterned paper was die cut at an angle and adhered to the card base.  I then stamped the layered magnolia flowers and leaves and cut them out with their co-ordinating dies and adhered in place.  The card was simply finished with a sentiment stamped in black.


Materials used:

  • Stamps: Clearly Besotted - Magnolia Moments (and co-ordinating dies), Love You Tons
  • Ink: Altenew - Frosty Pink, Coral Berry, Velvet, Frayed Leaf, Forest Glades; Versafine - Onyx Black
  • Die: MFT - Stitched Basic Edges
  • Avery Elle - The Sorbet Collection


Challenge entries:

Use Your Stuff - Challenge #394 - Spring
Stamping Sensations - March Challenge - Spring Florals
Penny Black and More - March Challenge - Spring Flowers


Thank you for taking the time to visit :)

Saturday, 14 September 2019

Less is More Challenge #404

Good morning!

Today marks the start of another challenge over at Less is More, and this time we're back with a Theme challenge.  Here's your cue card...


Our generous sponsor for the month of September is Visible Image, so, as always, just by playing along will give you a chance of winning the monthly prize

Visible Image


Just the one card from me this time, and it was a super quick one...


I started with a panel die cut with a stitched rectangle die.  All the text you see here is one stamp, so it was super easy just to stamp and heat emboss in white.  I then used post-it notes to mask the areas around the embossing then ink blended with Distress Oxides.  The panel was then popped up on the card base using fun foam.


Materials used:

  • Die: Create a Smile - Cool Cuts Double Stitched Rectangles
  • Stamp: Avery Elle - Cheers
  • Ink: VersaMark; Distress Oxides - Squeezed Lemonade, Mermaid Lagoon
  • Embossing Powder: Altenew - Pure White


My teamies are sharing some fabulous projects over on the main challenge blog, please do pop over for more inspiration.  And as always, there's two weeks to play along.

I'll be back with another post this evening, to share details of the first challenge at a new challenge blog, Perfectly CAS, so I hope you'll stop by.  My posts are like buses, nothing for days then two posts in one day!


Thursday, 11 July 2019

Designing for Honey Doo Crafts - Roses & Lilies and Garden Peony

Hi there

Ok, back this evening to share two final makes using more products by Honey Doo Crafts.  

And don't forget, Honey Doo will have feature hours on Hochanda TV tomorrow, 12 July 2019, at 10am and 3pm (Sky 673 / Freeview 85).  I know many of you will be working, as will I, so I'll be putting the shows on record to have a peak at later.  There will be lots of products available, demos by Amanda, and lots of samples from the whole of the Design Team.

Now, the two samples in this post may look a little familiar if you already follow my blog, and that's because I've made previous cards which are very similar (I've added some pics at the base of this post).  The two Honey Doo sets I'm using on these cards are Roses & Lilies, and Garden Peony.

Ok, first up is Roses and Lilies...


This card is similar to a one layer card I made back in May, here, where I also used teal cardstock and embossed the same image in white.  This time I stamped, embossed and fussy cut the image before adhering it onto the card over an offset panel of glittered polka dot cardstock in a similar tone.  I then simply finished with a sentiment stamped in black.


Materials used:

  • Stamps: Honey Doo Crafts - Roses & Lilies, Just in Case
  • Ink: VersaMark; Versafine - Onyx Black
  • Embossing Powder: Altenew - Pure White
  • Glitter Cardstock: Kanban - Sherbert Pips (many years old)

Challenge entries:

STAMPlorations - Summer Theme and Sketch Challenge - Stamps and Anything Goes
Time Out - Challenge #139 - Inspired by Words


Next up is Garden Peony...


For this card the stamped and coloured strip was actually the waste from this card, here, which I made back in April.  So it's a kind of reversed version, with a coral coloured panel behind picking out the colour in the images.  The sentiment was heat embossed in white and the floral strip popped up on 3D foam.

Materials used:

  • Stamps: Honey Doo Crafts - Garden Peony, Daisy May (sentiment)
  • Coral cardstock from stash
  • Ink: Memento - Tuxedo Black; VersaMark
  • Embossing Powder: Altenew - Pure White
  • Coloured with ProMarkers
  • Die: Avery Elle - Dotted Border Dies

Challenge entries:

Addicted to Stamps and More - Challenge #349 - CAS
Penny Black and More - July Challenge - Summer Colours
STAMPlorations - Summer CAS Card Challenge - AG CAS


Here are the previous similar cards I made...


Thanks so much for visiting, and I hope you are able to tune in tomorrow to see what Honey Doo Crafts has to offer.  If you love florals, it's for you for sure!

Saturday, 6 July 2019

Less is More Challenge #399

Good morning

It's new challenge day over at Less is More.  For the next fortnight we have a Theme challenge for you with lots of scope, here is the cue card...


As it's a new month we also have a new sponsor for you which is the awesome Skull and Cross Buns, so by playing along in our challenges will put you in the running for our monthly prize for July!

We also have a fabulous Guestie joining us this week and I'm sure you'll know her as one of our regular participants at Less is More, the super talented Viv, who was our May winner.  She has a stunning card to share for this challenge so please do pop over to her blog to take a look and say hi.


I've had this last week off work and the weather has been glorious which is pretty rare when I book a week as holiday, so I've been out and about making the most of it, so much so that I've only had chance to make one card for you this time I'm afraid.  I'm on the Design Team for Skull and Cross Buns so when a little package of new goodies arrived from the lovely Emily I wanted to use one of the new stencils on my card project.  

So here it is...


I've not seen any other animal print stencils before so just couldn't wait to have a play with this one!  I began by using the large balloon edge die to cut a corner from some kraft cardstock. I then blended some Distress Ink in from the edge to give it some depth and then blended through the stencil with black ink.  I tied some twine around the balloon and then adhered the die cut using fun foam onto the upper corner of my card base, cut from linen cardstock.  I then used three shades of pigment ink and, using my MISTI, repeatedly stamped 'celebrate' to create an ombre effect.  The remaining part of the sentiment was stamped below in black ink.


Materials used:
  • Die: MFT - Blueprints 26
  • Stencil: Skull and Cross Buns - Leopard Animal Print Stencil
  • Cardstock: Neenah - Dessert Storm; linen cardstock from stash
  • Ink: Distress Ink - Tea Dye, Black Soot; Versa Color - Sand Beige, Pinecone, Charcoal; Versafine - Onyx Black
  • Stamps: Paper Smooches - Sentiment Sampler; Avery Elle - Party Animal
  • Twine: Hemptique - Earthy set

Challenge entries:

STAMPlorations - Summer Theme & Sketch Challenge - Stamp and Anything Goes
STAMPlorations - Summer CAS Card Challenge - AG CAS


Thanks, as always, for stopping by.  I hope you can join in our Celebrations challenge, the linky is open until 19 July, so plenty of time for you to pop your entries into our gallery :)

Tuesday, 2 April 2019

Guest Designer for Honey Doo Crafts - Selection Three

Hi guys

Tonight I'm sharing the last few of my makes for my Guest Designer spot with Honey Doo Crafts

The new sets will be showcased on TV shopping channel, Hochanda tomorrow, 3 April 2019 at 12pm and 4pm BST so please do tune in if you can (Sky 673 / Freeview 85).


So, my cards today have used three more of the new sets I've yet to share.

First up is a shaker card I made using a lovely set called Peony Crest...


To begin I blended a little pale pink ink on the card base and stamped the sentiment.  I then created the offset oval shaker window using a oval stitched die, backed with acetate, and edged the panel with a stitched rectangle die.  The panel was popped up on 3D foam strips, trapping the confetti shaker bits inside.  I then stamped, coloured and fussy cut the main peony crest image and adhered to the panel.


Materials used:

  • Stamps: Honey Doo Crafts - Peony Crest
  • Ink: Distress Ink - Spun Sugar; Memento - Tuxedo Black
  • Dies: Create a Smile - Cool Cuts Double Stitched Rectangles; Lil Inkers - Stitched Ovals
  • Coloured with ProMarkers
  • Shaker Contents: Nuvo Pure Sheen Confetti - Diamond Harlequin; Little Things from Lucy's Cards - Itty Bitty Stars (Neon Bright)


For this next card I used the small images from a new set called Garden Peony to create a background pattern...


I stamped and coloured the panel the same size as the card base.  I then used a border die to cut away an inner section (I can use the cut away part on another card).  The remaining two parts of the panel were popped up on fun foam and the sentiment stamped between, directly onto the card base.  Simples!

Materials used:

  • Stamps: Honey Doo Crafts - Garden Peony, Peony Crest (sentiment)
  • Ink: Memento - Tuxedo Black
  • Coloured with ProMarkers
  • Die: Avery Elle - Dotted Border Dies


And a nice sunny card to complete my selection, using a set called Hello Sunshine...


I masked the card base and blended ink through a sun ray stencil for the central background.  I then created a frame using two rectangle dies and stamped the sentiment along the top before popping up on foam strips.  I then stamped the sunflowers onto watercolour paper and watercoloured with my Zig markers.  The image was then fussy cut out, adhered over the base, using foam pads to pop up the parts within the frame, and then the edges were trimmed to align with the card base.

Materials used:

  • Stamps: Honey Doo Crafts - Hello Sunshine
  • Ink: Distress Ink - Squeezed Lemonade, Spiced Marmalade; Versafine - Onyx Black; Zig Clean Color Real Brush Markers
  • Stencil: MFT - Sun Ray
  • Dies: Create a Smile - Cool Cuts Double Stitched Rectangles

Challenge entry:

Allsorts - Challenge #513 - Use Yellow


Thanks so much for all your lovely visits and comments, I appreciate each and every one of you.  And I hope you love these new stamps and enjoy the show tomorrow if you are able to watch it, unfortunately I'll be at work during both shows so I'll be catching up afterwards.

Related Posts Plugin for WordPress, Blogger...