Showing posts with label Skull and Cross Buns DT. Show all posts

Sunday, 6 February 2022

Skull and Cross Buns - Valentine's New for 2022

Hi there

I finally have some cards to share with you, my first of 2022!  Better late than never, eh!

I've been having a play with some of the New for 2022 Valentine's stamps from Skull and Cross Buns Rubber Stamps, combined with some existing SACB products and some other crafty bits from my stash.

Ok, for this first card I combined a few of the heart stamps...


On some white cardstock I stamped the Solid Heart, the Mini Hearts Outline (from a previous release) and the Happy Valentine's Day Heart Shape in a repetitive pattern in various shades of pink.  One of the solid hearts I stamped in a lighter shade then over-stamped with the sentiment stamp, which fits exactly over the top.  I then die cut using a stitched heart before adding some tiny smooth silver gems.  For some interest, before adhering the heart on foam to my card base, I scored five vertical lines directly onto the card base front.


Materials used:
  • Stamps: Skull and Cross Buns - Solid Heart, Mini Hearts Set (outline), Happy Valentine's Day Heart Shape
  • Ink: Altenew - Pinkalicious, Pink Diamond, Rose Quartz
  • Die: MFT Die-namics - Stitched Heart Stax
  • Gems from stash


Next up, the first of the fun new Valentine's Gonks...


On a die cut rectangle I stamped the Heart Boy Gonk in Copic friendly red ink and then added a little detailing with my Copic markers, just a little grey shading and gave him a pink nose.  I stamped a mask, covered him up and then stencilled over the background using the Brush Heart Pattern Stencil (discontinued) fading the hearts out towards the bottom.  I then used VersaMark ink to stamp the new You're The Best! sentiment and heat embossed it in silver.  After adhering the panel I added some Glossy Accents to the central heart.


Materials used:
  • Stamps: Skull and Cross Buns - Heart Boy Gonk; You're The Best
  • Stencil: Skull and Cross Buns - Brush Heart Pattern (discontinued)
  • Ink: Memento - Lady Bug; Distress Oxide - Worn Lipstick; VersaMark
  • Die: Create a Smile - Double Stitched Rectangles
  • Embossing Powder: Wow! - Metallic Silver
  • Accents: Glossy Accents, Copic markers


And the cute second Valentine's Gonk...
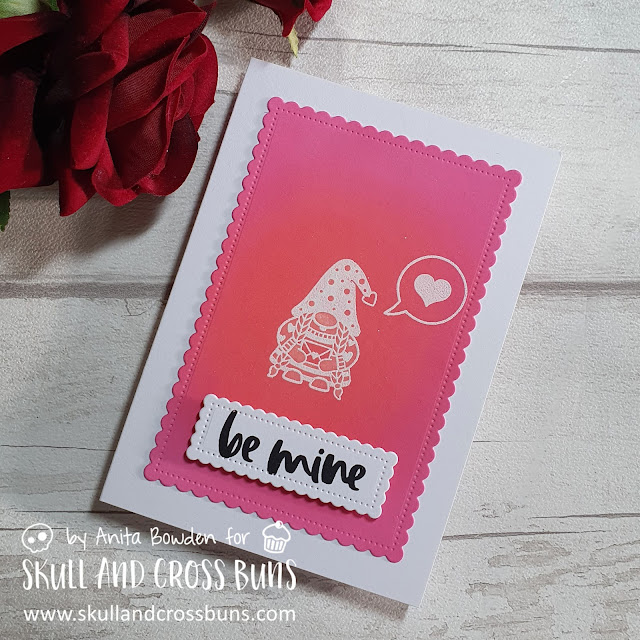

I stamped the new Envelope Girl Gonk and the new Love Heart Speech Bubble with VersaMark ink and heat embossed in white.  I then used the emboss resist technique and blended the whole background with red and pink Distress Oxide ink then buffed up the images to bring the white back.  I die cut this out using a scalloped rectangle die and adhered flat to the card base.  I die cut a smaller scalloped rectangle and stamped the sentiment from the existing Brush Hearts clear stamp set (reduced to clearance price) in black ink.  To finish, I 'painted' sections of the image using water, and blotted away the colour, leaving the envelope within the image a little more prominent.


Materials used:
  • Stamps: Skull and Cross Buns - Envelope Girl Gonk, Love Heart Speech Bubble, Brush Hearts clear set
  • Ink: VersaMark; Distress Oxide - Abandoned Coral, Picked Raspberries; Versafine Clair - Nocturne
  • Dies: Create a Smile - Scalloped Rectangles
  • Embossing Powder: Brutus Monroe - Alabaster White


And a few more of the new stamps for my final card...


A very simple stamped card here using the new for 2022 Heart Present, Solid Heart and Circle Heart stamps, together with the outline heart from the existing Mini Hearts set and a sentiment from the Contemporary Sentiments clear stamps set (reduced to clearance price), stamped in shades of blue and green.  To finish, I added some tiny hearts confetti.


Materials used:
  • Stamps: Skull and Cross Buns - Heart Present, Solid Heart, Circle Heart, Mini Hearts set (outline), Contemporary Sentiments clear set
  • Ink: Altenew - Desert Night, Volcanic Lake, Ocean Waves, Mountain Mist, Sea Glass; Versafine Clair - Nocturne
  • Accents: Little Things from Lucy's Cards - Sprinkles: Sky Blue Hearts


Challenge entries:

Card 1
Addicted to CAS - Challenge #213 - Hearts

Card 2
We Love Stamping - February Challenge - Anything Stamped with Option: Stencilling
NBUS - Challenge #35 - both new stamps

Card 4
Just Add Ink - Challenge #589 - Just Add Minimalist


Thanks for visiting today.  Please do take a look over at Skull and Cross Buns where you will find the new designs for 2022, as well as a great selection of rubber stamps, some of which can be personalised.  Also, all the clear stamp sets, stencils and embellishments are at greatly reduced prices, don't miss out!



(AD - some products kindly gifted for Design Team purposes)

Thursday, 1 April 2021

Easter at Skull and Cross Buns

Hi guys

Today I'm sharing a couple of cards using some stamps from the Easter range at Skull and Cross Buns.

At Skull and Cross Buns, as well as stocking clear stamp sets, inks, stencils and embellishments, Emily's main passion is for making wood mounted rubber stamps.  The stamps are amazing quality and the fact that they are manufactured in my home county of Devon, makes me a huge fan.  Personalised stamps are also available so please do take a look at the website.

Ok, onto my cards, which both use the 'bunny bum' stamp, as well as some others from the selection.  Here's the first...


I die cut a faux stitched square and heat embossed the round sentiment and image in the centre in white before ink blending over the top with Distress Oxides.  I then placed the panel in my MISTI and stamped the bunny four times, leaving the stamp in position and turning the panel 1/4 turn each time.  I then stamped the hot cross bun in between the bunnies in a light brown ink which I then coloured with Copics.  I popped the panel up on fun foam onto the card base and added some adhesive and white flitter to the bunny tails.


Materials used:
  • Die: The Works - square stitched dies
  • Stamps: Skull and Cross Buns - Bunny Bum, Hot Cross Bun, Happy Easter Wreath
  • Ink: Altenew - Frosty Pink; Memento - Desert Sand; VersaMark; Distress Oxide - Squeezed Lemonade, Cracked Pistachio
  • Embossing Powder: Brutus Monroe - Alabaster White
  • Copics: E50, E53
  • White flitter from stash

Challenge entries:

Make My Monday - Challenge #145 - Easter or Spring Card
Uniko - Challenge #64 - Signs of Spring (Option: Easter)


And my second card...


On my card base I adhered some patterned papers, one in a very thin strip along the top edge of another.  On a die cut rectangular panel I then stamped the bunny, sentiment and the daffodil (using mini stamps from a clear set) and coloured the daffodil with Copics.  I then used an embossing pen on the bunny's tail and added some chunky white embossing enamel in two layers for dimension.


Materials used:
  • Patterned paper: Dovecraft - Garden Party
  • Die: Create a Smile - Cool Cuts Double Stitched Rectangles
  • Stamps: Skull and Cross Buns - Bunny Bum, Happy Easter Quirky, Spring Motifs clear stamp set
  • Ink: Altenew - Coral Berry, Forest Glades; Memento - Bamboo Leaves, Cantaloupe
  • Copics: Y08, YG17
  • Embossing Powder: Stampendous - Chunky White Deep Impression Embossing Enamel


Thanks for the visit today, I'll be back tomorrow evening to introduce the new Happy Little Stampers CAS Challenge for April.
(AD - some products kindly gifted for design team purposes)

Thursday, 3 September 2020

Skull and Cross Buns - September 2020 - Selection Four

Good evening, guys

Here is my final batch of samples for Skull and Cross Buns, using products which will be featured on the 7am show on Hochanda TV this coming Saturday, 5 September 2020.


First up is a really simple card, and it proves how versatile some stamp sets can be...


On a die cut panel I stamped the sentiment from the new Contemporary Sentiments set and the heart was actually from the Scandi Christmas set.  I simply coloured the row of hearts with Copic markers and adhered the panel to the card base on 3D foam.

Materials used:
  • Stamps: Skull and Cross Buns - Contemporary Sentiments, Scandi Christmas
  • Ink: Memento - Tuxedo Black
  • Die: MFT Die-namics - Wonky Stitched Rectangle Stax


The next card combines the existing Retro Sweets stamp set with the new Retro Sweets stencil...


On a die cut rectangle I blended the background with Distress Oxides.  Once dry I then pushed my VersaMark ink pad through the stencil and then heat embossed with white pearl embossing powder.  I cut a strip of white cardstock and used a border die to create the holes.  The sweets were stamped and coloured with Copics and the sentiment was stamped and heat embossed in silver.


Materials used:
  • Stencil: Skull and Cross Buns - Retro Sweets
  • Stamps: Skull and Cross Buns - Retro Sweets
  • Ink: Distress Oxide - Tumbled Glass, Spun Sugar, Squeezed Lemonade; Memento - Tuxedo Black; VersaMark
  • Embossing Powder: Wow! - White Pearl, Metallic Silver
  • Dies: Create a Smile - Cool Cuts Double Stitched Rectangles; Paper Smooches - Dots & Dashes


And my final card uses Contemporary Sentiments again with the already available Diamond Harlequin stencil...


On a panel of kraft cardstock I ink blended with Distress Ink and faded it out.  Using the same shade I ink blended through the stencil, again fading it out.  I shifted the stencil slightly and used a second shade of purple ink.  I stamped the sentiment in dark grey ink, then shifted the position slightly and stamped and heat embossed the sentiment in white, creating a shadow effect.  The panel was then adhered on fun foam.


Materials used:
  • Stencil: Skull and Cross Buns - Diamond Harlequin
  • Stamp: Skull and Cross Buns - Contemporary Sentiments
  • Ink: Distress Ink - Seedless Preserves, Dusty Concord; Memento - Tuxedo Black; VersaMark
  • Embossing Powder: Wow! - Opaque Bright White


Thanks as always for stopping by, I hope you can tune in to the show on Hochanda on Saturday at 7am.


Skull and Cross Buns - September 2020 - Selection Three

Good morning

I'm back with more makes for Skull and Cross Buns.  Some Christmas ones for you this morning.


For this first card I've used the new Christmas Jumper stencil and a sentiment from the new Contemporary Sentiments set, along with the Elf Stockings stencil already available...


Lots of masking was involved to ink up this background.  I masked off alternate sections of the Christmas Jumper stencil so I could use the two colours, and the same principle was applied to the Elf Stockings stencil where I've just inked up one section of it for my focal image.  I finished by stamping and heat embossing the sentiment in gold sparkle and added two gold glitter enamel dots.


Materials used:
  • Stencils: Skull and Cross Buns - Christmas Jumper, Elf Stockings
  • Stamp: Skull and Cross Buns - Contemporary Sentiments
  • Ink: Distress Ink - Candied Apple, Lucky Clover; VersaMark
  • Embossing Powder: Wow! - Metallic Gold Sparkle
  • Die: MFT Die-namics - Pierced Square Stax
  • Enamel dots from stash


For this next card I combined two of the existing stamp sets, Christmas Baubles and Scandi Christmas...


I began by stamping and heat embossing the baubles in white on red cardstock and fussy cut them out.  I die cut a frame using two stitched rectangle dies and popped this frame up on 3D foam, adhering to the card base whilst trapping some red twine at the top.  The baubles were then popped up on foam as if hanging from their strings.  I finished by stamping the snowflakes in silver and the sentiment in red, and added some sequins to the baubles.


Materials used:
  • Stamps: Skull and Cross Buns - Christmas Baubles, Scandi Christmas
  • Ink: VersaMark; Versa Color - Silver; Altenew - Crimson
  • Embossing Powder: Wow! - Opaque Bright White
  • Dies: Create a Smile - Cool Cuts Double Stitched Rectangles
  • Accents: Red twine and sequins from stash

Finally, I've used the Christmas Santa Workshop set, along with the Stars and Sparkles stencil and the new Contemporary Sentiments set to create a gift tag...


The elf was stamped and coloured first then I created a mask to enable me to then ink blend the background and ink the stars through the stencil.  The sentiment was then stamped and the reinforcement ring and ribbon added to the tag.

Materials used:
  • Stamps: Skull and Cross Buns - Christmas Santa Workshop, Contemporary Sentiments
  • Stencil: Skull and Cross Buns - Stars and Sparkles
  • Coloured with Copics
  • Ink: Memento - Tuxedo Black; Distress Ink - Stormy Sky, Chipped Sapphire
  • Dies: Clearly Besotted - Tag Along


I'll be back with my final few makes, more than likely this evening.  All these products by Skull and Cross Buns will be showcased on Hochanda TV at 7am this Saturday, 5 September 2020.  


Wednesday, 2 September 2020

Skull and Cross Buns - September 2020 - Selection Two

Hi guys

I'm back with my next batch of samples using products from Skull and Cross Buns.  And if you can, don't forget to tune in to Hochanda TV at 7am this coming Saturday, 5 September 2020 for a closer look at the new products and some existing ones too.


My first card uses two new stencils, Giant Dots and Polka Dots, as well as a new stamp set, Contemporary Sentiments...


On a piece of white cardstock I began by ink blending with Distress Oxides through the Giant Dots stencil.  With the stencil still in position I placed the Polka Dots stencil over the top and added white pigment ink, I then shifted the stencil and added the darker dots.  The panel was then die cut with a double stitched circle die, as well as two co-ordinating shades of textured cardstock die cut with slightly smaller circles from the same set.  I stamped the sentiment then adhered the circles and trimmed away the excess, with the stencilled piece being popped up on 3D foam.


Materials used:
  • Stencils: Skull and Cross Buns - Giant Dots, Polka Dots
  • Stamp: Skull and Cross Buns - Contemporary Sentiments
  • Ink: Distress Oxide - Cracked Pistachio, Peacock Feathers, Mermaid Lagoon; Hero Arts - Unicorn; Versafine - Onyx Black
  • Dies: MFT Die-namics - Double Stitched Circle Stax

Challenge entries:

Allsorts Challenge - Week 587 - Going Around in Circles
NBUS - Challenge #18 - new stencils


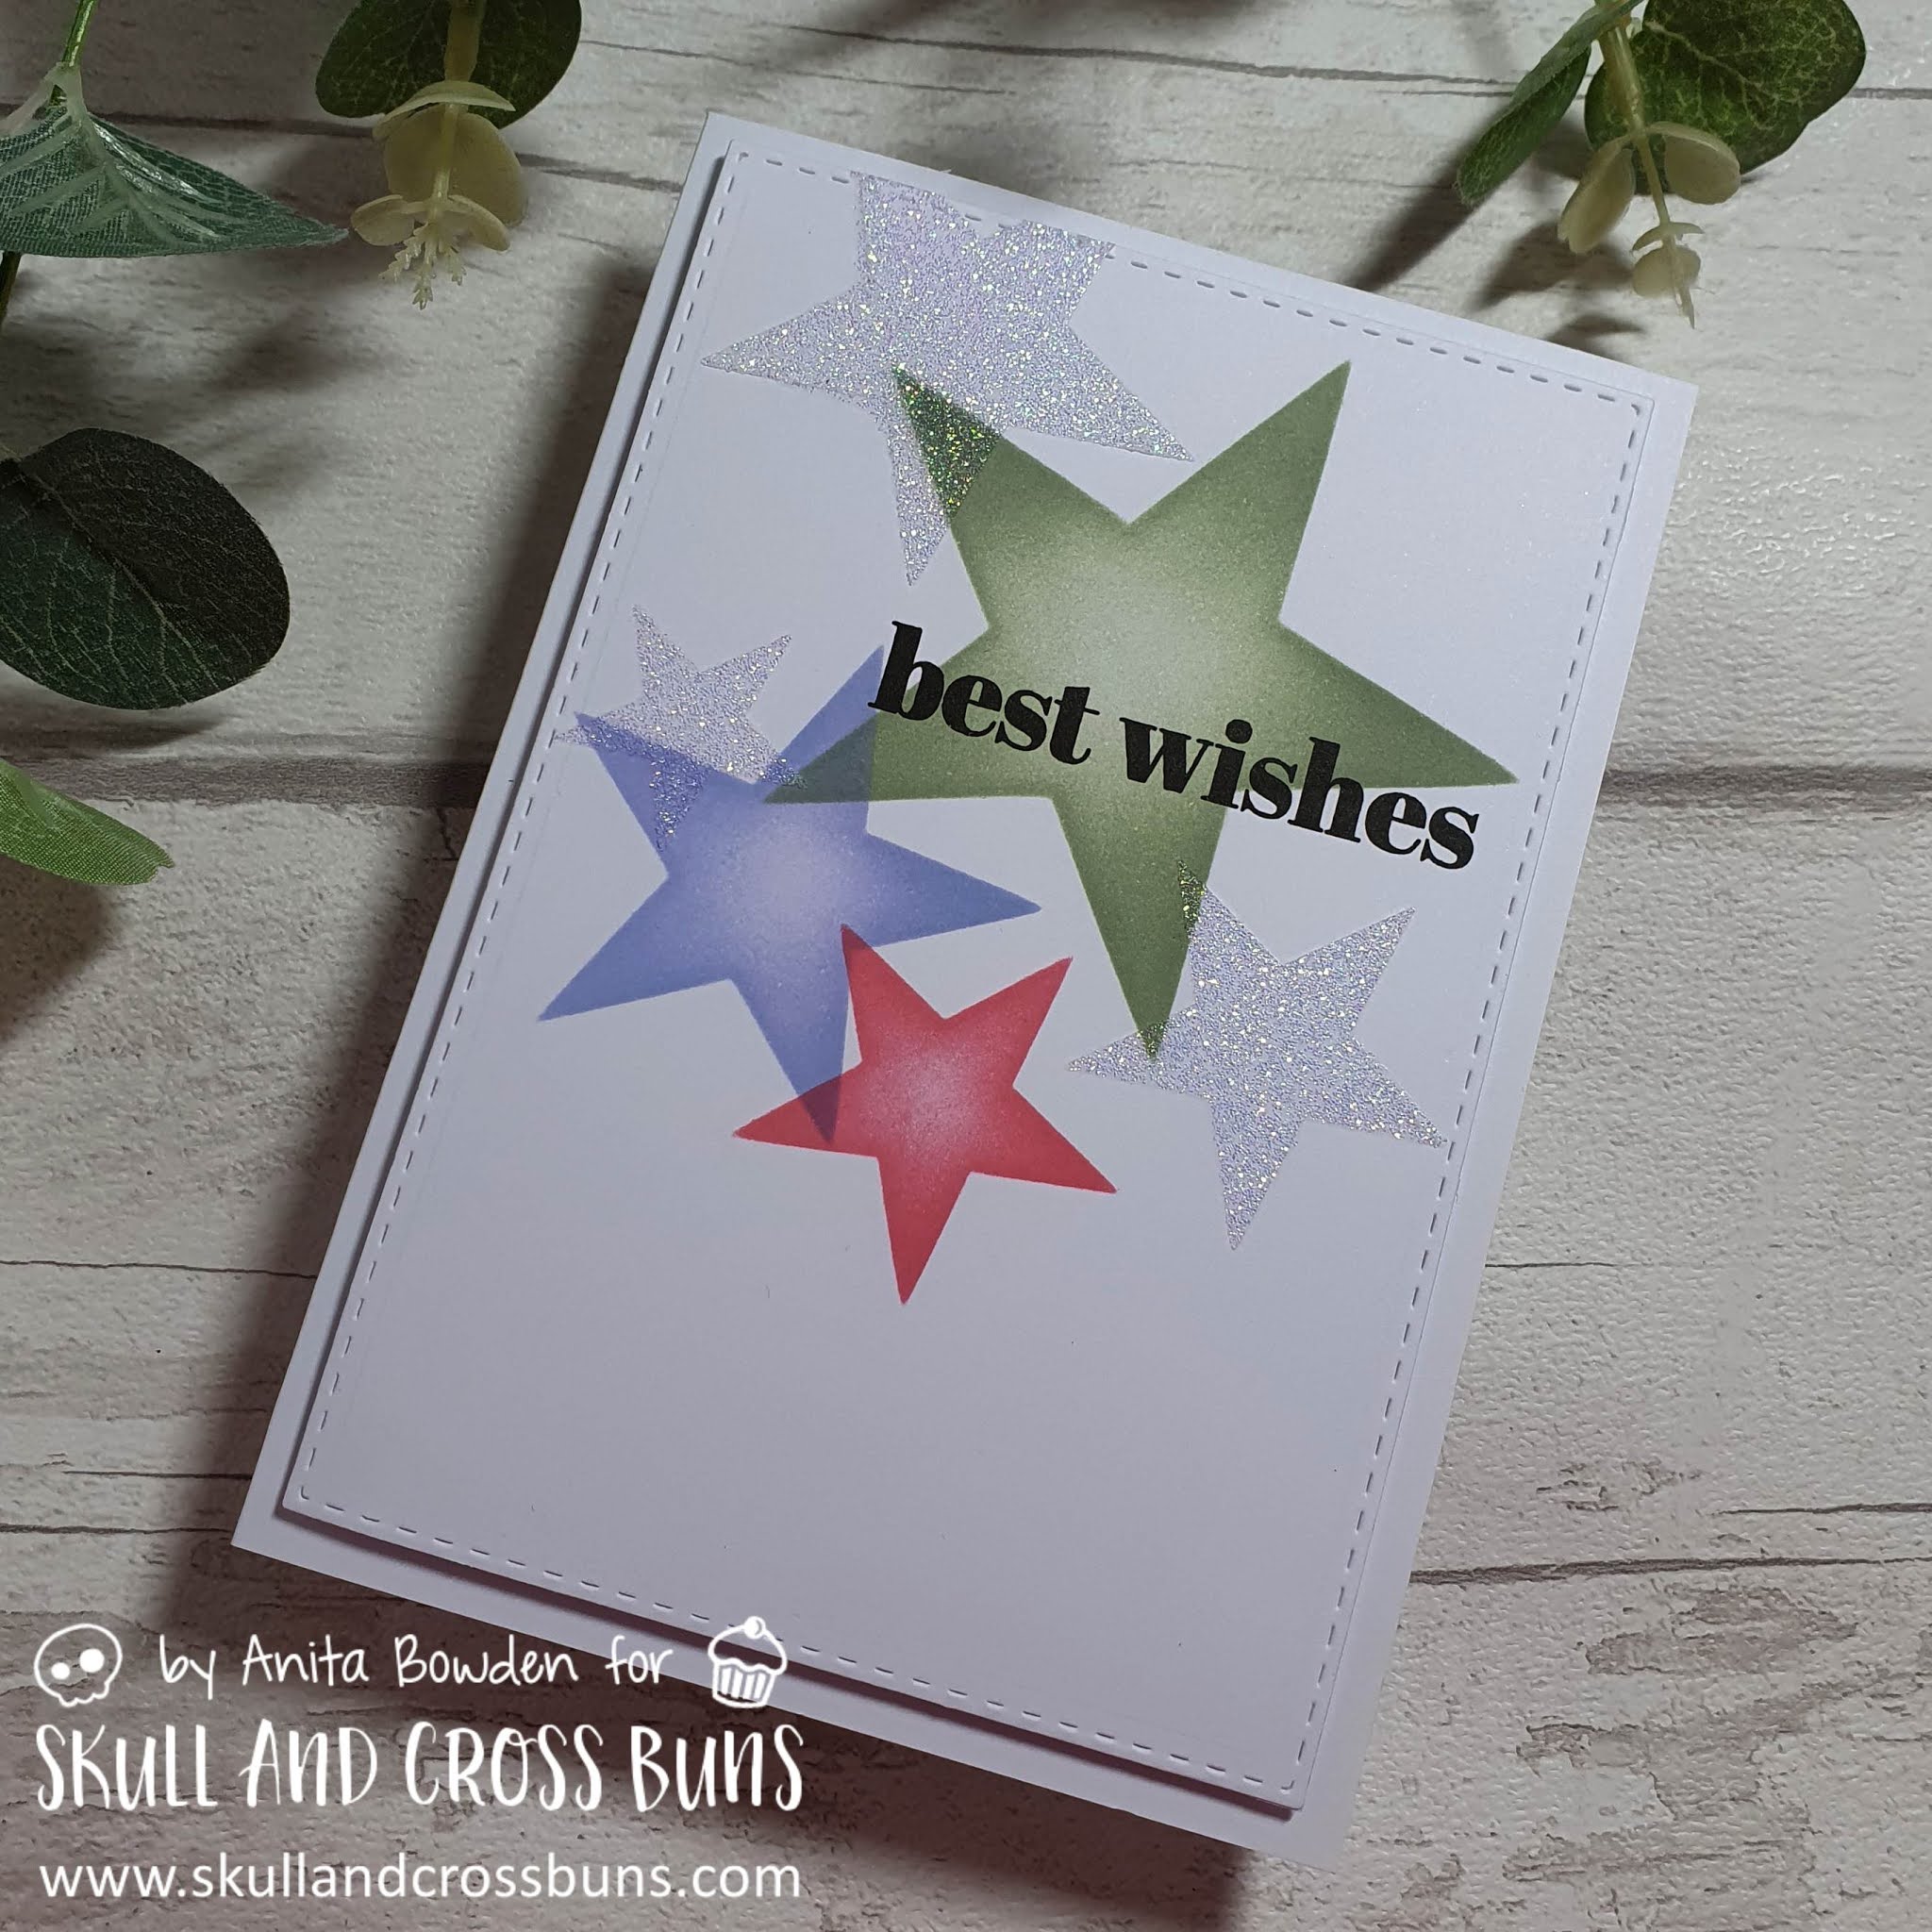
Another new stencil for the next card, Giant Stars and Masks...


On a stitched die cut panel I ink blended through three different stars of the stencil, each positioned separately to overlap slightly.  I cleaned the stencil and then spread some iridescent paste through three more stars.  To finish the sentiment was stamped in black and the panel adhered on fun foam.


Materials used:
  • Stencil: Skull and Cross Buns - Giant Stars and Masks
  • Stamp: Skull and Cross Buns - Contemporary Sentiments
  • Ink: Distress Ink - Bundled Sage, Shaded Lilac, Worn Lipstick; Versafine - Onyx Black
  • Embossing Paste: Nuvo Glimmer Paste - Moonstone
  • Die: Create a Smile - Cool Cuts Double Stitched Rectangles

And for my final card of this post I used the Giant Dots stencil to create some Christmas baubles...


I began by stamping the snowflakes from the existing Scandi Christmas set and heat embossing in clear before ink blending through the stencil so that the snowflakes resisted the ink.  I die cut the piece with a pierced square die and added some hand drawn strings and bows before adhering on foam over a slightly larger die from the same set.  The sentiment from the Christmas Foxes set was then stamped in black to finish.


Materials used:
  • Stamps: Skull and Cross Buns - Scandi Christmas, Christmas Foxes
  • Stencil: Skull and Cross Buns - Giant Dots
  • Ink: Distress Ink - Picked Raspberry, Shaded Lilac, Mermaid Lagoon; Versafine - Onyx Black
  • Embossing Powder: Wow! - Clear Gloss
  • Dies: MFT Die-namics - Pierced Square Stax


I will be back tomorrow with more makes using products which will be featured on the show.  Here's another peek of what's coming up on Saturday...


Related Posts Plugin for WordPress, Blogger...