Showing posts with label Memory Box. Show all posts

Wednesday, 28 December 2022

Pearlescent Christmas Tag Cards

Good evening

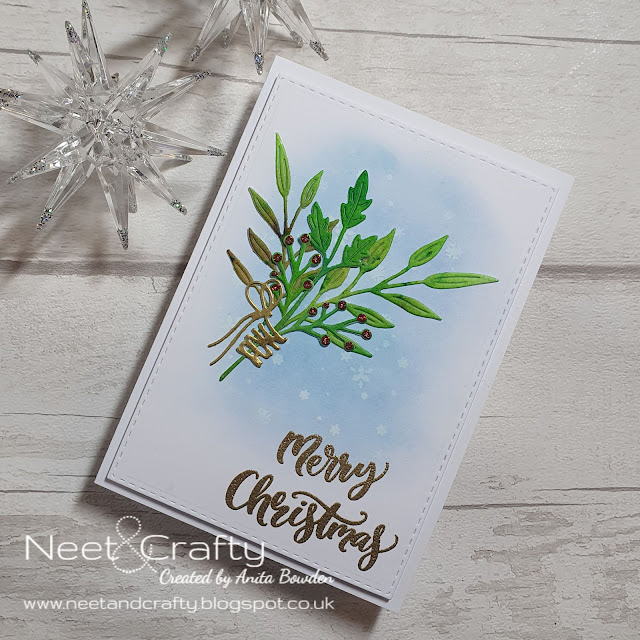
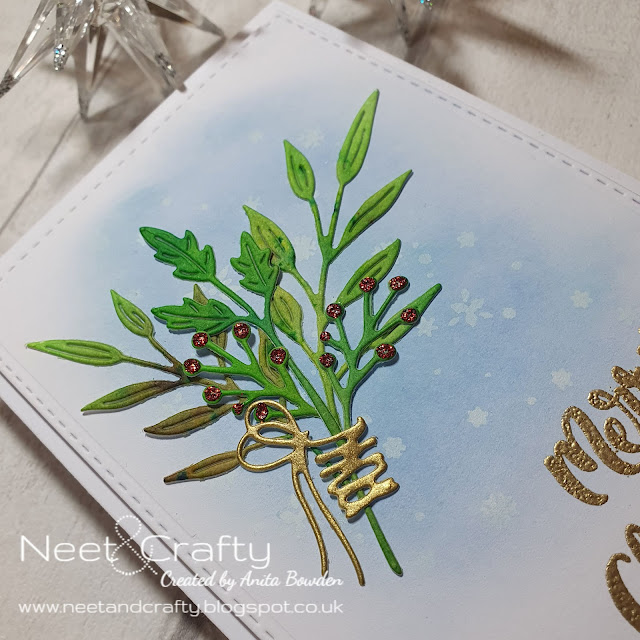
More of my Christmas card multiples for you today.  

No stamping on these, just die cuts cut from pearlescent cardstock and jacquard-effect papers.  I made eight of these, four in each colourway...


When I make cards I usually start with a piece of cardstock and cut and fold it myself to create the card base but I have a small stash of cards and envelopes which I'm trying to make use of so these ivory pearlescent card bases were my starting point for these.

I've also had these Merry Christmas papers in my stash for as long as I can remember, they were part of a Christmas kit I bought about fifteen years ago!  They look like jacquard fabric and are kind of pearlescent so worked perfectly with these bases.  

The blue and pink version...


I die cut the tags from the patterned paper, and also the bows from a different shade of the same paper collection.  I used a spare card base to die cut the cabin landscapes and then used the bottom part of the same tag die to trim these down, before adhering together.  Before adhering the tags I added three vertical score lines to the bases, just to add a little extra detail.  The bows were then adhered to the top of the tags.


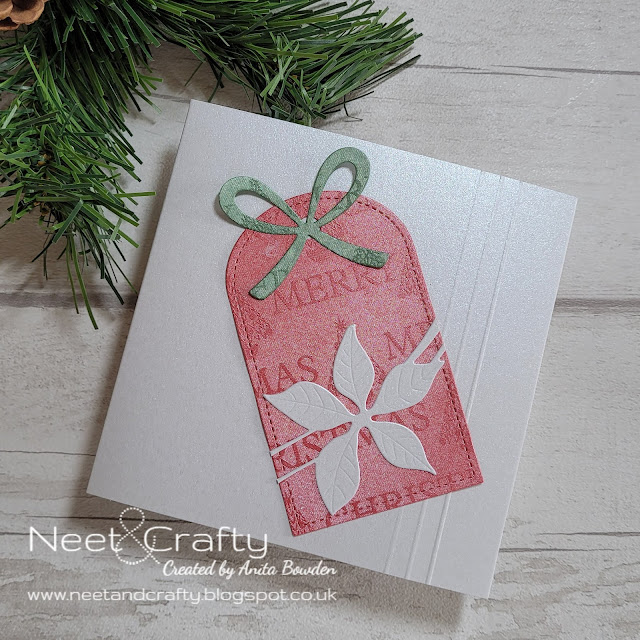
Here's the red and green version...


The process was exactly the same but here I used a poinsettia die to create the die cuts which were adhered across the tags.


The four landscape tag cards...


And the four cards with the poinsettia die tags...


Materials used:
  • Dies: Clearly Besotted - Tag Along Die Collection; Poppy Stamps - Poinsettia Ribbon; Memory Box - Quiet Cabin Landscape
  • Pearlescent cardstock and patterned papers from stash


Thanks for taking the time to visit, I'll be back soon with more.


Thursday, 30 December 2021

Winter Foliage Bundle

Hi guys

Today I'm sharing another card I made this Christmas, using some new goodies from The Greetery.  I can't take credit for this design as I saw a few examples from The Greetery where they used these products together and that's what encouraged me to buy them.

I'll get straight to the details...


I began by die cutting a panel with a stitched rectangle die.  I lightly ink blended from the centre using Distress Oxide ink and then laid a snowflake stencil over the top and inked through with white pigment ink.  On some watercolour paper I sprinkled various shades of Brusho pigment powder and spritzed with water.  Once dry I die cut all the foliage.  I stamped the sentiment and heat embossed it in gold.  I layered up and adhered all the foliage before die cutting the string tie from gold cardstock and adhering this over the stems.  To finish I added some red Stickles for the berries.


Materials used:
  • Dies: The Greetery - Inside & Out Berry Branch, Fit to be Tied; Create a Smile - Cool Cuts Double Stitched Rectangles
  • Ink: Distress Oxide - Tumbled Glass; Hero Arts - Unicorn; VersaMark; Brusho - Leaf Green, Emerald Green, Dark Brown
  • Stencil: Memory Box - Tiny Snowflakes
  • Stamp: Clearly Besotted - O Christmas Tree 
  • Embossing Powder: Wow! - Metallic Gold Rich
  • Accents: Stickles - Ruby

Challenge entries:

AAA Cards - Game #205 - Christmas
Happy Little Stampers - December Christmas Challenge - Anything Goes
Happy Little Stampers - December Anything Goes with Dies Challenge
NBUS - Challenge #33 - The Greetery dies are new to my stash
CHNC - Challenge #574 - Anything Goes Christmas
STAMPlorations - December Theme and Photo Prompt Challenge (I used the photo prompt)
Uniko - Challenge #68 - Celebrate (Reds and Greens)


I'll be back with another later, thanks for visiting.


Saturday, 14 March 2020

Perfectly CAS - March 2020 Challenge

Hi guys

I'm here to introduce the March challenge at Perfectly CAS...


The rules are simple, we want to see you using die cuts while keeping your designs to just one third of the card or less.

I chose to use some die cuts to create the laser cut effect...


This took a little measuring and lining up but wasn't too difficult.  I began with two strips of white cardstock and stamped the sentiment along the edge of one of them.  I then die cut the Gardenia die twice, laid the strips down upside down and adhered the die cuts across the gap on the reverse, thereby creating one complete panel.  I laid the strips onto my glass mat and use those guidelines to keep it straight.  I then adhered a strip of patterned paper behind the die cuts and trimmed off any excess of the paper and die cuts.  The panel was then popped onto the card base using fun foam.

Materials used:
  • Die: Memory Box - Gardenia
  • Stamp: Clearly Besotted - A Little Sentimental
  • Patterned Paper: First Edition - Wildflowers

Challenge entries:

Happy Little Stampers - March Anything Goes with Dies Challenge
Time Out - Challenge #157 - Birthday


This challenge will run until a few days before the April challenge starts, so there is almost a month to play along.

Sunday, 13 January 2019

Rays of Love

Hi guys

I was busy cataloguing some of my stash recently and came across a die that has been in my stash for some time but only used once I think, and that was for a card I don't think made it to my blog.

There's usually someone shouting for a last minute Valentine's Day card so I thought I'd make another for my stash.

Here's it is...


I started by die cutting a white cardstock panel using a stitched rectangle.  I then die cut the heart rays detail.  I added some adhesive behind the panel, and after cutting the same detail from some red mirri card, I filled the apertures in the panel with the red hearts.  I then simply stamped the sentiment in black ink and adhered the panel to the card base popped up on fun foam.


Materials used:
  • Dies: Create a Smile - Cool Cuts Double Stitched Rectangles; Memory Box - Heart Rays
  • Stamp: Clearly Besotted - Lovely Lilies
  • Ink: Versafine - Onyx Black
  • Accents: Red mirri card from stash

Challenge entries:

Happy Little Stampers - January Anything Goes with Dies Challenge
Time Out - Challenge #126 - Loving
Alphabet Challenge - U is for Use Some Stitching - Real or Faux


Thanks for visiting today, wishing you a fun week ahead.

Saturday, 22 December 2018

Challenge Me a Christmas Card with Michelle Lupton

Hi there

I'm thrilled to have been asked by Michelle Lupton to join her in her Challenge Me a Christmas Card series. 


Michelle has asked lots of friends in blogland to challenge her to make a card using, for example, a specific theme, technique or product, etc., and for each of us to also share a card.  Michelle has had some big names from the crafting community joining her this month, so to be asked to take part is an absolute honour!

The theme I chose for Michelle was 'Christmas Night Sky'.  My card is below and you can click here to see what Michelle created.  I'm now off to have a look myself!

Here is my card...


I created the sky on the top half of my card base by blending Distress Inks.  I then stamped the sleigh and reindeer image in black.  Next I die cut the main white panel using a landscape die with a large expanse of white for the snow in the foreground.  I then stamped the bunny and the sentiment in black before adhering the panel flat to the base.  I added a further three die cut trees which were adhered on glue dots for a little dimension.  To finish I added some twinkle to the snowy trees using a shimmer pen.  The shimmer can be seen more clearly in the image below...


Materials used:

  • Ink: Distress Ink - Dusty Concord, Chipped Sapphire, Black Soot; Versafine - Onyx Black
  • Stamps: Card-io - Christmas Scenery 2; Uniko - Most Wonderful
  • Dies: Memory Box - Quiet Cabin Landscape; Craft Emotions - Pine Trees
  • Accents: Spectrum Noir Shimmer Pen - Clear

Challenge entries:

Fab 'n' Funky - Challenge #420 - Cute Christmas
Happy Little Stampers - December Anything Goes with Dies Challenge
Happy Little Stampers - December Christmas Challenge - Anything Goes (Snow)
Stamping Sensations - December Challenge - Winter Sparkle


Thanks so much for joining me today, and a huge thank you to Michelle for inviting me to join in the fun :) x

Thursday, 2 August 2018

Happy Little Stampers August 2018 CAS Challenge

Hi guys

It's time for a batch of new monthly challenges over at Happy Little Stampers and today it's the new CAS Challenge for August.  I'll get straight to it, we want to see...


The winner for this challenge will receive a $20 coupon to spend at the shop! Check out all the details HERE.

IF YOU USE STAMPS BY HAPPY LITTLE STAMPERS AND YOU ARE THE RANDOM WINNER, YOUR PRIZE WILL BE DOUBLED!


For my DT card this time I didn't have a clue where I was going with it, I just wanted to use some new dies from my stash.  It just evolved as I went along.  I used the Happy Little Stampers Wish You Were Here stamp set on this one...


I started by masking off a border around the edge of my card base and then spread some Nuvo Glimmer paste through a stencil to add some subtle interest to my background and left it to dry.  I recently treated myself to the fab Tag Along die collection from Clearly Besotted so I wanted to play along with that set here.  I cut the hearts die, also new to my stash, from black glitter cardstock and again from some card I'd blended with Distress Inks.  So I then adhered the black outline part of the hearts die to the tag and inlaid the coloured inner heart pieces.  I stamped the sentiment in black below this and then finished off by die cutting the bow from the same black glitter cardstock and the circle surround from the same piece of card I had ink blended.  The tag was then popped up on 3D foam.  I think the 'wish you were here' sentiment fits perfectly with a hearts theme.

Materials used:

  • Stencil: Memory Box - Scraped Paint
  • Embossing Paste: Nuvo Glimmer Paste - Moonstone
  • Dies: Clearly Besotted - Tag Along Die Collection; STAMPlorations - Clustered Hearts Die
  • Ink: Distress Ink - Candied Apple, Picked Raspberry, Wilted Violet; Versafine - Onyx Black
  • Stamp: Happy Little Stampers - Wish You Were Here
  • Glitter cardstock from stash

Challenge entries

CAS on Friday - Challenge #138 - Tag It
STAMPlorations - Summer CAS Card Challenge
Allsorts - Week 278/9 - Tags


Don't forget, the challenge linky is open until the end of the month, and do keep an eye out for the remainder of the August HLS challenges, all due to start shortly.

Monday, 4 June 2018

Muse Challenge #269 - Hello Friend

Hi there

The designers' baton is back with me which means it's my turn to create a card for you for this week's Muse challenge.

I've been itching to use a couple of dies I bought last month at the Sincerely Yours Papercraft Show so I've used them together on this card.  Hopefully there are some elements here you can take as inspiration to play along.  You can choose any element(s) as a starting point, e.g. colours, layout, technique, etc.

Here's my card...


I cut a piece of patterned paper with an ombre sky effect to a size just smaller than the card base.  I then die cut the floral border and adhered this to the paper along the bottom edge, trimming to the same size.  Next I die cut the words from some white glitter cardstock to add a little bling.  I decided to single out a couple of the teeny flowers along the base and coloured these yellow, and die cut another to use as the dot on the 'i' of friend.  You can see the glittery cardstock a little better in the next photo.


All that was then left to do was adhere the panel to the card base, which I did with fun foam.

Materials used:

  • Patterned Paper: Docrafts Papermania - Capsule Elements Pigment
  • Dies: Memory Box - Broadsworth Floral Border; Pretty Pink Posh - Hello Friend Script
  • Coloured with Zig Clean Color Real Brush Marker
  • White glitter cardstock from stash

Challenge entries:

Addicted to Stamps and More - Challenge #294 - Clean and Simple


Thanks so much for stopping by today, and I hope you can find some time to play along with us at Muse this week.

Thursday, 22 February 2018

Pastel Floral Anniversary

Hi guys

Tonight I thought I'd share another of the Anniversary cards I made for my stash last weekend. 

I love how pretty this one turned out and it was fairly easy to create too.


I started by die cutting a heart aperture (sorry, it's that heart again!) from a panel of white cardstock.  Before I created the rest of the heart detail I stamped and heat embossed the sentiment in platinum.  I then die cut the Gardenia flower and placed it behind the aperture, adhering the edges to the reverse of the panel.  Behind this I secured some glittered patterned paper.  The panel was then popped up on fun foam onto the card base.

Materials used:

  • Dies: MFT Die-namics - Stitched Heart Stax; Memory Box - Gorgeous Gardenia Outline
  • Stamp: Clearly Besotted - Mr and Mrs
  • Ink: VersaMark
  • Embossing Powder: Wow! - Metallic Platinum
  • Patterned Paper: By Decotime - unknown name


Challenge entries:

Just Add Ink - Challenge #397 - Just Add 'H' (heart, heat embossing)
Cards in Envy - Give It Some Heart
Inkspirational - Challenge #154 - Aperture
Happy Little Stampers - February Challenge - Anything Goes with Dies
Creative with Stamps - Challenge #23 - Heart
Aurora Wings - Challenge #64 - Bingo (Glitter / Die Cuts / Layers)


Thank you so much for stopping by :)

Thursday, 28 December 2017

Cheery Robins

Hi there

Another Christmas card for you!  This one was made for a friend to give to my brother and sister-in-law.  They love nature, particularly birds, so I chose to create these cute little robins, together with winter hats!


I started by stamping the hats and then masked them to stamp the birds which are from a builder stamp set.  I coloured the hats with ProMarkers.  The birds were then fussy cut.  On a panel of pale blue cardstock I stamped the branch and the sentiment, and then masked these before spreading some Nuvo glimmer paste through a snowflake stencil.  The robins were then popped up on 3D foam.

Materials used:
  • Stamps: Wplus9 - All Year Cheer; Clearly Besotted - Arctic Animals (hats)
  • Ink: Memento - Tuxedo Black; Versafine - Onyx Black; Altenew - Rocky Shore, Mocha, Espresso, Coral Berry, Rouge
  • Coloured with ProMarkers
  • Blue cardstock from stash
  • Stencil: Memory Box - Tiny Snowflakes
  • Accents: Nuvo Glimmer Paste - Moonstone

Challenge entries:

Creative Inspirations - Challenge #284 - Winter/Christmas
Happy Little Stampers - December Christmas Challenge - Anything Goes
Uniko - Challenge #44 - Christmas


I'm nearly done, just a couple more to share very soon :)

Related Posts Plugin for WordPress, Blogger...