Showing posts with label Chibitronics. Show all posts

Tuesday, 3 July 2018

Lightbox Wedding

Hi guys

A friend of mine had her gorgeous wedding on Saturday and today I'm sharing the card I made for her and her husband.

I wanted to use a new stamp set and co-ordinating embellishment from Skull and Cross Buns with which you can create one of the massive trends at the moment....a lightbox!  Check out the site, here, for this new stamp set, as well as some new embellishments and stencils :)

This one took a little forward planning as it was my first attempt at creating a light up card using Chibitronic LEDs and a pull-tab slide switch, I've only made them previously using the push battery method.  My first circuit started to be a little temperamental before I completed the card so I started again and had success the second time around!

Here's the completed card...


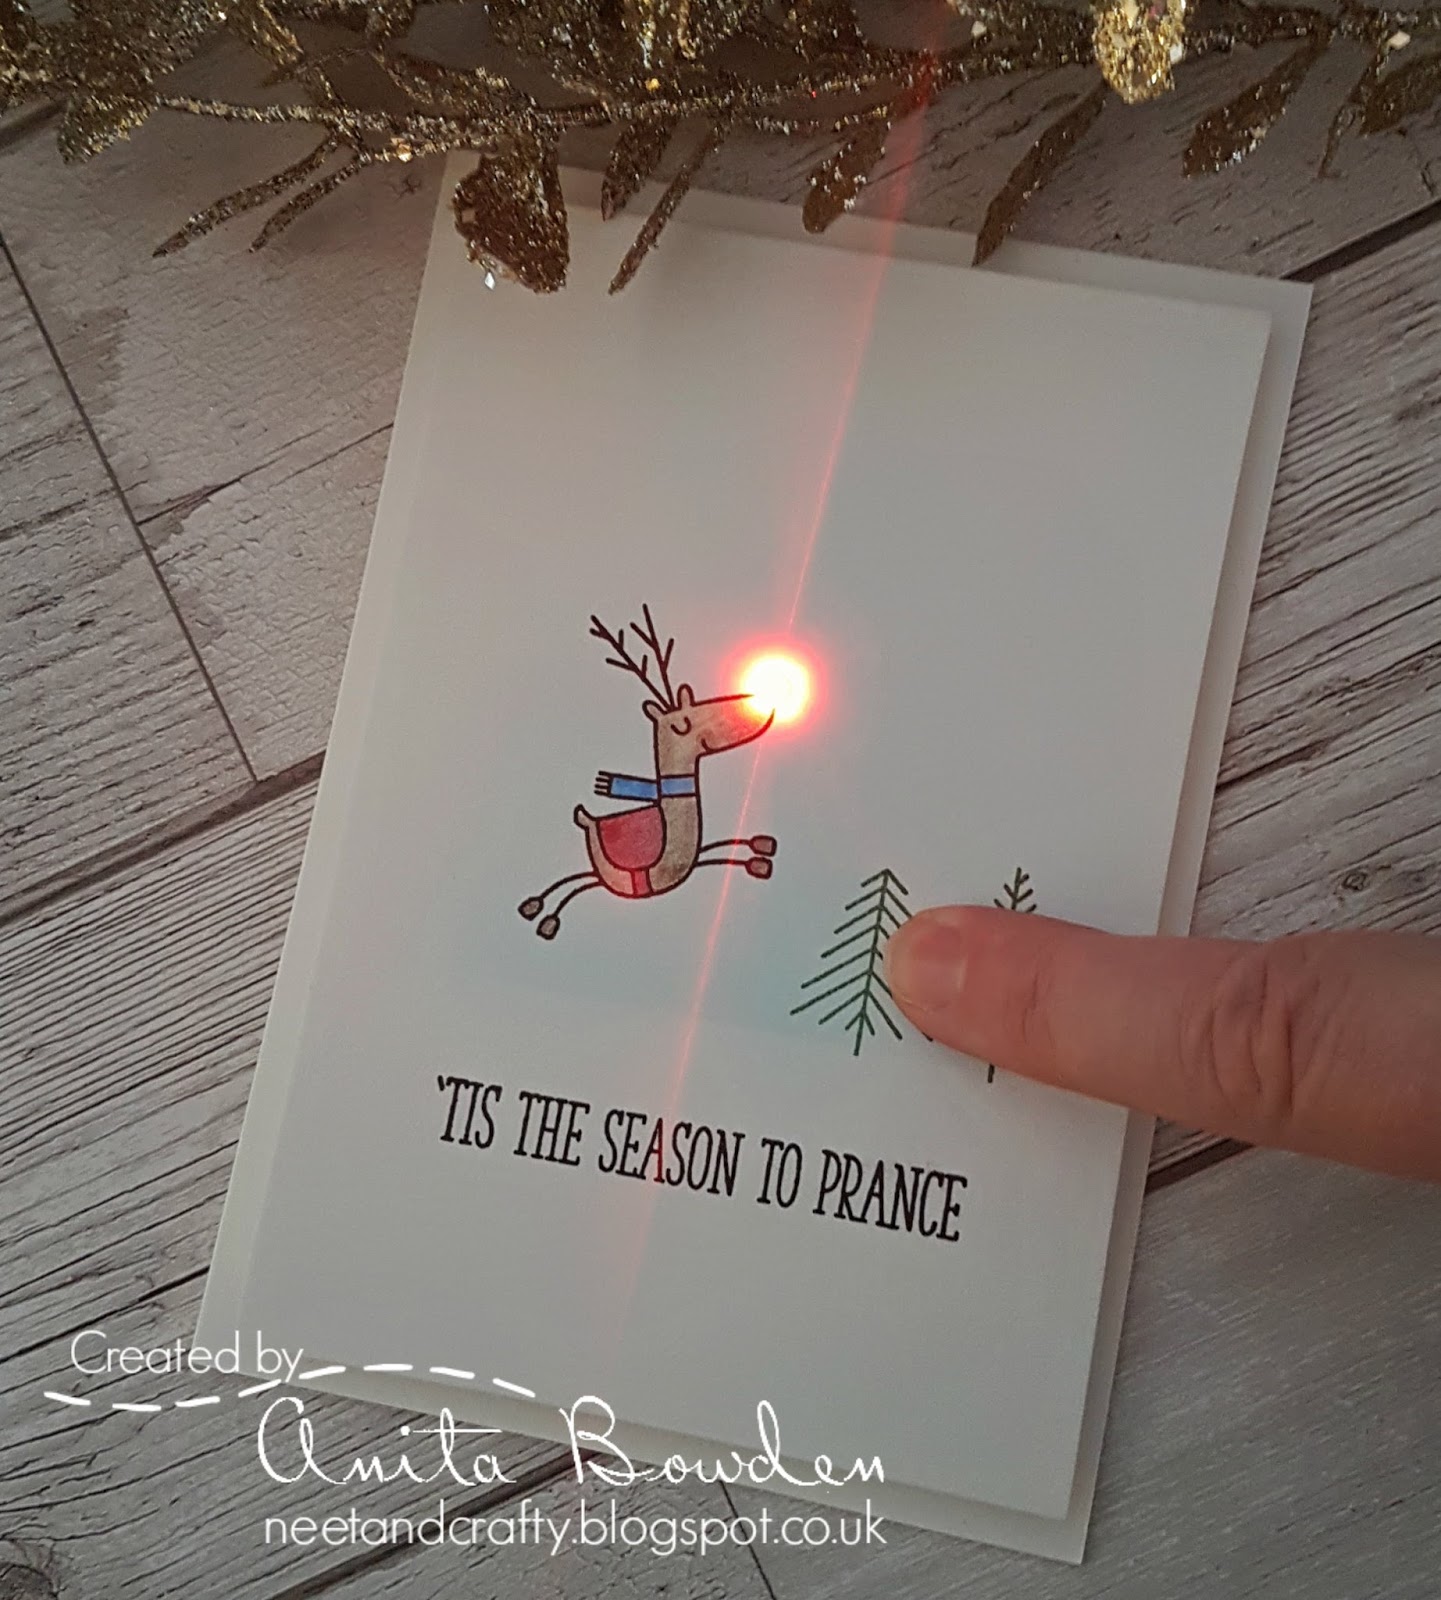
And here it is with the light activated...


I started by cutting an aperture where the lightbox would sit and marked on a piece of card behind (on which I would build my circuit) where I wanted the LED, battery and slide switch to be.  I then followed this tutorial, here, to create my circuit (my card is much less complicated than the one in the example!).  Apologies, I didn't take any photos of the inner panel.

I marked through the acrylic grid with pencil onto the back of some vellum to help with alignment and then stamped the letters and heart in black and heat embossed with clear powder.  I then erased the pencil lines and adhered the vellum behind the aperture.  I wanted to diffuse the light a little more so added another layer of vellum.  The light is very bright in these photos, you can in fact see the heart with the light activated.

The circuit panel was then adhered in position on the card base.  I didn't take into account that the copper tape could be seen through the vellum so I did some surgery with some scrap white card to cover that area and just made a hole for the LED to shine through.  I stamped the sentiment before adhering the top panel on 3D foam.  Next I adhered the acrylic lightbox grid over the aperture using Glossy Accents to ensure it adhered well.  I then stamped, coloured and die cut the floral image and popped this up on 3D foam.  I finished by adding some really pretty iridescent jewels.

I just hope the little circuit is still behaving itself now it's in the hands of the new Mr and Mrs! :)


Below is a very amateur video I took to show it in action...


Materials used:

  • Stamps: Skull and Cross Buns - Lightbox Love; Clearly Besotted - Fairytale Ending(flowers), Time to Celebrate (arrow on slider); Lawn Fawn - Happy Wedding
  • Ink: Versafine - Onyx Black; Memento - Tuxedo Black
  • Dies: Clearly Besotted - Fairytale Ending; Stripped (for the slider switch)
  • Embossing Powder: Wow! - Clear Gloss
  • Image coloured with ProMarkers
  • Tools: Chibitronics - White LED sticker (copper tape and battery)
  • Vellum from stash
  • Accents: Little Things from Lucy's Cards - Jewels (Clear iridescent mix)

Challenge entries:

Daring Cardmakers - Weddings and Anniversaries
Just Add Ink - Challenge #415 - Inspiration photo
Dream Valley - Challenge #182 - All Things Bright and Beautiful
AAA Cards - CAS Game #118 - Use a Frame


Thanks so much for visiting today.  Why not get yourself some Chibitronics LEDs and have a go yourself.  It's very satisfying when it works! :D

Sunday, 24 December 2017

Light Up Rudolph

Hi guys

Yes, I'm back with another light up card!  This time, using a red LED for Rudolph's nose, and a card I sent to my bestie.


On the front panel I started with a mask across the bottom and created a gentle blend with blue Distress Ink and stamped the trees with the mask still in place.  I then stamped the sentiment and Rudolph, and coloured him with coloured pencils.  I pierced a hole through his nose and then made a circuit on the card base using a red LED sticker.  For this one the trees were the trigger for the battery.  There are lots of videos on YouTube explaining these light circuits, just search for 'Chibitronics'.


Materials used:

  • Stamps: Clearly Besotted - Let's Prance
  • Ink: Distress Ink - Tumbled Glass; Versa Color - Evergreen; Versafine - Onyx Black
  • Coloured with Faber Castell Polychromos pencils
  • Tools: Chibitronics - Red LED sticker (adhesive copper tape and battery)

Challenge entries:

Creative with Stamps - Challenge #21 - Reindeer
CAS-ual Fridays - Challenge #189 - Dreaming of a White Christmas
Creative Inspirations - Challenge #284 - Winter/Christmas
Uniko - Challenge #44 - Christmas


Thanks for all your visits and comments, I'll be back with more to share very soon.

Light Up Winter Star

Good morning, and a very Happy Christmas Eve to you all!

I'm having a relaxing day at home today so thought I'd share some more of my recent Christmas makes.

At the Happy Little Stampers Craft Retreat we had great fun making light up cards.  I've shared two previous one here and here.

This is the card I made for my good friend and fabulous teamie at Less is More, Sarah of Sazzle Dazzle Crafts.  I was really pleased with it and I know she loved it too.


I started on a panel of white cardstock and, using a piece of scrap paper cut with a curve, I masked and blended the ombre sky at the top of the panel.  I shifted the paper down just a fraction (about 1mm to allow for the stamp meeting the mask) and then stamped the trees using deep blue pigment ink in first and second generation stamping to create some depth and distance.  I removed the mask, blended a little more ink where the deer would be positioned and then stamped the deer and sentiment in black.  I then stamped and heat embossed the star in silver.  I pierced a hole through the star (which you can see in the photo below) and then marked through with a pencil onto the card base so I knew where to place the LED and also marked out where the battery would be placed, behind the sentiment.  There are lots of videos on YouTube to show how to create light-up cards, just search for 'Chibitronics'.

Once I'd created the circuit and surrounded the LED and battery with foam, the panel was popped onto the front.  Here is a pic of the card not lit up.


Materials used:

  • Ink: Distress Ink - Faded Jeans, Dusty Concord, Versafine - Onyx Black; VersaMark; Versa Color - Neptune
  • Stamps: Card-io - Mini Tall Trees, Winter Walks, Christmas Scenery 1; Clearly Besotted - Merry Little Christmas (star); sentiment from set free with a publication
  • Embossing Powder: Wow! - Metallic Silver
  • Tools: Chibitronics - White LED Circuit sticker (adhesive copper tape and battery)

Challenge entries:

CAS-ual Fridays - Challenge #189 - Dreaming of a White Christmas
Creative Inspirations - Challenge #284 - Winter/Christmas
Happy Little Stampers - December Christmas Challenge - Anything Goes
Stamping Sensations - December Challenge - Winter Trees and Flowers
Creative with Stamps - Challenge #21 - Reindeer
Uniko - Challenge #44 - Christmas


Thanks for popping by, I'll be back in a short while with another light up card I made for my best friend.

Saturday, 2 December 2017

Less is More Week #357

Good morning!

And this morning I'm introducing this week's new challenge over at Less is More which is a Colour challenge.  This week we want to see...


Any projects will do but this is perfect for those traditional
Christmas cards if you still need to create more....I know I do!


Our Sponsor for this month is the fab Happy Little Stampers so do play along
with our challenges this month for a chance to win the monthy prize.


I have two samples for you today, and that's two more to add to my Christmas stash!

Here's the first, and another I made whilst away at the Happy Little Stampers craft retreat where we were having fun with light up cards using Chibitronics LEDs...


On a panel of watercolour card I stamped the image in VersaMark and heat embossed in gold.  I then watercoloured the leaves and berries with Zig markers.  I stamped the sentiment from the same set in black, and the sentiment is the push point to activate the light.  You can find a tutorial here where Kylie of Happy Little Stampers explains how to create a light up card.  I pierced a number of holes around the berries to allow the light to shine through, and chose a red LED to add more colour.


Materials used:
  • Stamps: Woodware - Sprig of Holly
  • Ink: VersaMark; Versafine - Onyx Black
  • Embossing Powder: Wow! - Metallic Gold Rich
  • Watercoloured with Zig Clean Color Real Brush Markers
  • Tools: Chibitronics - Red LED Circuit Sticker (adhesive copper tape and battery)

Challenge entries:

Christmas Cards All Your Round - December Challenge - Anything Goes
CAS on Friday - Challenge #122 - Christmas
AAA Cards - CAS Game #104 - Christmas
Uniko - Challenge #44 - Christmas


And next up, another Christmas card and this one using stamps by our sponsor...


A classic layout and fairly simple to execute.  The poinsettia was stamped in alcohol friendly ink and coloured with ProMarkers.  The sentiment was stamped in VersaMark and heat embossed in gold.  I double matted the panel to add some border interest and finished by adding some detail with gold Stickles to the centre of the bloom.


Materials used:
  • Stamps: Christmas Joy and Mixed Christmas Sentiments
  • Ink: Memento - Tuxedo Black; VersaMark
  • Embossing Powder: Wow! - Metallic Gold Rich
  • Coloured with ProMarkers
  • Accents: Stickles - Gold

Challenge entries:

Crimbo Crackers - Challenge #146 - Anything Goes
Fusion - Red Christmas (challenge photo)


For more inspiration please do pop over to the challenge blog to view my teamies' projects this week, and click on their links where you could find even more makes this week.

Thanks so much for stopping by, I so appreciate your visits and comments.

I'll be back this evening to tell you all about this month's Happy Little Stampers CAS Challenge, hope to see you then.

Saturday, 25 November 2017

Less is More Week #356

Hi guys

These weeks are flying by and we're back with another new challenge at Less is More this morning.  Our Recipe challenge this time is...


Anything that shines/glistens/sparkles/shimmers is perfect for our challenge this week.


One of the techniques Sarah, Sharon and myself were playing with at the Happy Little Stampers retreat earlier this month was making light up cards.  We had great fun making our circuits and it was perfect timing to make our samples for this week's challenge.

Here's mine...


You can find a tutorial on YouTube here by Kylie of Happy Little Stampers which will explain how the circuits are created.  All you need are LED circuit stickers, self-adhesive copper tape and a battery.  I used three white LEDs for my card shining through a snowscape trees die.  I heat embossed my sentiment in white which is the press location for my battery.  I then topped the black panel with the tree die and snow bank die.  The most difficult part is working out all the placement initially, but other than that it's pretty simple, and really effective.  I'll certainly be making more of these!

Materials used:

  • Stamp: Happy Little Stampers - Christmas Joy
  • Ink: VersaMark
  • Embossing Powder: Wow! - Opaque Bright White
  • Dies: Craft Emotions - Landscape Pines; Mama Elephant - Landscape Trio
  • Tools: Chibitronics - White LED Circuit Stickers (plus adhesive copper tape and a CR2032 battery)


Challenge entries:

Addicted to Stamps and More - Challenge #269 - Clean and Simple
Happy Little Stampers - November Anything Goes with Dies Challenge
Creative Inspirations - Challenge #283 - Sparkle
Daring Cardmakers - Trim the Tree


Please do check out all of my teamies' great creations this week, including the light up cards also made by Sarah and Sharon.

I'm looking forward to seeing lots of shine in the gallery this week.

Related Posts Plugin for WordPress, Blogger...