Sunday, 20 December 2020

Christmas Card Multiples - Sweet Gingerbread Christmas

Hi there

This is another Christmas card design that was quick to replicate so I made a little batch.

Usually I make my own card bases by cutting down sheets of A4 cardstock but I also have a box containing lots of ready to go card bases and envelopes that I've had in my stash for many years.  So for these I grabbed some little square cards.  

Colouring takes far too long when you need to get a production line going so I went on the hunt in my stamp stash for some solid images that I could just stamp one after the other in my MISTI.  I chose a cute set by Clearly Besotted (now retired) for the images and sentiment.


Gingerbread House


I stamped the gingerbread house in two shades of ink, re-stamping around the edge with the slightly darker shade.  These did lighten up as the ink dried by you can just about see the difference in the two shades.  I then stamped the sweet in the upper window and the sentiment below.  Some glitter enamel dots were then added to replicate gum drops.


Gingerbread Man


These were made in exactly the same way with two shades of ink, and then the smiley face was stamped together with the sentiment.  The glitter enamel dots were added here too for the gum drop buttons.


Materials used:
  • Clearly Besotted - Naughty or Nice
  • Ink: Altenew - Sunkissed, Caramel Toffee, Crimson, Versafine - Onyx Black
  • Accents: Happy Little Stampers - Glitter enamel dots

Challenge entries:

Crafty Hazelnut's Christmas Challenge - Challenge #521 - Anything Goes (Optional: use the word Christmas)
AAA Cards - CAS Game #180 - Made in Minutes (Optional: Christmas)
STAMPlorations - December CAS Challenge - Anything CAS Goes
Uniko - Challenge #62 - 'Tis the Season
Sweet Stampin' Challenge - Last Minute Christmas


Oh, and if you spotted the little gingerbread man ornament, he is made from modelling clay and was made for me by my best friend a number of years ago.  Isn't he the cutest?!


Thanks as always for taking the time to visit.  I have more to come very soon.


Wednesday, 16 December 2020

Christmas Card Multiples - Angled Patterned Papers

Hi guys

The one thing I seem to disregard more than anything else in my stash is my patterned paper pads.  So I decided to make an effort to use some of them in my Christmas card designs this year.

I recently came across a great video by Lisa Beard where she shares a tutorial on how to cut four angled pieces from one piece of 6x6 paper.  You can find the video, here.

So I got to work with three festive sheets of paper and created twelve cards.


I chose paper designs, all from the same paper pad, with patterns that could be used in any orientation and therefore made all the cards with the same layout, matting and layering onto mirri cardstock and adhering onto some linen card bases, stamping an angled sentiment and cutting a word die cut, also from mirri cardstock.  The panels were all adhered in the same position and I used my MISTI to stamp the sentiments one after the other.  The die cuts words were then adhered in position.

Here's a closer look at each variation...


Festive Sweets


The festive sweets paper was matted onto a layer of green mirri card and I used gold mirri card for the Merry sentiment.


Ditsy Holly


The ditsy holly paper was matted onto a layer of gold mirri card and I used red mirri card for the Merry sentiment.


Colourful Gifts


The colourful gifts paper was matted onto a layer of red mirri card and I used green mirri card for the Merry sentiment.


Materials used:
  • Patterned Paper: Doodlebug - Santa Express
  • Stamps: Concord & 9th - Cozy Christmas
  • Ink: Versafine - Onyx Black
  • Die: Clearly Besotted - Merry Christmas Die Collection
  • Mirri cardstock from stash

Challenge entries:

AAA Cards - CAS Game #180 - Made in Minutes (Christmas)
STAMPlorations - December CAS Challenge - Anything Goes
Allsorts Challenge - Challenge #602 - Got to be Christmas
Crafty Hazelnuts Christmas Challenge - Challenge #520 - AG (Use the word Merry)
Uniko - Challenge #62 - 'Tis the Season


I still have lots more to share so please do stop by again between now and Christmas if you have time :)


Tuesday, 15 December 2020

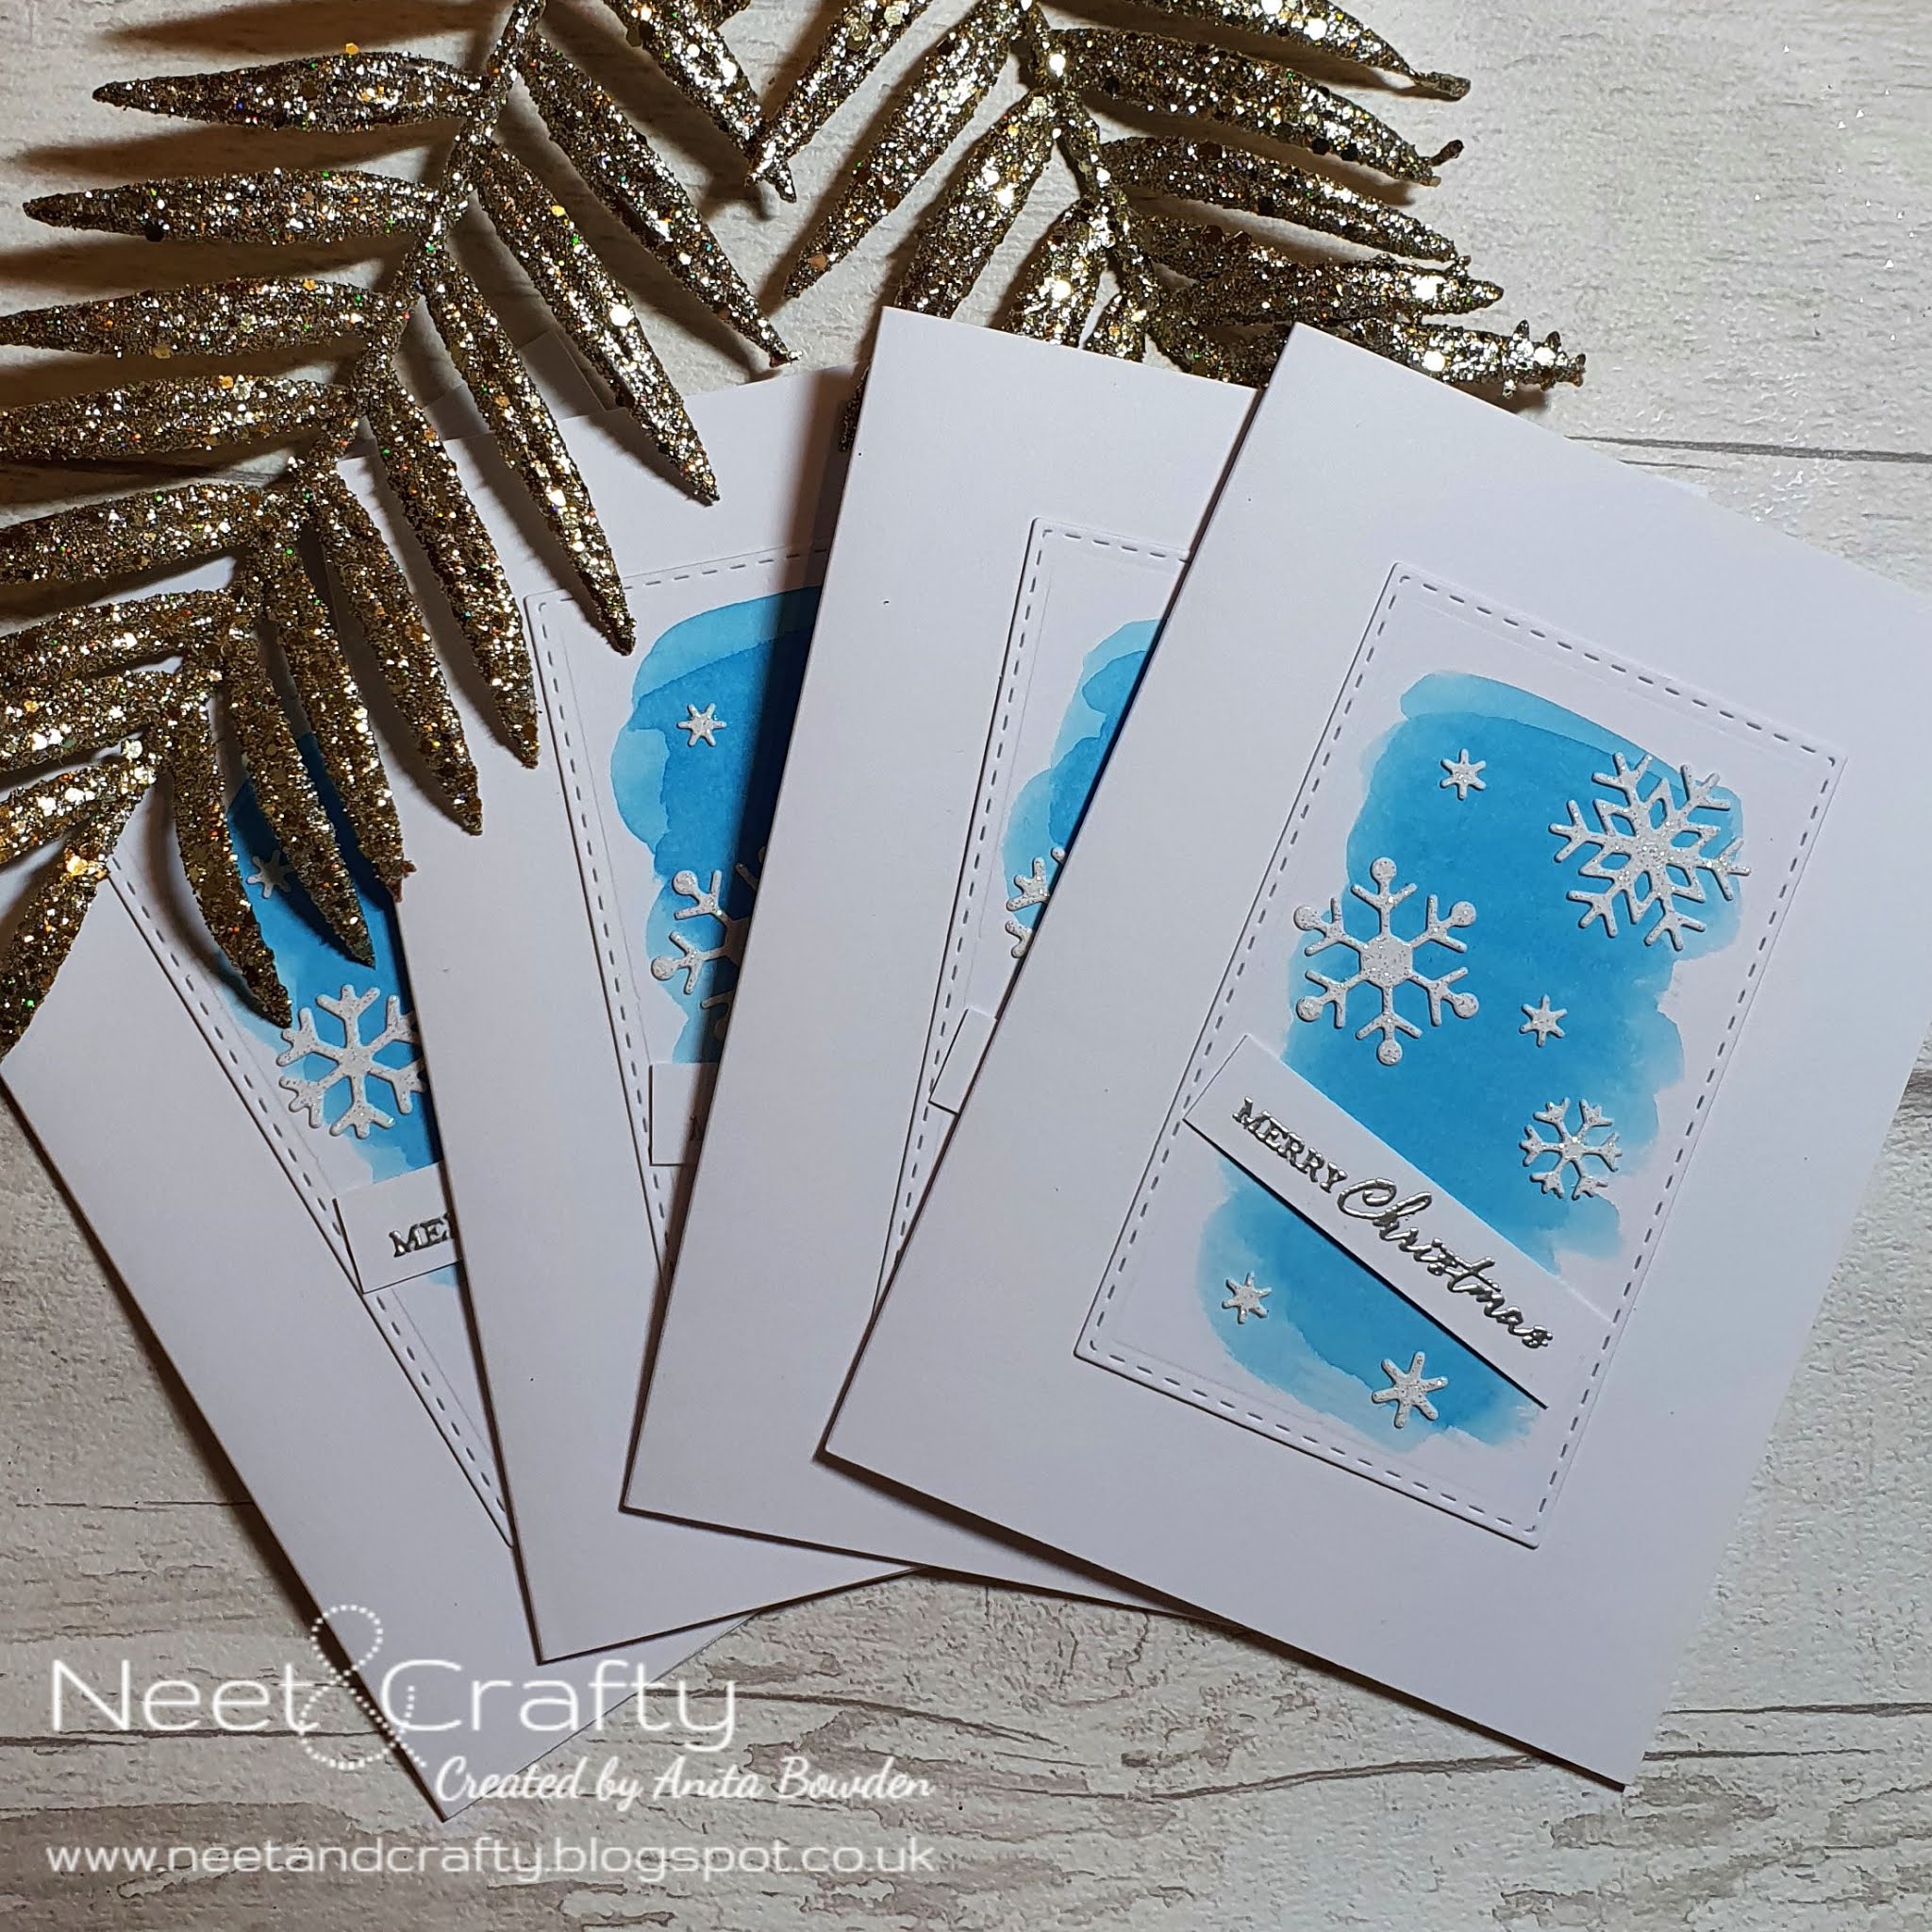
Christmas Card Multiples - Watercolour and Glittered Die Cuts

Hi there

More multiple makes for you today.  I made four each of four different versions of a similar design.  I just changed up the colours and die cuts for each.


I started with some white card bases and stitched die cut rectangles.  I mixed Distress Inks with water and roughly watercoloured some brush strokes onto the panels and left to dry.  I then die cut poinsettias, holly leaves, bells and snowflakes from some white glitter cardstock and adhered these over the panels onto the bases.  To finish I stamped and heat embossed some sentiments in gold and silver and cut down the sentiment strips and adhered on glue dots rather than foam to make the finished cards more mail friendly.


Red Poinsettia


Materials used:
  • Dies: Create a Smile - Cool Cuts Double Stitched Rectangles; Poppy Stamps - Small Posh Outline
  • Ink: Distress Ink - Candied Apple; VersaMark
  • Stamp: Clearly Besotted - Brushed Sentiments
  • Embossing Powder: Wow! - Metallic Gold Rich


Green Holly Leaf


Materials used:
  • Dies: Create a Smile - Cool Cuts Double Stitched Rectangles; Tonic - Holly Leaf
  • Ink: Distress Ink - Pine Needles; VersaMark
  • Stamp: Clearly Besotted - Brushed Sentiments
  • Embossing Powder: Wow! - Metallic Gold Rich


Blue Snowflakes


Materials used:
  • Dies: Create a Smile - Cool Cuts Double Stitched Rectangles; Lawn Fawn - Mini Snowflakes
  • Ink: Distress Ink - Salty Ocean; VersaMark
  • Stamp: Clearly Besotted - Brushed Sentiments
  • Embossing Powder: Wow! - Metallic Silver


Lilac Bells


Materials used:
  • Dies: Create a Smile - Cool Cuts Double Stitched Rectangles; Xcut - Filigree Bell
  • Ink: Distress Ink - Dusty Concord; VersaMark
  • Stamp: Clearly Besotted - Brushed Sentiments
  • Embossing Powder: Wow! - Metallic Silver

Challenge entries:

Dream Valley - Challenge #238 - Christmas
Try It On Tuesday - Christmas Sparkle
STAMPlorations - December CAS Challenge - Anything CAS Goes
STAMPlorations - December Theme & Photo Challenge - Stamps and Shimmer


I'll be back again soon with more festive makes, thanks for taking the time to visit :)


Monday, 14 December 2020

Christmas Card Multiples - Dasher


Hi there

Sorry it's been a while since my last post.  I've been concentrating on getting my Christmas cards made, written and posted over the last couple of weeks.

Yet again, I left them far too late but I'm now in a position to start sharing them with you so here are the first of my multiple makes this year.

For these one layer cards I used a Stampin' Up wooden stamp I bought second-hand a few years ago...


I used some pale purple card bases here and began by masking off the bottom half and blending up from the centre with purple ink.  With the mask still in place I next stamped the stag image in dark purple ink and, once dry, I blended through a stencil with white ink to create snow.


To finish I stamped the sentiment from a retired stamp set just below the masked line and then added some silver glazed gems to the stag's antlers.


Materials used:
  • Stamps: Stampin' Up - Dasher; Clearly Besotted - Signature Christmas 
  • Ink: Distress Ink - Dusty Concord; Altenew - Andromeda; Hero Arts - Unicorn; Versafine - Onyx Black
  • Stencil: Clearly Besotted - Snowy Day
  • Gemstones from stash

Challenge entries:

Use Your Stuff - Challenge #412 - Winter/Snow/Christmas
STAMPlorations - December Stencil Challenge - Anything Goes
Sweet Stampin' - Let It Snow
My Time to Craft - Challenge #447 - Monochromatic Christmas
Inkspirational - Challenge #228 - Snow


Thanks so much for taking a look, I'll be back with more very soon.


Saturday, 21 November 2020

Less is More Challenge #433

Hi there

Today, I'm back to announce the new challenge at Less is More.  This will be the last challenge of the year in order to give the Design Team a little break throughout December.

And just to cheer you all up, we're finishing with a One Layer Challenge!  But I can assure you it's an easy one, here's the cue card...


And we also have a familiar face joining us for this one.  Our previous leader at Less is More, the lovely Chrissie, was our October challenge winner and is therefore joining us as our Guest Designer.  Please do pop over to take a look at her lovely CAS project and to say hi.  It's so great to have you back, Chrissie!


I have two one layer makes to share with you this time.  The first was a super quick make and I'm actually really loving this one...


I masked off the back of the green card base and then lightly blended some green ink from the upper corner, fading it out.  The holly (from an oldie but goodie stamp set, now retired) was then stamped in dark green ink and the sentiment in VersaMark.  I then heat embossed the sentiment in gold before finally adding some holly berries with Nuvo drops.


I'm still way behind on my Christmas makes this year, so as I love this design so much I think I may make more of these, and some variations of the same layout.  Although this was a one layer card, made from one piece of green card, to stretch my coloured cardstock I'll more than likely make panels to adhere to the fronts of more cost effective white card bases.

Materials used:
  • Stamps: Clearly Besotted - Christmas Poinsettia, Sing It's Christmas
  • Ink: Distress Ink - Pine Needles; Altenew - Evergreen; VersaMark
  • Embossing Powder: Wow! - Metallic Gold Rich
  • Accents: Nuvo Crystal Drops - Autumn Red
Challenge entries:

Time Out - Challenge #175 - Quick
We love Chocolate Baroque - November Challenge - Christmas


And while we're on the subject of holly, I wanted to share this picture with you.  I took it a couple of weeks ago when visiting a local Country Park.  I've never seen a holly bush with so many berries, it looks so festive!


Ok, would it even be approaching Christmas if I didn't make a winter scene card using my Card-io stamps?  Here's card number two...


I masked off a central rectangle on my card base and then chose a selection of images from the different scene-builder sets and roughly planned the layout.  Using some paper scraps cut with curves I gently blended the glow and evening sky, the snow banks and shadows where my images would be, and gave the edges a touch of ink to frame the scene.  Then it was just a case of stamping the images in black ink, the church and trees with a mask in place, and the foreground foliage in first and second generation stamping.  To finish, I adhered some fine glitter with a glue pen, which you can see more clearly below.


Materials used:
  • Stamps: Card-io - Festive Fun, Festive Scene, Greenery 1, Mini Tall Trees, Dear Deer, Branching Out
  • Ink: Versafine - Onyx Black; Versa Color - Marigold, Neptune
  • Accents: Cosmic Shimmer Diamond Frost - Frosty Dawn
  • Quickie Glue pen

Challenge entries:

Uniko - Challenge #62 - Tis the Season (option: Sparkle)


Thanks so much for taking a look today.  As usual, the challenge linky over at Less is More will remain open for two weeks.  Looking forward to seeing lots of one layer makes in the gallery in the run up to Christmas.


Related Posts Plugin for WordPress, Blogger...