Showing posts with label Bullet Journal. Show all posts

Wednesday, 2 February 2022

February 2022 Bullet Journal Set Up

Hi there

Sorry I've not shared any cards with you so far this year, I hope to find time to get creative very soon.  I've just been trying to catch on boring things at home so crafting has unfortunately been at the bottom of the list since Christmas.

But, I do have another bullet journal set up to share with you today, my February pages.

Once again I used some stamps from my stash for these spreads.  As February is Valentines month I chose a roses and flowers theme, and again, kept it all very simple.


I used a mix of stamps from Altenew and Skull and Cross Buns for these spreads.  It was all going great until I coloured the images.  I tried to watercolour with my Zig Clean Color Real Brush Markers and, although these pages are thick enough to take water, the mix of the ink used for the stamped images, water and the colouring medium caused the colour to bleed through the page.


So, as you can see below, I had to patch up a section!  I had some pages left in my 2021 journal so I cut a section from there and used my glue runner to adhere in place.  Yes, I can see it but it doesn't bother me as much as the big pink blob!

So for the remaining spreads I used my Derwent Inktense pencils with minimal water to add some very sketchy colour to the flowers and leaves.

Just a simple monthly layout here, I really don't need anything more detailed.


Next up are my weekly spreads.  Last month I used two pages for each week but I just don't need that much space at the moment.  So, here, the days of the week are big enough sections for appointments, birthdays, etc. (I don't have a whole lot going on right now!), and the weekly rolling task list still works perfectly for me.


...and pretty much the same layout for the last two weeks of February.  I even managed to squeeze the rogue Monday in at the bottom!


Materials used:
  • Stamps: Altenew - Amazing You, 365; Skull and Cross Buns - Days and Months, Planner Banner
  • Ink: Versafine - Onyx Black (waterproof once dry)
  • Coloured with Derwent Inktense pencils

Thank you for popping by, I hope to be sharing projects more regularly very soon.


Thursday, 13 January 2022

January 2022 Bullet Journal Set Up

Hi guys

I'm back with my bullet journal January 2022 set up as promised...albeit later than I hoped!

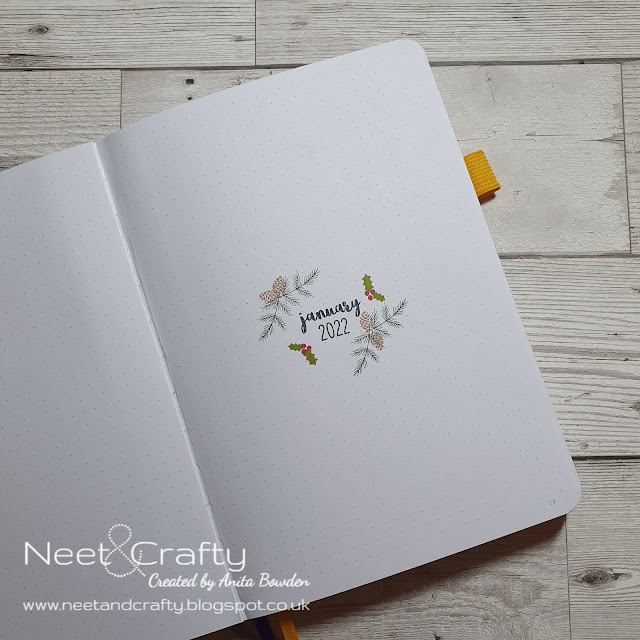
I've kept it super simple but still used some of my craft supplies to add some minimal detail.

For now, until I'm back in the swing of using it, I've just kept it to a cover page, monthly calendar and weekly spreads.  I've previously created habit trackers but I found I just don't fill them in so I've decided against creating them for now.

So, for January I've chosen a winter foliage theme, here's my minimal cover page created purely with stamps and ink...


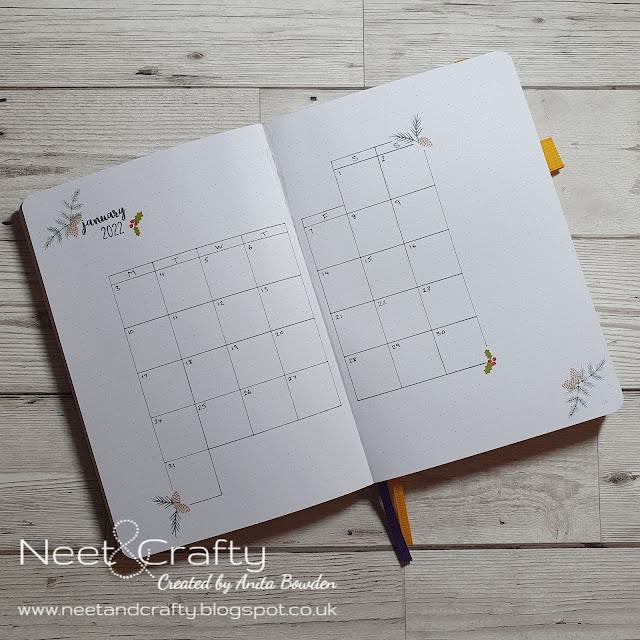
And then my monthly calendar where I'll transfer anything from my Future Log and use for further appointments, events, reminders, etc.


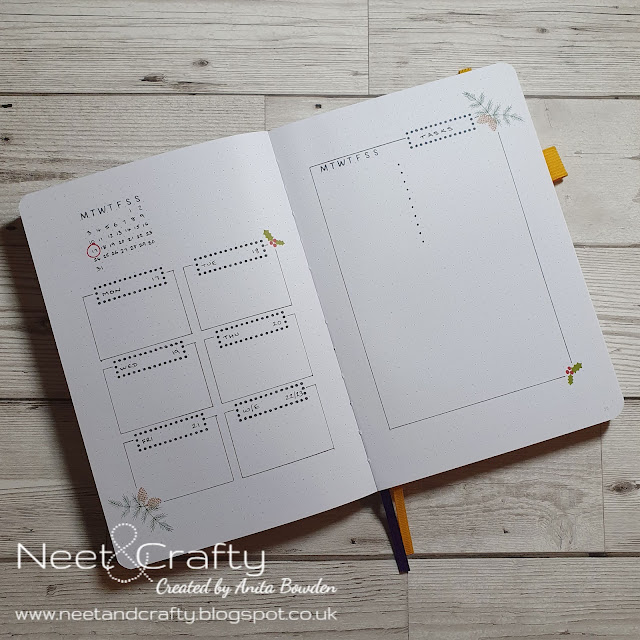
And here's one of my weekly spreads (they are all the same layout for January).  I found in my previous journals that a rolling weekly task list works best for me (using the Alastair Method).  You just assign a bullet under the day you want to complete whichever task and then cross them off or, if applicable, migrate them to the following week.  Here I used some stamps and some was handwritten.  


Materials used:
  • Stamps: Uniko - Background Builders: Vines Winter Additions; Skull and Cross Buns - Planner Banner; Altenew - 365
  • Ink: Memento - Tuxedo Black; Altenew - Evergreen, Moss, Mocha, Velvet

Thanks so much for taking a look.  Hopefully using the journal will make me organised so that I can share my February set up ahead of time!  


Tuesday, 4 January 2022

2022 Bullet Journal Set Up

Hi there

And a very Happy New Year to you, thanks for stopping by.

I have something a little different to share today.  If you follow me on Instagram you may have seen my very few and far between posts showing my bullet journal set ups.  I've dabbled in bullet journaling over the last couple of years but never used the system to its full potential.  It think with the various lockdowns and not living normally, this has hampered it a little but fingers crossed I can start getting the system going a little better this year.  There were spreads I created in my previous journals that I just didn't use so I've not included them this time.  But the great thing about bullet journaling is that you just create as you go, so if I think of something that may be useful, I can just add it in and reference it in the index.

As I'm a cardmaker I have a fair stash of stamps, dies and stencils so I like to try to incorporate them in my journal.  I'm not going to lie, it does take a lot more time to set it up using these products rather than just creating everything by hand, but once the main set up is done, the rest is easy.  I don't like my handwriting (and hand lettering is something I plan to learn more about this year) so by using my craft supplies, especially for my yearly spreads, it's much more aesthetically pleasing, and hopefully this will encourage me to reach for it more.  I'll detail the products I've used at the end of this post.

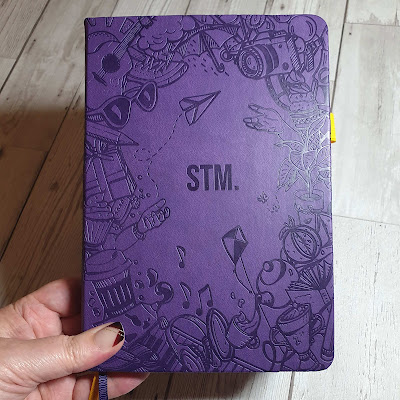
For the last two years I've used journals by Scribbles that Matter and they are great quality so I've chosen the same brand again this year.  I've chosen the Iconic Dotted Journal (160gsm) in Aubergine (looks a little bluer in this photo for some reason).  I've stuck with the 160 gsm pages so I have the option to perhaps try watercolouring or other mediums throughout the year, which the thicker paper can withstand.


Ok, onto my 2022 cover page, and this is the theme I've used for my yearly spreads...stencilled brush strokes.  I simply ink blended through the stencil apertures with three shades of Distress Ink.  I've also used die cut letters, but these spreads did take hours to create as I had to glue all the letters in position individually!  I love the result but I won't be doing that again for my monthly pages, it was far too time consuming!


After trawling YouTube and Instagram I've chosen a Dutch door layout for my future log as this means I only had to create the header once, and I put my calendar stamps to good use here to save me writing out all the dates!  These were stamped onto die cut squares.  In my previous journals I've also had a Year at a Glance page but it's not really required if you have the calendars in the Future Log spread.

I made a continuation of the stencilling on all three views here, so whichever four month view is on display, the brush strokes continue across the pages, I hope that makes sense.  I also created tabs for this spread simply by cutting away the edges to create the tabs and I masked and ink blended them.


Here's a further view of the Dutch door layout...


The next two spreads are pretty self-explanatory.  I used a further brush stroke from the stencil for my box headers.


Next up are my Wish List and Purchases spreads.  Once gain, pretty self-explanatory.  Over the last couple of years I've been making a lot more purchases online as I was wanting to stay away from busy shops so this is a great way to keep track of what's been ordered and when, and if it's been received.


Another spread I've used previously and found really useful is the When Did I Last... spread.  This is great for thinks like, when I last had a hair cut, when I changed my toothbrush or when the window cleaner visited.  I've previously just put some dashes alongside items so I could write the date in but this time I thought I'd add the months of the year.  For each entry I have four squares available for each month so I can just write the relevant date in each box.  So I can then also use this for keeping track of cleaning, etc.


Another fairly self-explanatory page, just somewhere I can keep track of TV series I would like to watch and can mark off episodes as I watch them.


The following spread is for following the Konmari process...the Marie Kondo way of decluttering.  If you've not read her book, the Life Changing Magic of Tidying Up, I strongly recommend it as a way of organising your home.  I have followed the process previously but never got to the end so I'm going to start from the very beginning again and work through the categories, it's very satisfying.  I've yet to fill in all the sub-categories but you get the idea.


And finally, a spread I revert back to all the time...my master grocery shopping list.  Obviously this still needs to be filled in but it's so helpful when completing your shopping list.


Here are the products I used from my craft stash:
  • Stencil: Clearly Besotted - Brush Strokes
  • Ink: Distress Ink - Speckled Egg, Victorian Velvet, Dusty Concord; Memento - Tuxedo Black
  • Stamps: Taylored Expressions - Playful Alpha; Skull and Cross Buns - Days & Months; Altenew - 365
  • Dies: MFT - Bottle Cap Letters, Pierced Square Stax
  • Lilac and black cardstock from stash

Thanks for taking a look.  I'll be back soon to share my January set up....once I've decided on a theme and actually created it!  I was hoping to get it all ready to go before the New Year but time just disappeared and 2022 arrived so fast!  

I hope you'll pop back again soon.


Monday, 18 May 2020

Honey Doo Crafts - May 2020 Release - Birthday Cake

Hi there

Today I'm sharing the first of some samples using the latest stamp release from Honey Doo Crafts.

Not only will Amanda from Honey Doo be showcasing them on Create and Craft TV this coming Friday, 22 May 2020 (11.15am and 3.45pm), she will also be sharing them with you on a Facebook live tomorrow, Tuesday 19 May 2020 at 7.00pm.  You can find their Facebook page here.

The new release of stamps are a little bit different to the well known florals by Honey Doo, this time being large, sketchy, very detailed images.


These are my samples using the new set called Birthday Cake...


I began by die cutting a panel of white cardstock (no surprise there!) and stamped the large tiered cake image.  I then stamped this a second time on a couple of post-it notes to use as a mask.  Next I ink blended through the Honey Doo Ribbons stencil using Distress Oxide inks.  I really like this technique when the focal image is so detailed, you don't necessarily have to colour it in, just add colour to the background instead.  To finish I heat embossed the sentiment, also included in the Birthday Cake set, in silver onto a strip of vellum, then wrapped this around the panel before mounting onto the card base on fun foam.


Materials used:

  • Stamps: Honey Doo Crafts - Birthday Cake
  • Stencil: Honey Doo Crafts - Ribbons
  • Die: Create a Smile - Cool Cuts Double Stitched Rectangles
  • Ink: Versafine - Onyx Black; Distress Oxide - Picked Raspberry, Wilted Violet, Mermaid Lagoon; VersaMark
  • Embossing Powder: Wow! - Metallic Silver
  • Vellum from stash


This next card took a little time to create but I'm really happy with the end result...


I decided to go with the rainbow theme of the moment!  I don't usually stamp with Distress Inks but I love the vibrancy of the colours on this card.  I stamped the cake in blue first then using a mask, covered it up, shifted the panel across in my MISTI (a stamping platform really does help with even spacing) and stamped in purple, then masked the purple image, shifted the panel across again and stamped in pink...and so on right across the panel.  I trimmed the panel down, adhered some striped paper to my card base then mounted the stamped panel on top.  I decided to leave this one sentiment free.

Materials used:

  • Stamps: Honey Doo Crafts - Birthday Cake
  • Ink: Distress Ink - Broken China, Wilted Violet, Picked Raspberry, Candied Apple, Spiced Marmalade, Squeezed Lemonade, Twisted Citron
  • Patterned Paper: MFT - Dots & Stripes Neutrals


And my final sample is something a little different.  At the start of 2020 I decided to try bullet journaling.  As May is my birthday month I chose this image for my May cover page!  It's a very minimalist design, just how I like it!  And with us having to be in lockdown for the last two months my whole journal has been very minimal, there's really not a lot going on!  Apart from a few collection pages and keeping up with a few birthdays, etc. my journal is really just a to-do list right now!


This was simply stamped before I trimmed away the outside edge of the page, and then very roughly coloured with some Tombow markers.  I wanted my journal to be more of a productive tool than a creative one, but some stamped images have crept in here and there :)  I'm still learning all about it so not using it to its full potential just yet, its a big learning curve but I love it so far.


I'll be back tomorrow with more samples for you.  And don't forget Amanda's Facebook live tomorrow evening when she will be showing you this new set, along with the rest of the release ahead of the Create & Craft shows on Friday.

Thanks for visiting x

(AD - some products kindly gifted for design team purposes)
Related Posts Plugin for WordPress, Blogger...