Showing posts with label Storage Solutions. Show all posts

Wednesday, 17 June 2020

My Craft Space - June 2020 Update

Good morning

I'm just popping by this morning to let you know that I've updated my 'My Craft Space' page.

You can find the update by clicking, here, or on the tab above.

I originally shared my 'new' craft space three years ago and although my limited space doesn't allow much to change, I've added a few things and moved things around to work better for me.  I've also spent the last few weeks going through my whole stash and tidying it up.  I need to go through all my stamps and purge some but for the moment they are all in order where they should be.


Thanks for looking and have a great day, whatever you're doing.  I'm now off to work but remaining in the same chair at home!

Saturday, 13 June 2020

My Swatch Folder

Hi there

Just a quick post about how I make and store swatches of products in my stash.

I use the method shared by Jennifer McGuire many years ago, you can find her video here.

Basically, this involves using individually stamped swatches which are then stored in coin pockets.  I purchased some coin pockets from Amazon, these are A4 ones which fit into any ring binder.

Jennifer has a download link for her templates but I struggled to get them to line up properly when printing, possibly due to the difference in size between US Letter size and UK A4 size.  So I set up my own template in MS Word, using a table with the right measurements then just removed the grid lines.  I just over-type this whenever I make new swatches.  Then it's just a case of printing and trimming.

I have a circular solid stamp set aside that I use for all my swatches.


And as you can see above, I also made swatches for my embossing powders.

I initially created this swatch folder a couple of years ago and have bought more inks since then so that's another task for me to do very soon.

I highly recommend creating one of these, it's a great way to see the true colours of what you have rather than relying on the ink pad packaging.  I originally had some swatches which were little punched cards kept on a metal ring but found that much more fiddly.  It's so much better to see the colours laid out and easier just to flip through the pages.

I hope this helps!

How I Store My Dies

Hi there

Since I've been on the subject of craft organisation and storage in my recent posts, I thought I'd just add a quick post about how I store my dies.

I love how some crafters use magnetic boards on their craft room walls to store their dies but I have a very compact craft space and it's also in the main hallway of my very small flat so I need to keep it looking tidy.  So my die storage is nothing fancy but it works for me.

I use two Papermania Stamp and Die Storage Folders which I purchase from The Range, here.


These are supplied with ten pockets, each with a magnetic sheet.  You can also buy the pockets separately should you need more.  

I take all of my dies out of their original packaging and place them in here, with a label detailing the brand and name.  My dies are not in any particular order at the moment, I just tend to use one folder for frames/outlines/background type dies, and the other for everything else, flowers/butterflies/alphabets, etc.


I used to keep these folders in a drawer but it wasn't the best use of space and when full they are quite heavy to keep lifting from a drawer, so they now live in the top section of my trolley, alongside my desk.

Any dies that co-ordinate with stamps I store with their companion stamp set in my main craft cupboard.

I appreciate your visit, thank you :)

Stencil Storage Update

Hi guys

A little update for you today about how I store my stencils.

I shared a detailed post in 2018 about my stencil storage which you can find, here.

To be honest, not much has changed.  My stash of stencils has grown considerably in the last two years so I have transferred them from a ring binder to a lever arch file.  Stencils are very inexpensive and there are so many great techniques you can do with them, so it's a great way to add to your stash if you're on a tight budget.

I use A4 photo sleeves with pockets which I purchase from Amazon.  The most common 6" x 6" stencils as well as the larger A5 stencils will fit into the photo sleeves with two pockets.  Since my last update I have also now purchased more photo sleeves which have four pockets which are ideal for the smaller ones and also for slim/tall stencils.

By placing some paper behind the stencils this also allows me to store them back to back.  I previously just used white copier paper but have recently bought some inexpensive coloured paper from eBay which makes the stencils a lot easier to see.  

The only other change is that I have typed up my labels.  I don't love my handwriting and typing these up didn't take long at all.  I just used MS Word and printed onto Avery L4732 label sheets.  There are 80 labels per sheet so, as you can imagine, I've had this pack of labels for years!  

And this is the cute file I keep them in.  I bought a few different folders from this range some years ago (Bramble Wood from WH Smith, a stationery/book store here in the UK) but I think they may now be discontinued.  But any ring binder or lever arch file will work fine for these pockets.


Thanks for visiting and I hope this will give you some ideas.  I thought this lockdown would mean lots of crafting for me but instead I've been sorting through everything, and I'm loving being this organised!

Friday, 12 June 2020

Storing Those Scraps!


Hi there

I think anyone that is a crafter will agree that no matter how hard we try, we end up with countless off-cuts and scraps left from our projects.  

I am certainly guilty of nearly always reaching for a fresh piece of cardstock from my organised stash instead of using up the perfectly good smaller pieces, and the mountain of these leftovers was starting to grow.

So I gathered together the box and carrier bag that these were living in and spent a couple of hours sorting through them and organising them into some logical and easy to grab storage.

I had some A5 plastic zip wallets which I had picked up previously from a couple of stores as I thought they would prove to be useful at some point, and they were perfect for this.  Any off-cuts which were larger than A5 I placed back in my main cardstock storage.


I had four of these reinforced plastic zip wallets which I picked up some time ago at The Range (I can't see them on the website but they were in store in the office stationery section).

So I used these four wallets for: Blues, Greens, Purples/Lilacs and Reds/Pinks

And so that each can be identified easily from my cupboard I tied co-ordinating pieces of ribbon to the tabs already on these...


I also had some different plastic wallets, with plastic slide-type zips, which I had previously bought from WH Smith (a stationery/book store here in the UK).  These aren't as sturdy and probably not as hardwearing so I used these for the colours of which I have fewer scraps.

So in these I am storing: Yellow/Oranges, Metallic/Glitter, Black/Neutrals, Vellum/Acetate


These don't have ribbon tabs so I punched holes in the side and tied the identifying ribbons to those...


I had tonnes of white and cream cardstock scraps so these are now altogether in a larger A4 zip wallet...


I also had countless strips of white trimmings so these now live in a spare tin so whenever I need a sentiment strip I don't need to even go to my white scraps wallet, I'll just use these....and it appears these could last a lifetime!


I feel so much better for sorting all these out, it's a job that needed doing for a couple of years, and I hope you find this useful.

Saturday, 27 May 2017

Introducing My New Craft Space!

Hi lovelies

As some of you will remember, about a month ago I shared some photos of the space I was planning to use as my new creative space.

Well, after some decorating, building of furniture and a really good sort out of my stash I can now share it with you.

I've decided to add all the details to a page rather than a post so I can update it as and when I need to.  So, for my happy page please click here or follow the tab above.

Here's a sneaky peek of my new workstation!


Thanks for popping by!

Sunday, 16 June 2013

Scrap Storage Idea

Good evening fellow crafters

After making some cards this weekend I realised that I was probably wasting a lot of cardstock as I always tend to go straight to my full sheets of cardstock when looking for a colour I want to use.  I had my scraps/offcuts sorted into colours and kept in cello bags in a box.  I then realised that because they are out of sight I never look there first so this afternoon I've been crafting to make a solution.

I've made some boxes out of A4 sheets of card and only time will tell if this will work for me.  So, I thought I would share with you how I made them.

I had some 200gsm card that I bought for stamping but its not as good as I thought it would be so I didn't mind using a few sheets for this.

I started with an A4 sheet and marked the centre point on the longest side.  I decided to make the width of my boxes 3cm which I think is about right for storing scraps, so I then marked 1.5cm either side of the central point and scored two lines, as below...

I then scored 3cm in from each side, lengthways.  Whatever width you decide on for the box, this measurement will need to be the same, as below...


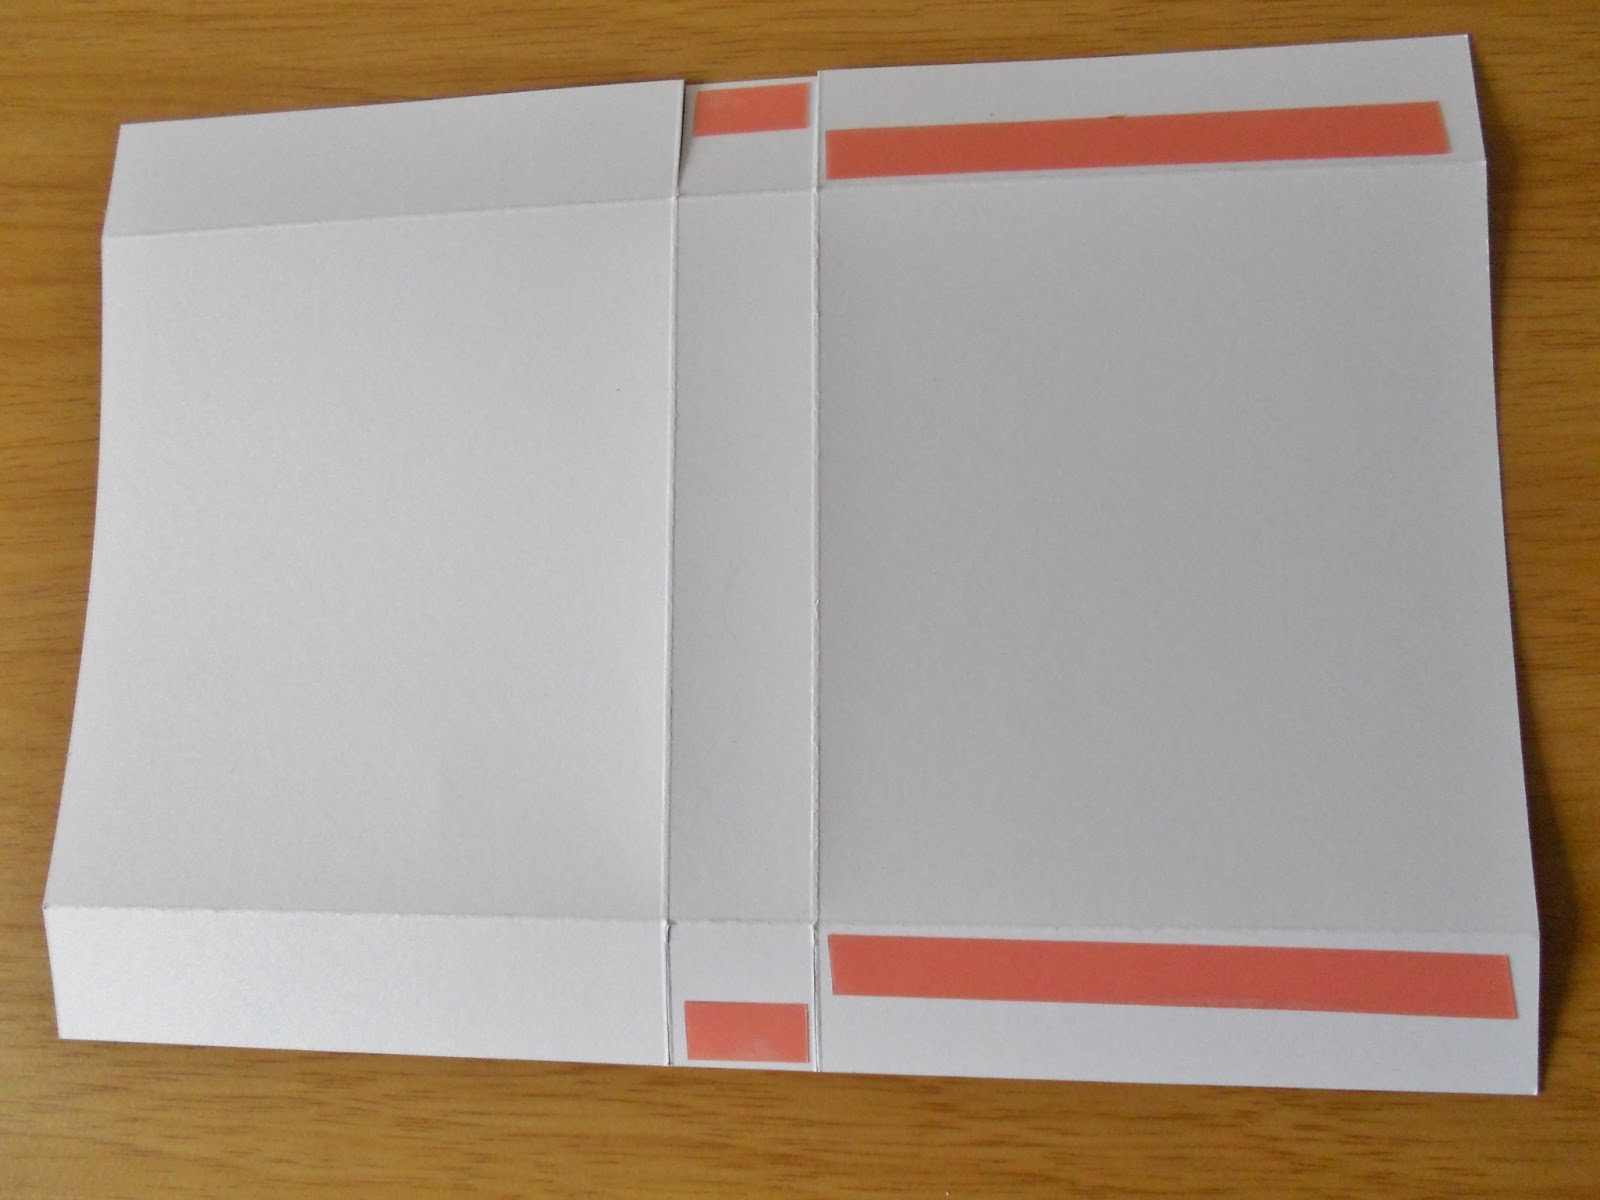
Next, I made two small cuts along the score lines which will form the two small internal edge flaps, then folded all the score lines inwards...


The next step is to turn the whole thing over and add double sided tape to the small edge flaps, and the two side flaps at one end...


Then you need to stick the small flaps to the inside of two taped sides...


and then stick the untaped sides around the outside of the taped sides to form a box, open at the top...


I then coloured in some labels with Flexmarkers to indicate the colour range contained within each box...


And here's my finished set.


I need to make a couple more for my gold/silver scraps, and perhaps my creams as I currently have these in with my whites but for now I'm pretty pleased with this and once I'd worked out how to make the first one, I completed the set in no time :)

I just now need to make a mental note to look here first before cutting into my large cardstock unnecessarily. 

Hopefully this may give you some inspiration if you are looking for your own solution, and its a nice inexpensive one too!

Bye for now


Saturday, 25 May 2013

Pen / Marker Storage - Bargain Solution!

Hi guys

If you saw my blog post yesterday you may remember I mentioned that I had a possible inexpensive solution to my Promarker/Flexmarker storage problem.

I've been looking around for storage for my growing collection of alcohol markers and just can't stretch to the cost of many that I've found online so far.  Until now I've had them in a couple of boxes, all thrown in together so its been very frustrating hunting through them each time I want to colour a different image.

I was recently at my local Home Bargains store when I saw these Flat Pack Pen Pots.  So tonight this is what I've done with them...

I bought 6 of these

straightforward flat pack design

I used strong double-sided tape to secure the internal flaps

Once the 6 were constructed I used the same strong adhesive tape to secure them together

and here is the finished article!

The boxes are only made of card (I'd guess about 300gsm) so the whole thing is a little bit bendy when containing the pens but its great for what I need for now.

And here's the best news of all, the whole unit (excluding adhesive) cost me...

£1.74!
Yep, each pen pot was 29p!
So, this will do me nicely for the time being.  I could do with more sections as I have some groups of colours in together but its certainly better than having them in a box.
I hope this idea can be of use if any of you are looking for the same storage solution :)
Take care
Related Posts Plugin for WordPress, Blogger...