Showing posts with label Vellum. Show all posts

Friday, 27 February 2026

Uniko 14th Birthday February 2026 Release - Introducing...Ink & Flip Layering Retro Flowers

Good morning and Happy Friday!

I have the final introduction of the new Uniko release which will be launching tomorrow.

And it's another Ink & Flip stencil set...Ink & Flip Layering Retro Flowers.  This design is so fun, I think you're going to love it.  The first time I saw it I was immediately getting the wallpaper image vibes from the Mr Men books.  Not exactly the same as those flowers only had four petals but hopefully you can see where I'm coming from!  

I paired this design with a sentiment from the Birthday Sentiments stamp set...


I wanted my background to have some colour so I chose a pale green cardstock and then used Distress Oxides to ink up the design, as they are opaque.  I first inked up both sides of the flowers and then when I did the centres, I decided to stop after doing the first half and left the remaining flower centres green.  I stamped and heat embossed the sentiment in white on a strip of vellum which was wrapped around and adhered on the reverse.


Materials used:
  • Stencils: Uniko - Ink & Flip Layering Retro Flowers
  • Stamp: Uniko - Birthday Sentiments
  • Ink: Distress Oxide - Peacock Feathers, Dusty Concord, Mermaid Lagoon, Villainous Potion; VersaMark
  • Embossing Powder: Brutus Monroe - Alabaster
  • Cardstock and vellum from stash


Please do check out the Uniko blog, here where you will find lots more inspiration from the team.  I'll be back tomorrow for the full release reveal so would love for you to stop by.

All the new products will be available from tomorrow, Saturday 28 February 2026 at 9am GMT.

Thanks so much for visiting today.


Monday, 28 July 2025

Uniko Christmas in July 2025 - Introducing...Ink & Flip Christmas Tree Pattern and Ink & Flip Snowflake Pattern

Hi there

It's day three of the Uniko introductions from the Christmas in July release.

And today the team are showcasing two new additions to the Ink & Flip family...Christmas Tree Pattern and Snowflake Pattern.  These are standalone stencils which will help you to create quick and fun Christmas backgrounds.

First up, here's my sample card using the Ink & Flip Christmas Tree Pattern stencil...


The stencil creates half of the trees, with a vertical split, and then you flip it to complete the trees.  I used four colours of Distress Oxides here.  I inked up the first side using Iced Spruce fading into Pine Needles, then the flip side using Mowed Lawn fading into Rustic Wilderness.  I then heat embossed the large Merry onto vellum and fussy cut this out, then heat embossed the rest of the greeting in gold on a white strip, both of which I adhered on 3D foam.  These were from the Big & Bold Merry set.  I finished with a single enamel star on one of the trees.

Materials used:

  • Stencil: Uniko - Ink & Flip Christmas Tree Pattern
  • Stamps: Uniko - Big & Bold Merry
  • Ink: Distress Oxide - Iced Spruce, Pine Needles, Mowed Lawn, Rustic Wilderness; Versafine Clair - Nocturne; VersaMark
  • Embossing Powder: Wow! - Clear Gloss, Metallic Gold Rich
  • Vellum and enamel star from stash


And now my card using the Ink & Flip Snowflake Pattern, paired with a sentiment from the Background Builders Winter Wonderland set...


Placing the stencil on the diagonal, I inked up through the first side of the stencil with Tumbled Glass Distress Oxide, before flipping and inking through with Shaded Lilac.  I then die cut the panel with a stitched rectangle die.  I then stamped and heat embossed the sentiment in silver before adhering the panel flat to my card base.


Materials used:
  • Stencil: Uniko - Ink & Flip Snowflake Pattern
  • Stamp: Uniko - Background Builders Winter Wonderland
  • Ink: Distress Oxide - Tumbled Glass, Shaded Lilac; VersaMark
  • Embossing Powder: Wow! - Metallic Silber
  • Die: Create a Smile - Cool Cuts Double Stitched Rectangles


Be sure to check out the Uniko blog, here where you'll find many more projects from Bev and the Brand Ambassadors  I'll be back tomorrow to introduce another of the new products.

All the new products will be available on Thursday 31 July 2025 from 9am BST.

I appreciate you taking a look and hope to see you soon.


Friday, 1 November 2024

Uniko October/November 2024 Release - Introducing...BIG & BOLD Joy

Good morning.

It's time for another new introduction from the upcoming release at Uniko.

And this time it's another great addition to the Big & Bold family of stamp sets...Big & Bold Joy.  Another great set, I think you'll agree.

The focal point on my first card is all heat embossed stamping...


On a panel of raspberry coloured cardstock I planned out where I wanted the various elements.  I started by stamping and heat embossing the dove in white.  Next I masked the dove and then stamped and heat embossed the word Joy in platinum.  I then stamped and embossed the foliage in green glitter and then finally the second part of the sentiment was heat embossed in red glitter.  And finally, before adhering the panel to my card base, I blended a darker shade of red ink around the edges to give it some depth.


Materials used:
  • Stamps: Uniko - Big & Bold Joy
  • Ink: VersaMark; Distress Ink - Aged Mahogany
  • Embossing Powder: Brutus Monroe - Alabaster; Wow! - Platinum; Heat It Up Embossing Tinsel - Green and Red


Next I combined the set with stamps from the Christmas Pop set...


On the card base I stamped the tree and star to create a backdrop which was to show through an aperture.  I die cut an aperture from a panel and I then heat embossed the Joy in gold on a strip of vellum which was fussy cut and then wrapped around the panel and adhered on the reverse before adhering the panel flat to the card base.  The rest of the greeting was heat embossed in white on a grey sentiment strip and adhered on 3D foam.

Materials used:
  • Stamps: Uniko - Big & Bold Joy, Christmas Pop
  • Ink: Memento - Cottage Ivy; Versa Color - Gold; VersaMark
  • Embossing Powder: Wow! - Metallic Gold Rich; Brutus Monroe - Alabaster
  • Die: Create a Smile - Cool Cuts Double Stitched Rectangles
  • Vellum from stash


We still have another introduction tomorrow before the big reveal on Sunday so be sure to pop back if you can, and visit the main Uniko blog, here.

I'll be back tomorrow with a couple more cards using another of the new products.


Thursday, 31 October 2024

Uniko October/November 2024 Release - Introducing...Background Blocks Snow Flurry

Hi there

Ok, so, the last two days we've been welcoming back two re-introductions at Uniko.  Today we have the first of the new introductions and it's another addition to the fabulous Background Blocks series...Snow Flurry.

In this festive design, Bev has once again used her much loved snowflake designs and I just love how this stamp is in reverse, so the emphasis is on stamping the background.

I have two very different cards for you today, here's the first, and I've combined it with stamps from the Big & Bold Snow stamp set...


I began by stamping the snow flurry stamp on the card base multiple times with three shades of ink until I achieved a nice blend of colours.  I then stamped the Snow sentiment and heat embossed it in white on vellum and die cut it with the co-ordinating die.  I adhered the vellum on tiny 3D foam pads behind just the white parts and then finished by adding the white embossed sentiment strip.

Materials used:
  • Stamps: Uniko - Background Blocks Snow Flurry, Big & Bold Snow
  • Ink: Altenew - Winter Lake, Wisteria, Pink Diamond; VersaMark
  • Embossing Powder: Wow! - Opaque Bright White
  • Die: Altenew - Featured Sentiments
  • Vellum from stash


And now my second card...


On a piece of white cardstock I randomly blended ink in pink, aqua and lime shades.  I then stamped the Snow Flurry stamp over the top in a very dark navy ink which then let the snowflakes show through in the bright colours.  I die cut three rounded squares and adhered these to the card base.  The sentiment strip, embossed in white on black and mounted on a pink frame, was then adhered on 3D foam.  This sentiment is from a set we are introducing later in the week.

Materials used:
  • Stamps: Uniko - Background Blocks Snow Flurry
  • Ink: Altenew - Pinkalicious, Aqualicious, Bamboo, Dark Night; VersaMark
  • Embossing Powder: Wow! - Opaque Bright White
  • Die: MFT Die-namics - Stitched Rounded Rectangles


Take a look at the Uniko blog, here, for more inspiration from the rest of the team.  It's amazing what different projects have been created using the same background stamp.

All the new products will be available from Sunday 3 November 2024.

I hope you'll pop back tomorrow where myself and the team will be introducing another new stamp set.


Thursday, 11 January 2024

Uniko January 2024 Non-Release Brand Ambassador Blog Hop & GIVEAWAY!

Hi there

Bev at Uniko is kicking off 2024 by bringing back the Non-Release Brand Ambassador Blog Hops and Giveaways, where the team revisit the oldie but goodie products and give them some well-deserved love.  Today we are revisiting the Beautiful Blooms I stamp set and Designer Dies Beautiful Blooms I.

I have four cards for you today, all a little different to hopefully give you some crafty inspiration.  Unfortunately, I don't have the die set in my stash so where the flowers have dimension I have fussy cut them.

First up, I've used vellum for the bloom and paired the stamp set with the Birthday Wishes stamp set...


I die cut a piece of pale green textured cardstock with a scalloped die to use as my card front panel.  I stamped and heat embossed the smaller of the flowers in the set in white on vellum and then fussy cut it out.  I then placed this in position in order to work out where I wanted the leaves to be stamped.  These were then stamped in a soft green and the flower was adhered on 3D foam.  I finished by stamping the sentiment from the Birthday Wishes set in grey ink.


Materials used:

  • Stamps: Uniko - Beautiful Blooms I, Birthday Wishes
  • Ink: VersaMark; Altenew - Mountain Mist, Grey Denim
  • Embossing Powder: Brutus Monroe - Alabaster
  • Die: Create a Smile - Cool Cuts Scalloped Rectangles
  • Cardstock and vellum from stash


My second project involved a little masking of the images and I combined it with the Quilted stencil and the Simply Said stamp set...


I think this is my favourite of the four cards today, and other than the sentiment strip, it's a one layer design.  I began by stamping the first flower in two shades of yellow/orange ink.  I then masked it to stamp the second flower and lower leaves, which were also stamped in two shades of ink.  I finally masked the second flower, stamped the upper leaf and then masked all the leaves.  I then inked through the Quilted stencil in grey ink, masking off a few sections to create the stepped design.  To finish I stamped and heat embossed the sentiment in white on grey cardstock.

Materials used:
  • Stamps: Uniko - Beautiful Blooms I, Simply Said
  • Stencil: Uniko - Quilted
  • Ink: Altenew - Warm Sunshine, Orange Cream, Frayed Leaf, Forest Glades, Silver Lake


Card three uses coloured cardstock for a tone on tone effect...


I stamped the flowers in blue ink on paler blue cardstock and the leaves in green on paler green cardstock.  These were then fussy cut.  I added some score lines to create some interest on the card base without adding any layers and then positioned and adhered the flowers and leaves, which are all adhered flat apart from the large flower which is adhered on 3D foam.  I finished with a stamped sentiment from the Simply Said set.

Materials used:
  • Stamps: Uniko - Beautiful Blooms I, Simply Said
  • Ink: Altenew - Caribbean Sky, Moss; Versfine Clair - Nocturne
  • Accents: Little Things From Lucy's Cards - Sprinkles: Little Dots


And for my final card I combined Beautiful Blooms I with Background Blocks Pinstripe and a sentiment from Pure Florals: Chrysanthemum...


I began by stamping the large flower from the set in shades of pink, adding the darker inks to the stamp with a blender brush.  I then masked the flower and stamped the Background Block Pinstripe image in a darkish grey.  I cut the mask right to the flower edge and some of the ink migrated under the mask but hey, this is handmade not Hallmark, right?!  I finished with a sentiment stamped in one of the same pink shades, adhered on a sentiment strip.

Materials used:
  • Stamps: Uniko - Beautiful Blooms I, Background Blocks Pinstripe, Pure Florals Chrysanthemum (sentiment)
  • Ink: Altenew - Pinkalicious, Purple Wine, Cosmic Berry, Industrial Diamond


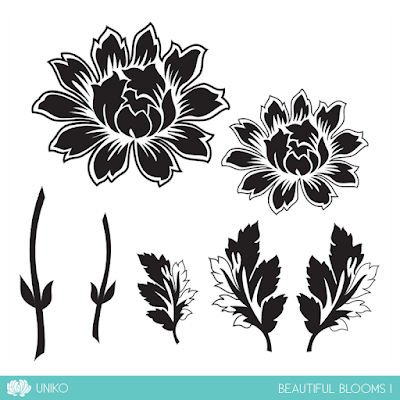
And this is what you get in the stamp and die sets, which can also be purchased as a bundle...


Don't forget to take a look at the main Uniko post, here, where the rest of the team are sharing their projects and if you follow the hop and comment along the way you could be the lucky winner of a £15 eGift Code!

Thanks for visiting today.


Friday, 4 August 2023

Uniko July/August 2023 Release - Introducing...Background Blocks Arts Decoratifs Christmas & Everyday Family

Good morning

Two more new products to introduce today from the latest Uniko release.

There is a great little festive addition to Art Deco series in the shape of a new Background Block.  And Bev has designed another stamp set to add to the Everyday Sentiments collection - Everyday Family, a really useful set for relatives galore. 


Here is the background block in action...


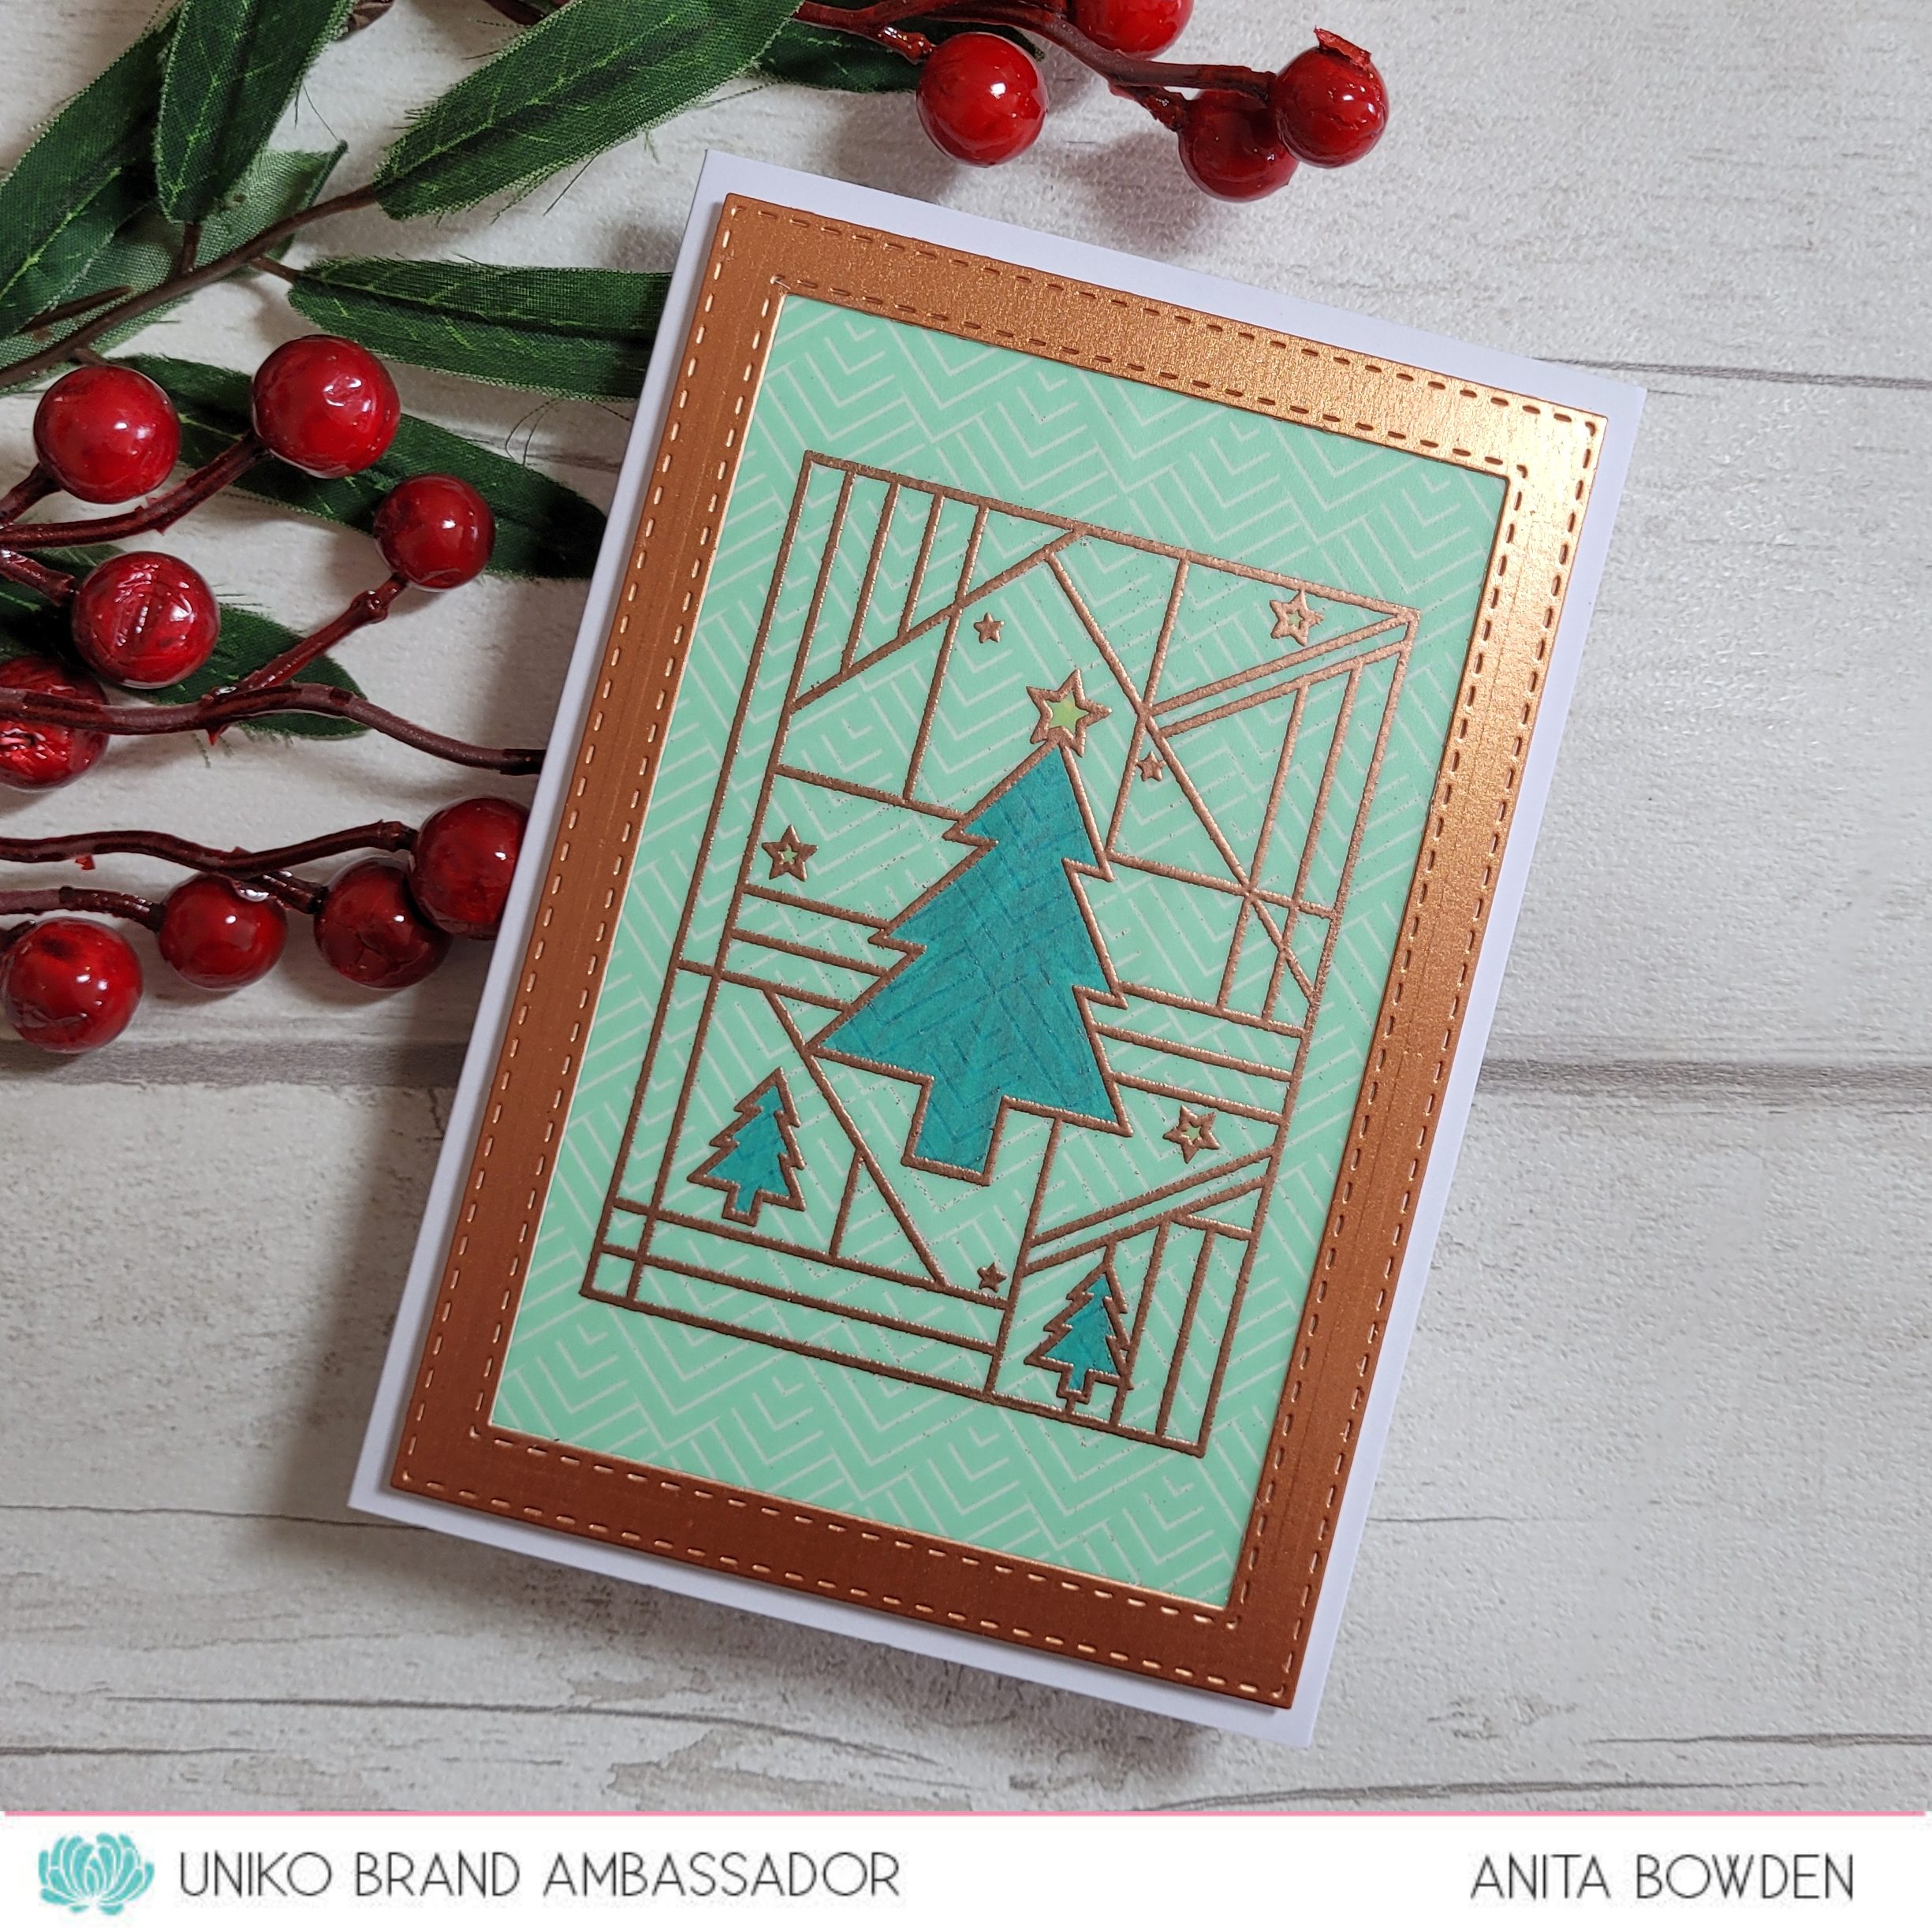
I knew that I wanted to stamp this great design onto some kind of patterned paper or vellum but I was struggling to decide what to use.  Then I stumbled across this green vellum in a vellum pad I forgot I had bought and it had the perfect Art Deco style pattern so that was my starting point.  I stamped the block and then heat embossed it in copper.  I then coloured the trees and the stars on the reverse of the vellum using Copics.  I then created the copper frame by die cutting with two stitched rectangle dies and then mounted the frame and vellum on fun foam.  I chose to leave this one without a sentiment as it had a lot going on.


Materials used:
  • Stamp: Uniko - Background Blocks Arts Decoratifs Christmas
  • Ink: VersaMark
  • Embossing Powder: Wow! - Metallic Copper
  • Dies: Create a Smile - Cool Cuts Double Stitched Rectangles
  • Vellum: Hobbycraft - Pastels Vellum Paper Pad
  • Coloured with Copics
  • Copper cardstock from stash


And for my second card I used the new Everyday Family stamp set combined with the new Background Block, and the seasonal sentiment from a set we will be introducing tomorrow...


I chose to do the emboss resist technique here using gold embossing powder and Distress Oxide inks.  I also did some colour lifting on the stars, by adding water and blotting away the colour.  I added some random scored lines on the card base to continue the Art Deco theme.  The sentiments from the two sets were simply stamped and mounted on sentiment strips.


Materials used:
  • Stamps: Uniko: - Background Blocks Arts Decoratifs Christmas, Everyday Family, Mid Century Modern Baubles
  • Ink: Distress Oxide - Peacock Feathers, Chipped Sapphire; VersaMark; Versafine Clair - Nocturne
  • Embossing Powder: Wow! - Metallic Gold Rich


The team are over on the main Uniko blog, here, sharing more projects using these new sets.

I'll be back with the last of the introductions tomorrow, I hope you'll stop by to take a look.


Wednesday, 27 July 2022

Uniko July 2022 Mini Release - Introducing...Stencil Tropical Leaf #2

Hi there

Another of the new Uniko products for you today, and we have a new stencil for you.  

A great one to combine with the existing tropical and paradise range, this is the Tropical Leaf #2 stencil.  It's a Monstera leaf stencil, together with a mask, and in a great size too.

For my first card I used the mask...


I masked off the edges of my card base first and then positioned the mask, using a little low tack adhesive on the reverse.  I then blended out around the mask using three shades of Distress Oxide ink.  The little 'holes' in the leaf are also included as part of the stencil.  I simply stamped the two part sentiment from the Paradise clear stamp set and the card was finished.


Materials used:
  • Stencil: Uniko - Tropical Leaf #2
  • Stamps: Uniko - Paradise
  • Ink: Distress Oxide - Twisted Citron, Mowed Lawn, Peacock Feathers; Versafine Clair - Nocturne


And for my second card I used the stencil...


I inked blended through the stencil with four shades of Distress Oxide ink.  I then messed up!  I stamped the hibiscus flower from the Paradise clear stamp set over the stencilled image but I forgot that the impression isn't great when stamped over Oxide ink so I fixed it by stamping and embossing the flower onto vellum.  I added a heat embossed sentiment from the Happy Days clear stamp set, embossed in white.  I cut the front of my card base away so it was then a card front so I was able to wrap the vellum around it, ensuring the flower was in position above the one I'd stamped below it, before adhering to another card base.  


Materials used:
  • Stencil: Uniko - Tropical Leaf #2
  • Stamps: Uniko - Paradise, Happy Days
  • Ink: Distress Oxide - Blueprint Sketch, Wilted Violet, Picked Raspberry, Dried Marigold; Versafine Clair - Nocturne; Versamark
  • Embossing Powder: Wow! - Clear Gloss, Opaque Bright White
  • Vellum from stash


I hope you're enjoying see this new release so far.  I'll be back to share more tomorrow morning.  Don't forget to check out the Brand Ambassador makes over at the main blog, here.


Saturday, 7 August 2021

Less is More Challenge #449

Good morning

This time over at Less is More it's the turn of a Colour challenge.  I'll get straight to the cue card...


We have a fabulous Guest Designer joining us for this one.  It's Sid who was our winner for the month of May.  Please do pop over to take a look at his project for this challenge and to say hi.

For my sample card I used some products which are brand new to my stash and only arrived in the mail earlier this week.  Yes, that's how last minute my Design Team makes are these days!  

I discovered Simply Graphic, a fabulous French company, thanks to my former LIM teamie, Chrissie, sharing some of her beautiful makes using their dies.  I just couldn't resist placing an order.

Here's what I made...


All the dies you see here are from Simply Graphic, apart from the sentiment oval.  I began with a piece of watercolour paper and used a mix of Brushos and water to create a background of differet blue shades, and it was this that the two main flowers were cut from.  I die cut the tall leafy stem from white cardstock and the shorter foliage from pale blue vellum.  I gave my card base a light splattering using Distress Ink mixed with water and then arranged and adhered the cluster of die cuts.  I stamped the sentiment in dark blue onto an oval die cut and adhered this using glue dots.  The card was then finished with a few pool toned jewels.


Materials used:
  • Dies: Simply Graphic - a selection of flowers and foliage; Lil' Inker Designs - Stitched Ovals
  • Stamp: Clearly Besotted - Simple Script
  • Ink: Brushos - Ultra Marine, Turquoise, Emerald Green; Distress Ink - Broken China; Altenew - Desert Night
  • Vellum from stash
  • Accents: Little Things from Lucy's Cards - Jewels: Shimmering Pool Mix

Challenge entries:

NBUS - Challenge #29 - I just had to share at Darnell's challenge, I don't think I've ever used new products so quickly before!


If you need more inspiration, don't forget that my teamies are sharing their projects over on the main LIM challenge post, and if you follow their links they may have more on their personal blogs too.

Happy Saturday, enjoy your weekend :)


Sunday, 31 January 2021

Uniko - Super Sunday Guest Designer Spot


Good morning, everyone

Today I'm super excited as I'm being featured in Uniko's Super Sunday Guest Designer Spot.  I was so honoured when I received the invitation from the lovely Bev and I've had great fun creating with lots of my Uniko stamps.


This post is a bit photo heavy as I got a bit carried away and created quite a few cards, once I started I couldn't stop!  I've centred all these cards around Uniko's current themes of love, kindness and friendship, I hope you like them.


Card #1

For this first sweet card I combined stamps from Uniko's Background Builders Classics and Simply Said sets...


I die cut a heart window first in my upper panel and then marked the area on the card base that would show through the aperture, masked it off then stamped the various border designs in varying shades of pink.  The sentiment was heat embossed in white to show through the raised panel.

Materials used:
  • Stamps: Uniko - Background Builders Classics, Simply Said
  • Dies: Xcut - Heart Nesting Dies; Create a Smile - Cool Cuts Double Stitched Rectangles
  • Ink: Altenew - Frosty Pink, Coral Berry, Ruby Red, Grapevine; VersaMark
  • Embossing Powder: Brutus Monroe - Alabaster White


Cards #2 and #3

For these two love themed cards I used the Scattered Polka Hearts background stamp and sentiments from the You Are…Sentiments Outlined set...


For this first one I heat embossed the background hearts in white and used emboss resist to blend over the top with Distress Oxides in a diagonal gradient.  I then used a vellum wrap with the sentiment heat embossed in white.


Materials used:
  • Stamps: Uniko - Scattered Polka Hearts, You Are...Sentiments Outlined
  • Ink: Distress Oxide - Spun Sugar, Picked Raspberry, Festive Berries; VersaMark
  • Die: Create a Smile - Cool Cuts Double Stitched Rectangles
  • Embossing Powder: Brutus Monroe - Alabaster White
  • Vellum from stash

And an alternative using the same stamp sets...


This one is a similar design but in reverse.  I used my MISTI to stamp the polka hearts multiple times, creating a gradient of pale to deep pink.  Here I heat embossed the sentiment on a die cut heart from black cardstock and popped it up on 3D foam.


Materials used:
  • Stamps: Uniko - Scattered Polka Hearts, You Are...Sentiments Outlined
  • Dies: Create a Smile - Cool Cuts Double Stitched Rectangles; Xcut - Heart Nesting Dies
  • Ink: Altenew - Frosty Pink, Coral Berry, Ruby Red; VersaMark
  • Embossing Powder: Brutus Monroe - Alabaster White


Card #4

My next make used the gorgeous Bee Happy stamp set...


I adhered some honeycomb/hexagon patterned paper to the lower half of my card base and then die cut an angled stitched edge from my upper panel.  This was then stamped in black, grey and honey shades using various stamps all from the same set, with a little Copic colouring on the bee.

Materials used:
  • Stamps: Uniko - Bee Happy
  • Ink: Altenew - Sunkissed; Hero Arts - Soft Granite; Memento - Tuxedo Black
  • Die: MFT Die-namics - Stitched Basic Edges
  • Patterned Paper - Doodlebug - Kraft in Color (kraft)


Card #5

This selection of Uniko creations wouldn’t be complete without using one of the Flower Power sets, and here I’ve combined blooms from Flower Power #2 with leaves from Natures Treasures II and the sentiment from Hello Lovely...


I used really bright summer colours here, started with the leaves and then stamped and die cut the flowers, using their co-ordinating dies, before adhering them in a cluster on glue dots.  The stamped sentiment and some vertical score lines finished off this one layer card.

Materials used:
  • Stamps: Uniko - Flower Power #2 (and companion dies), Natures Treasures II, Hello Lovely
  • Ink: Altenew - Pinkalicious, Orange Cream, Maple Yellow, Parrot; Versafine - Onyx Black


Card #6

I chose stamps from Just Because, Beautiful and Hello Lovely for this friend card...


On a pale green panel I stamped the same image in different orientations both in green and also heat embossed in white.  The sentiment was heat embossed on a green strip and a further smaller strip adhered on 3D foam.


Materials used:
  • Stamps: Uniko - Just Because, Beautiful, Hello Lovely
  • Die: Create a Smile - Cool Cuts Double Stitched Rectangles
  • Ink: Altenew - Frayed Leaf; VersaMark
  • Embossing Powder: Brutus Monroe - Alabaster White


Card #7

It wasn’t until I was making these that I realised how much the flower stem from the You Are, Yes You set resembled the flower in my blog logo!  I combined it here with the Background Builders Pinstripe II stamp and the sentiment from Originally Organic Additions.  I also thought I'd work with my blog colours too...


I stamped the flower in a pale ink before colouring with Copics and then masking it to stamp the pinstripes.  With the stem stamp still in my MISTI, I then restamped it over the original image before heat embossing in white. 


Materials used:
  • Stamps: Uniko - You Are Yes You, Background Blocks Pinstripe II, Originally Organic Additions
  • Die: Create a Smile - Cool Cuts Double Stitched Rectangles
  • Ink: Memento - London Fog; Altenew - Mountain Mist; VersaMark; Versafine - Onyx Black
  • Embossing Powder: Brutus Monroe - Alabaster White
  • Coloured with Copic markers


I'm linking up with the following challenges:

Card #1
NBUS - Challenge #22 - both stamp sets are new to my stash for this GD spot


Card #2
Alphabet Challenge - V is for Vellum

Card #7
Just Us Girls - Challenge #569 - Masking
Fusion - Flowers (using the inspiration photo)


Thanks so much for taking a look at my cards today and I hope they have given you some crafty inspiration.

And many thanks to Bev for thinking of me and for providing this Guest Designer spot.  I thoroughly enjoyed making all of these.


Related Posts Plugin for WordPress, Blogger...