Hi there
I'm absolutely thrilled to have been asked to Guest Design for
Honey Doo Crafts once again.
The lovely Amanda Fletcher from Honey Doo will be sharing some fabulous new products, along with some demonstrations, over on the craft shopping channel, Hochanda (Freeview 85 / Sky 673) this coming Thursday, 14 February 2019, at 12pm and 4pm.
Part of the reason I've been a bit quiet on my blog lately is because I've been beavering away behind the scenes playing with these wonderful stamp sets and creating samples for the show.
So, over the next few posts I'll be sharing my cards using these gorgeous new products.
First up, and as the show is going to be on Valentine's Day, I thought I'd share this stunning stamp called
Single Rose.
I love these highly detailed floral images that Amanda designs and I love to leave them just black and white, mask them and add detail to the background, which is what I've done for these first two samples...
I stamped the rose stem in black directly onto my card base and stamped a second time on a few post-it notes to create some masks. Yes, it did take some time to cut out the masks but it's so worth it. I die cut a heart from some spare cardstock and used the negative space as a mask to blend the heart background with Distress Inks.
I removed all the masks, stamped a simple sentiment in red ink and added some Raindrops to finish.
Materials used:
- Stamps: Honey Doo Crafts - Single Rose, Just in Case
- Die (for masking): MFT Die-namics - Stitched Heart Stax
- Ink: Memento - Tuxedo Black; Distress Ink - Candied Apple, Aged Mahogany; Altenew - Velvet
- Accents: Little Things from Lucy's Cards - Raindrops
Challenge entries:
I followed a similar technique on this one, but here I used a stencil to create the backdrop...
The rose was stamped on a panel of white cardstock and masked off with cut out post-it notes. I then laid the stencil over the image and blended through two Distress Oxide inks. The panel was then popped up on fun foam and a sentiment strip added, with the sentiment heat embossed in white.
Materials used:
- Stamps: Honey Doo Crafts - Single Rose, Just in Case
- Stencil: Honey Doo Crafts - Mesh
- Ink: Versafine - Onyx Black; Distress Oxide - Mermaid Lagoon, Twisted Citron; VersaMark
- Embossing Powder: Wow! - Opaque Bright White
Challenge entry:
Next up, as Spring flowers are certainly starting to make an appearance here in the UK, is the new Daffodils stamp set..
I stamped the daffodils image and watercoloured with Zig markers. It's difficult to see in this photograph but I blended the background using a cloud stencil, this is a lot clearer in real life. I stamped the sentiment from the same set. I added some striped patterned paper to the card base before popping the panel up on fun foam in the centre.
Materials used:
- Stamps: Honey Doo Crafts - Daffodils
- Ink: Versafine - Onyx Black; Distress Ink - Tumbled Glass; Zig Clean Color Real Brush Markers
- Stencil: MFT - Cloud
- Patterned Paper: Lawn Fawn - Let's Polka Mon Amie
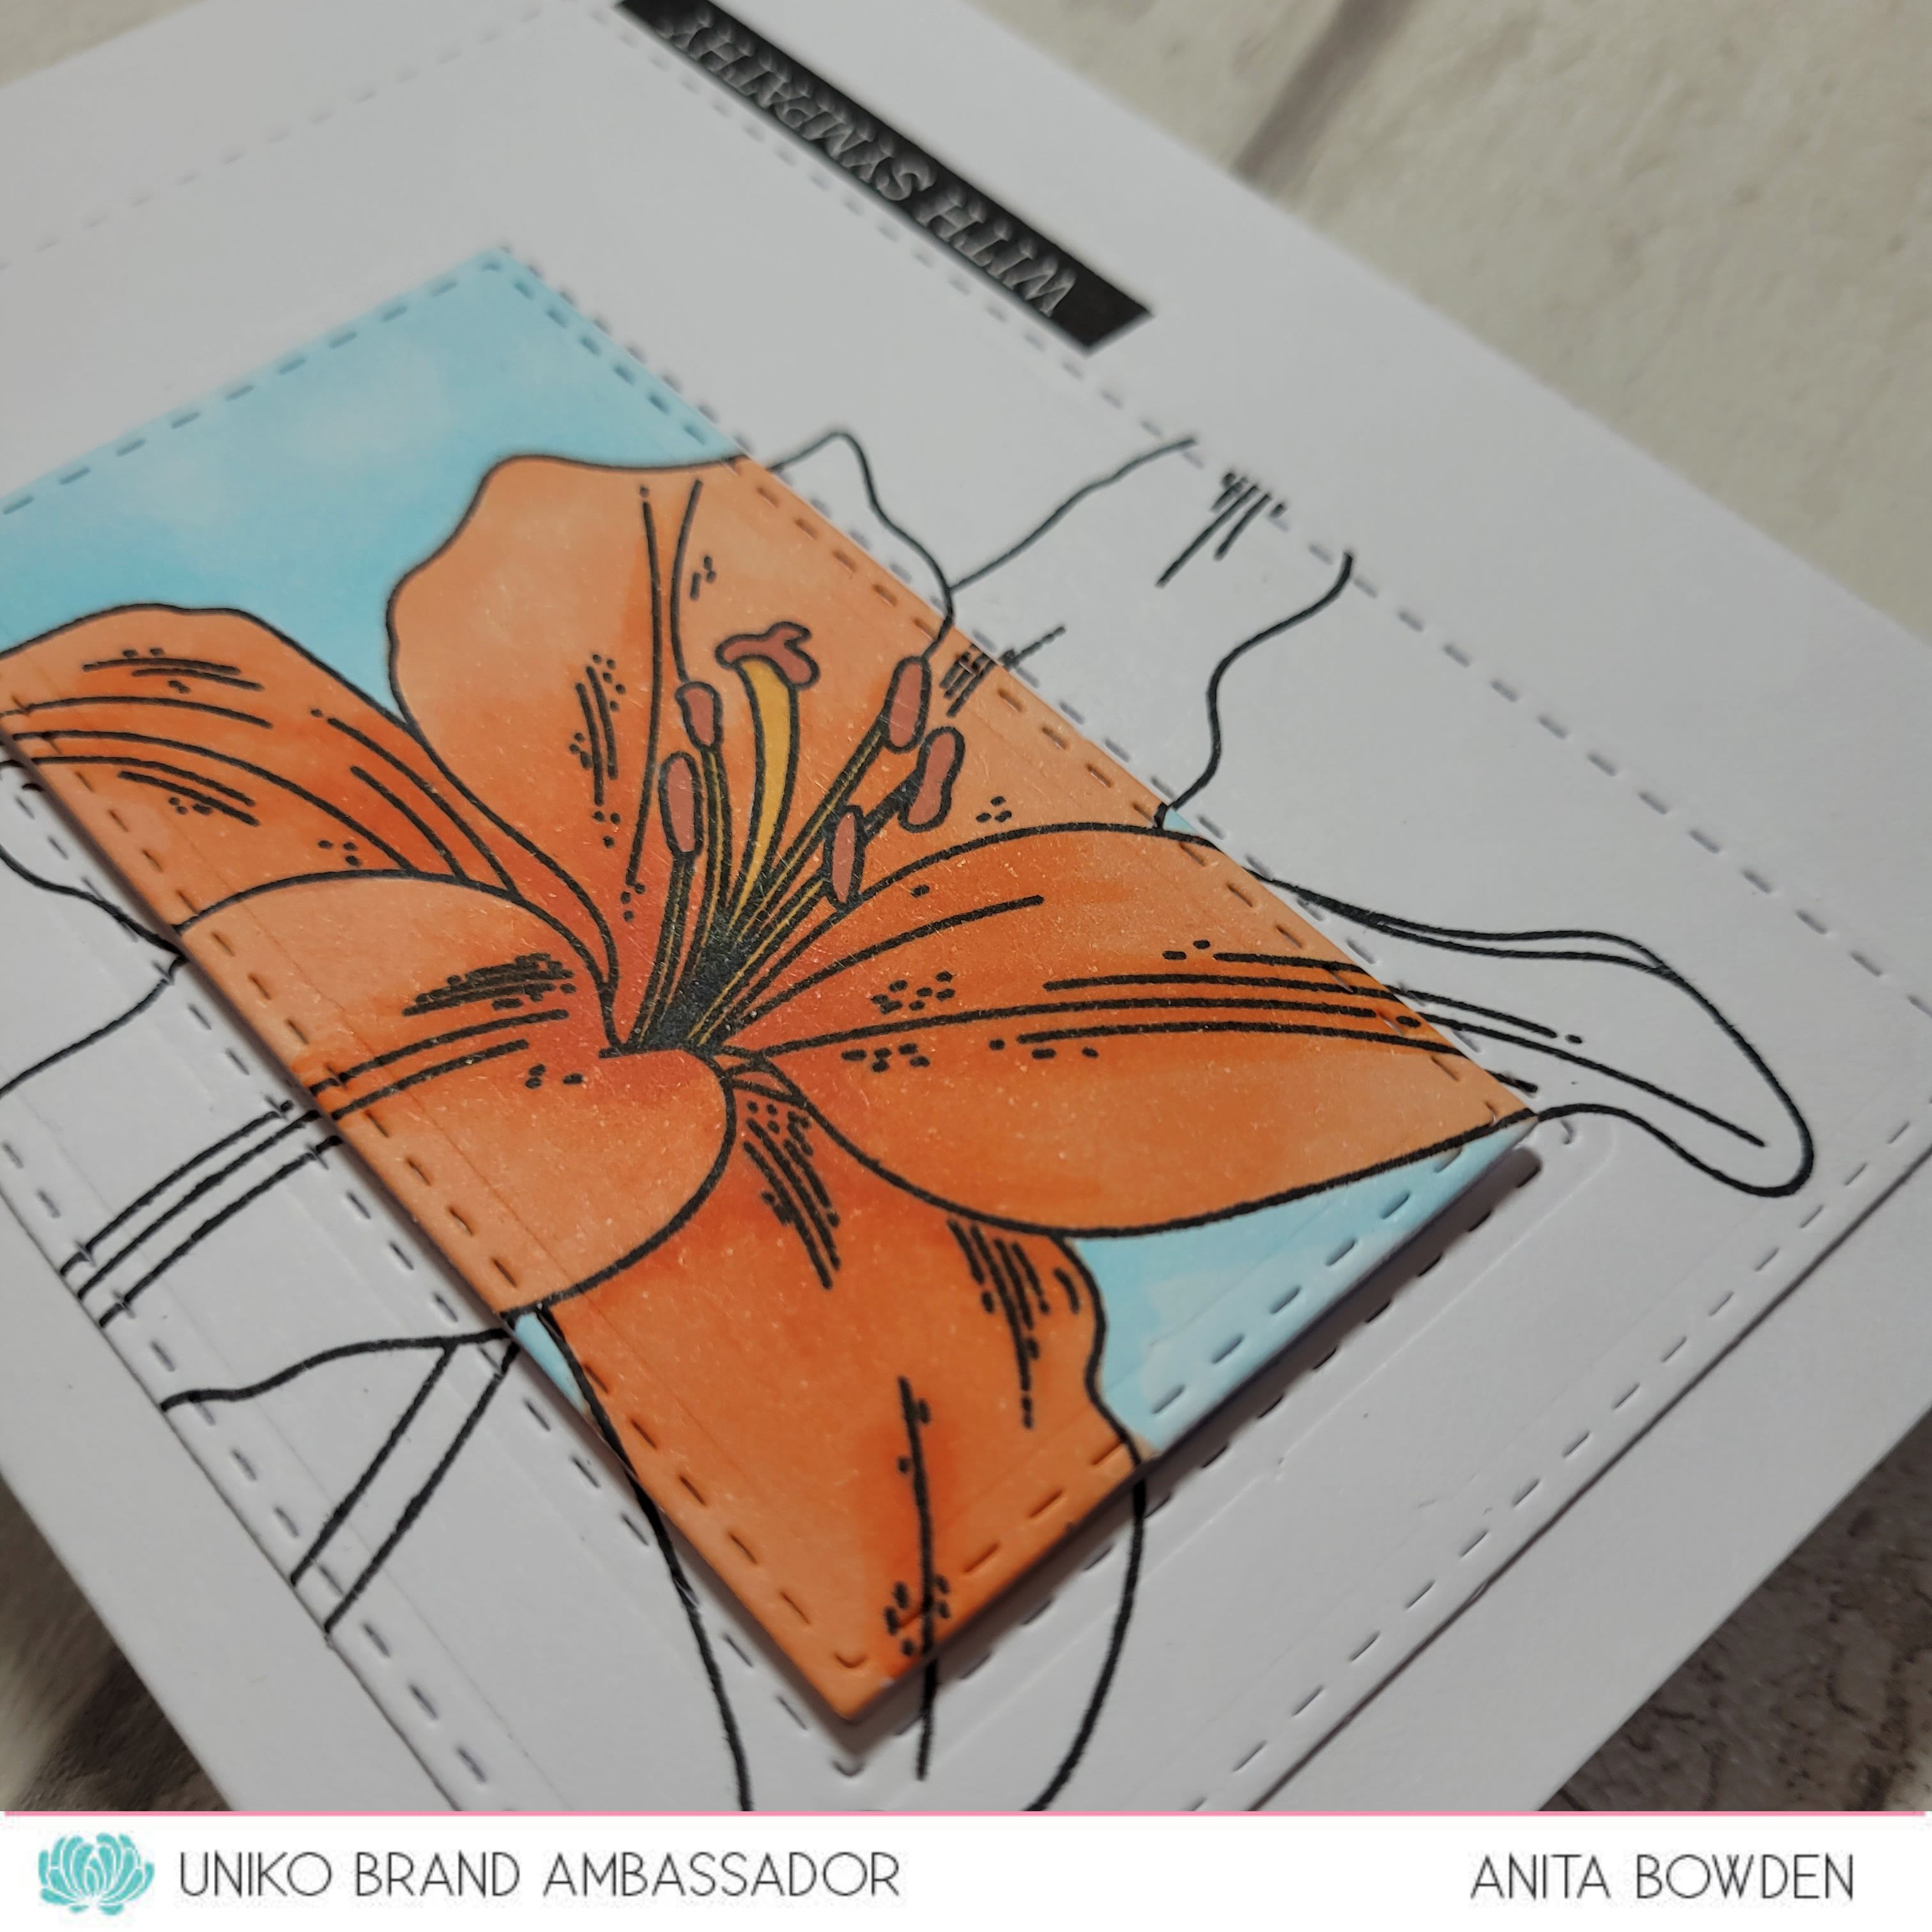
Next up is Entangled Flourish and for this one I used the spotlighting technique with a raised die cut...
I started with a die cut panel and stamped this gorgeous image in black, and that's how it remained. On another panel I stamped the same image and then die cut a central section of it with an oval die. This was then watercoloured using Zig markers. The main panel was adhered on fun foam to the card base, and the coloured oval was then carefully adhered on top of this, being sure to line everything up with the image underneath to create a seamless design. You can see the dimension from the angled photograph below...
To finish I heat embossed the sentiment in white and popped the black strip up on a 3D foam strip.
Materials used:
- Stamps: Honey Doo Crafts - Entangled Flourish, Just in Case
- Ink: Versafine - Onyx Black; VersaMark; Zig Clean Color Real Brush Markers
- Dies: Create a Smile - Double Stitched Rectangles; Lil Inker Designs - Stitched Ovals
- Embossing Powder: Wow! - Opaque Bright White
Challenge entry:
Last up for this selection is the Carnations stamp set and co-ordinating dies, this one has been available for a while but is also being featured on the show. This is a bit different for me but I wanted to use these stamps in one of the ways Amanda intended when designing it, using embossed vellum layers...

I chose some yellow vellum I've had in my stash for years, but on reflection I think it was a little too thick for this technique but hopefully you'll see the effects that can be achieved. I stamped numerous layers of the carnations on the vellum in VersaMark ink and heat embossed in a co-ordinating shade of embossing powder. I was hoping to achieve the two-tone frilly effect of real life carnations. These were then die cut with the co-ordinating dies. Each layer was then manipulated by folding the petals and then glued one at a time to create the cluster. I stamped the carnation stem on the card base and layered up some patterned paper, with an oval cut away, and topped with an oval stitched frame. The flower head was then adhered with some strong glue dots and the sentiment stamped at the base.
The following angled photograph shows the dimension in more detail...
Materials used:
- Stamps: Honey Doo Crafts - Carnations, Daffodils (sentiment)
- Dies: Honey Doo Crafts - Carnations Outlines Dies; Lil Inker Designs - Stitched Ovals
- Ink: VersaMark; Versafine - Onyx Black; Altenew - Evergreen
- Embossing Powder: Wow! - Aztec Glintz
- Patterned Paper: Lawn Fawn - Let's Polka
- Vellum from stash
Thanks so much for visiting. I'll be back tomorrow with some more of my sample cards made using these lovely sets by Honey Doo Crafts, ahead of the shows on Thursday.