Showing posts with label Sweet Poppy. Show all posts

Thursday, 24 April 2025

Uniko April 2025 Release - Introducing...Ink & Flip Delightful Diamonds

Hi guys

I'm back to share more newness from Uniko and today the team are introducing another, yes Bev has designed another, Ink & Flip stencil...this time Delightful Diamonds.

This is just one stencil, so it has no central focal design but it creates really striking backgrounds, or can be masked to just use part of it.

Here's my first card and I paired it with a sentiment from the Simply Said Blocks set...


For this one I began with a piece of white cardstock and I inked through one side of the stencil using Distress Oxide in Villainous Potion.  I then cleaned off the stencil and flipped it.  I then squished some of the same ink onto a mat and mixed it with some pearlescent stencil paste and spread it over the stencil to create the second part of the pattern.  It's hard to believe this paste is mixed with the same colour of ink!  I cut along the edge of the panel following the pattern and then adhered the cut piece to my card base.  It was then simply finished with a stamped sentiment.


Materials used:
  • Stencil: Uniko - Ink & Flip Delightful Diamonds
  • Stamp: Uniko - Simply Said Blocks
  • Ink: Distress Oxide - Villianous Potion; Versafine Clair - Nocturne
  • Paste: Sweet Poppy - Stencil Dimensions Pearlescent White


And now for my second card, also using a sentiment from the Mid Century Modern Birthday stamp set...


Now, I'm not going to lie...the inking of this one took me ages and I went through many post-it notes making off the different sections to ink blend each colour.  And I used a card from my Color Cubes as inspiration for this colour palette.  You can see this in the photo below.  I didn't have the exact shades to match but close enough.  I wasn't sure if this worked but liked it a lot more once I'd stamped the bold sentiment.


Materials used:
  • Stencil: Uniko - Ink & Flip Delightful Diamonds
  • Stamps: Uniko - Mid Century Modern Birthday
  • Ink: Memento - Paris Dusk, Cantaloupe, Lilac Posies; Altenew - Polar Bear, Aqualicious; Versafine Clair - Nocturne


If you'd like to see more examples of projects using this new stencil, take a look at the Uniko blog, here.  My teammates are sharing some great makes.

I'll be back tomorrow to introduce another great new stamp set.

And don't forget, all the new products will be available from next Sunday 27 April 2025.



Friday, 3 January 2025

Uniko January 2025 Release - Introducing...Ink & Flip Layering Flower Stencil and Simply Said Blocks Occasions

Good morning

More Uniko introductions for you today.  First is another Ink & Flip stencil, Layering Flower Stencil, which is a smaller version of Flower Power #8 and another set to join the sentiment sets already available, Simply Said Blocks Occasions.

My first card is very clean and simple, just using the central part of the Ink & Flip Layering Flower stencil, and a sentiment from the new Flower Power #11 set which was introduced yesterday...


I inked through both sides of the stencil, blending from pink, to purple and blue in both directions.  I then simply stamped the sentiment in black and added a few silver gloss gems.


Materials used:
  • Stencil: Uniko - Ink & Flip Layering Flower Stencil
  • Stamps: Uniko - Flower Power #9
  • Ink: Distress Ink - Picked Raspberry, Wilted Violet, Blueprint Sketch; Versafine Clair - Nocturne
  • Accents: Gems from stash


Onto my second card, and here I used just the stencil which inks up the outer background effect and creates a great shape in the centre, and I also used a sentiment from the new Simply Said Blocks Occasions set and also the existing Simply Said Blocks set, and the flower is from Flower Power #11...


I inked up a panel through both sides of the stencil using a blush shade and lemon shade of ink and the overlaps produced the orange shade.  I then simply stamped the flower head and stem in black and the sentiment in the same ink colours.  The small dot is also from the Flower Power #11 set.

Materials used:
  • Stencil: Uniko - Ink & Flip Layering Flower
  • Stamps: Uniko - Flower Power #11, Simply Said Blocks, Simply Said Blocks Occasions
  • Ink: Altenew - Buttercream, Pink Pearl; Versafine Clair - Nocturne


For my last card I used both ink and paste through the stencil...


On a die cut panel I inked up through the first side of the stencil in Milled Lavender Distress Oxide ink.  I then cleaned the stencil, flipped it, and then spread the paste through the second side which had been mixed with some of the Distress Ink for a similar tone.  The "happy" is from the Simply Said Blocks set and the "Mother's Day" stamps are from the new Simply Said Blocks Occasions set.  I stamped these in a co-ordinating grey shade of ink and fussy cut them out and adhered them on 3D foam.  A small enamel dot in the centre finished off the card.


Materials used:
  • Stencil: Uniko - Ink & Flip Layering Flower Stencil
  • Stamps: Uniko - Simply Said Blocks, Simply Said Blocks Occasions
  • Ink: Distress Oxide - Milled Lavendar; Altenew - Silver Stone
  • Stencil Paste: Sweet Poppy - Stencil Dimensions Pearl White
  • Die: Create a Smile - Cool Cuts Double Stitched Rectangles
  • Accent: Doodlebug Sprinkles - Lilac assortment


Thanks so much for taking a look today.  You can find more projects from the team using these two new products over at the Uniko blog, here.  There are some great creations, I've seen them already.

All the new products will be available from Sunday 5 January 2025.

I hope you'll pop back tomorrow when I will be introducing the final product of this release which is a re-introduction.


Thursday, 18 April 2024

Uniko: You're Going to Flip - Ink & Flip Geometric Heart Layering Stencil Revisited

Good morning 

More Ink & Flip inspiration for you today from Uniko.

Each day this week, Bev and the Brand Ambassadors are revisiting the existing Ink & Flip stencils, ahead of a new release stencil set which will be available from Saturday.  Be sure to check out the Uniko blog to see lots of inspiration from the team.

So today is all about the Ink & Flip Geometric Heart Layering Stencils.  You can use the two stencils together or just use the central geometric heart on its own.

I have two cards for you today and have used just the central heart on these, and for my first I've kept it super clean and simple...


I inked up using the first side of the stencil with Distress Oxide ink in Speckled Egg.  I then cleaned the stencil, flipped it over and then spread over the stencil using a mix of stencil paste and Distress Oxide ink in Kitsch Flamingo.  This was then left to dry before finishing the card with a sentiment from the Flower Power #3 set in black ink.


Materials used:
  • Stencil: Uniko - Ink & Flip Geometric Heart Layering Stencil
  • Stamps: Uniko - Flower Power #3 (sentiment)
  • Ink: Distress Oxide - Speckled Egg, Kitsch Flamingo; Versafine Clair - Nocturne
  • Stencil Paste: Sweet Poppy - Stencil Dimensions in Pearlescent White


For my other card I dug out by Brusho pigment powders...


On some watercolour card I laid the heart stencil down, sprinkled sparingly with purple Brushos and then spritzed with a mist of water to release the pigment.  I removed the stencil and left the pigment to dry, then I flipped the stencil and repeated the process using blue Brushos to complete the heart.  I had a rummage in my coloured papers and found this co-ordinating purple jacquard paper, also with a geometric pattern.  I used a border die, trimmed down the panel and adhered it to the card base, leaving the patterned paper showing at the base.  I finished with a sentiment from the Just Because stamp set.


Materials used:
  • Stencil: Uniko - Ink & Flip Geometric Heart Layering stencil
  • Stamps: Uniko - Just Because
  • Ink: Brushos - Purple, Ultramarine; Versafine Clair - Nocturne
  • Dies: Stampin' Up Edgelits - Adorning Accents; Altenew - Featured Sentiments
  • Patterned paper from stash

I hope these have given you some inspiration today.  Don't forget to visit the Uniko blog, here, to see the Brand Ambassadors' makes using this stencil set, and we'll be showcasing another tomorrow.


Monday, 28 November 2022

Uniko Brand Ambassador Inspiration - Snowflake Serenade

Hi there

I'm over on the Uniko blog today, here, sharing some cards using the Snowflake Serenade Clear Stamp Set.

You can find all the information on how these were made over on the Uniko post but here they are, along with the supplies used...


Materials used:

  • Stamps: Uniko - Snowflake Serenade, Rustic Christmas
  • Ink: VersaMark; Distress Ink - Rustic Wilderness
  • Embossing Powder: Wow! - Metallic Gold Rich
  • Die: MFT Die-namics - Wonky Stitched Rectangles Stax


My second card...


Materials used:
  • Stamps: Uniko - Snowflake Serenade
  • Ink: Altenew - Dust; Distress Oxide - Tumbled Glass, Broken China, Prize Ribbon; Versafine Clair - Nocturne
  • Water
  • Gems from stash


And my final make...


Materials used:
  • Stamps: Uniko - Snowflake Serenade, Background Builders Winter Wonderland
  • Ink: Versafine Clair - Nocturne
  • Glitter: Sweet Poppy - Super Fine Satin Glitter in Moss Green and Light Blue


Thanks so much for stopping by, I hope you have a lovely week.


Tuesday, 1 November 2022

Uniko October/November Stencil Release - Introducing...Flower Power #6

Good morning

It's day two of the stencil introductions for the latest mini release coming up from Uniko.

Bev is introducing another fab stencil to join the Flower Power series, this time it's #6, featuring the familiar rose design.  This one features the background solid images and the detailed roses, as well leaves, and also comes with masks of the solid images.


I kept my first card really simple but used something I've not used for a long time...texture paste...


I die cut a stitched rectangle from some linen cardstock and then mixed a little Distress Ink with white texture paste, before spreading it through the largest rose.  While still wet I sprinkled on some super fine glitter.  Before completely dry I gently pressed the glitter into the paste to ensure it was adhered.  When dry I inked through the leaves with Distress Oxide ink.  It would have been easier to do those first! I finished with a sentiment in black ink, from the Simply Said stamp set.


Materials used:
  • Stencil: Uniko - Flower Power #6
  • Stamps: Uniko - Simply Said
  • Ink: Distress Ink - Scattered Straw; Distress Oxide - Cracked Pistachio; Versafine Clair - Nocturne
  • Die: Create a Smile - Cool Cuts Double Stitched Rectangles
  • Embossing Paste: Dreamweaver
  • Accents: Sweet Poppy - Super Fine Satin Glitter - Crystalina Rainbow


And for my second I layered up the solid and detailed images...


I inked up the solid rose image first, then used a darker ink to add the detailed rose.  I also did the same with the leaves before die cutting with a pierced square die.  This was then mounted onto a larger square, die cut from deep pink cardstock.  I then finished with a stamped sentiment from the Pure Florals Rose stamp set.

Materials used:
  • Stencil: Uniko - Flower Power #6
  • Stamp: Uniko - Pure Florals Rose
  • Ink: Distress Ink - Worn Lipstick, Festive Berries, Bundled Sage, Rustic Wilderness; Versafine Clair - Nocturne
  • Dies: MFT Die-namics - Pierced Square Stax


Please do pop over to the main Uniko blog, here, to see this new stencil in action, with some awesome projects from Bev and the Brand Ambassadors.

The new stencils will be available to purchase from the Uniko website from 3 November at 9.00am GMT.  Bev is also doing a Giveaway so pop along to the blogs of each member of the team and leave a comment for a chance to win the stencils.

I'll be back with more tomorrow, using the final two stencils from this release.


Thursday, 30 December 2021

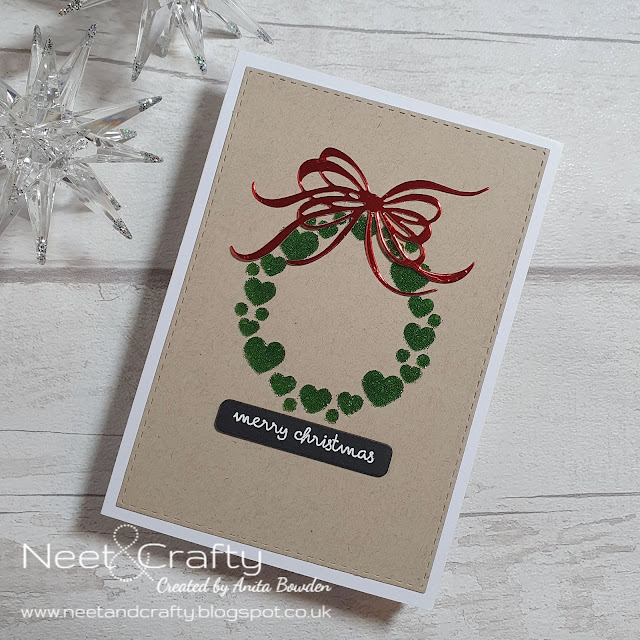
Micro Bead Wreath of Hearts

Good afternoon

I'm back this afternoon to share the last of my 2021 Christmas card makes.  Apologies that the selection was a little limited this year, that will teach me for leaving them even later than I usually do!

This will also be my last post of this year as I'm back to work tomorrow.  As you will have seen in my recent posts, I've also decided to step down from all the challenge blog Design Teams I've been part of for many years.  Hopefully this will give me the opportunity to put my spare time to better use and be able to craft more, without having the other commitments and deadlines that come with being on challenge blog Design Teams.  Hopefully it will be something I could reconsider in the future, it sure was fun.  I still remain a member of the Skull and Cross Buns Design Team and will introduce and showcase Emily's products when she needs me.

Ok, back to my final Christmas card, and this was the one I made for my other half...


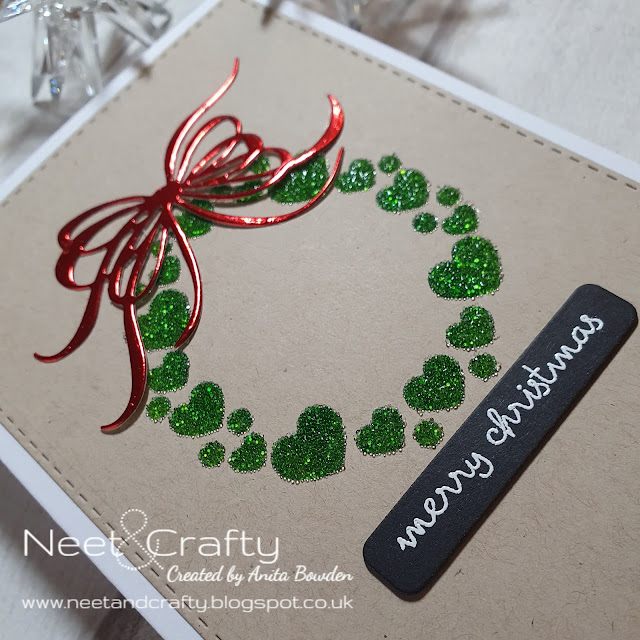
To make it a bit more masculine I began with a die cut panel of kraft cardstock.  I used the same technique as my previous trees card which used micro beads...I inked through the stencil with Distress Ink first and then cleaned the stencil before spreading translucent paste through it over the inked image and then sprinkling on the glass beads.  This was then left to dry completely before adhering the panel to a white card base.  And yes, it's the same sentiment again!  It was on my desk so it got used for pretty much every Christmas card this year!  I heat embossed it on a black die cut strip.  To finish, I die cut a bow from red glossy mirri cardstock and adhered this to the top of the wreath.


Materials used:
  • Dies: Create a Smile - Cool Cuts Double Stitched Rectangles; Altenew - Featured Sentiments Die Set; The Greetery - Fit to be Tied
  • Stencil: Clearly Besotted - Circle Around
  • Stamp: Clearly Besotted - Simple Script
  • Ink: Distress Ink - Rustic Wilderness, Pine Needles; VersaMark
  • Embossing Paste: Sweet Poppy - Stencil Dimensions:Translucent
  • Embossing Powder: Brutus Monroe - Alabaster White
  • Cardstock: Neenah - Desert Storm; red mirri card from stash
  • Accents: Sweet Poppy - Clear Glass Micro Beads

Challenge entries:

AAA Cards - Game #205 - Christmas
Happy Little Stampers - December Christmas Challenge - Anything Goes
Happy Little Stampers - December Stencil Challenge - Anything Goes
NBUS - Challenge #33 - The Greetery bow die and the wreath stencil are new to my stash
CHNC - Challenge #574 - Anything Goes Christmas
Uniko - Challenge #68 - Celebrate (Reds and Greens)
STAMPlorations - December Stencil Challenge - Anything Goes


I just love the online crafting community and want to say thank you all for your support and encouraging feedback throughout this year.  It's so great to know that I can provide lots of inspiration, and gain some back too!

So, all that's left to say is...

Saturday, 16 October 2021

Less is More Challenge #454

Hi there, Happy Saturday

At Less is More today we have a new challenge and we're back with the dreaded One Layer!  But the theme is an easy one, here's the cue card...


For my card base and white space I chose some very lightly textured tan cardstock...


I aligned a metal stencil off the edge of my card front, held it in place with some stencil tape and then blended through it with four shades of Distress Ink.  I then finished it with a simple sentiment stamped in black.  And that was all.  I did think about adding some gems but I don't think it needs anything else.


Materials used:
  • Stencil: Sweet Poppy Stencils - Foliage
  • Ink: Distress Ink - Peeled Paint, Brushed Corduroy, Fossilized Amber, Aged Mahogany; Versafine Clair - Nocturne
  • Stamp: Altenew - Leaf Canopy 
  • Cardstock from stash

Challenge entries:

CAS on Friday - Challenge #216 - Autumn or Halloween
My Time to Craft - Challenge #468 - Halloween or Fall Colours
Happy Little Stampers - October Stencil Challenge - Anything Goes
STAMPlorations - October Stencil Challenge - Anything Goes


Thanks for visiting today, have a wonderful weekend.


Wednesday, 30 December 2020

Stencilled Snowflake

Hi guys

I'm almost there with sharing all my 2020 Christmas makes, just one more after this one.

I decided on another square card base for this one as I think it worked best with this large stencil and the symmetry if the design.


This is a lovely metal stencil from Sweet Poppy Stencils.  I inked through it with pastel shades of Distress Ink then trimmed the panel down and matted it onto no-shed silver glitter cardstock and then adhered flat to the card base.  I added glue dots to various parts of the design with a glue pen and added some fine glitter.  To finish I stamped and heat embossed the sentiment on vellum which I wrapped around a strip of more of the glitter cardstock and adhered this on 3D foam in the centre.


Materials used:
  • Stencil: Sweet Poppy - Mehndi Snowflake
  • Ink: Distress Ink: Spun Sugar, Shaded Lilac, Salty Ocean; VersaMark
  • Stamp: Clearly Besotted - Tiny Type
  • Embossing Powder: Brutus Monroe - Alabaster White
  • Accents: Sweet Poppy Superfine Satin Glitter - Crystalina Rainbow
  • Vellum and cardstock from stash

Challenge entries:

Allsorts Challenge - Week 603/4 - Sparkle & Shine
Use Your Stuff - Challenge #412 - Winter/Snow/Christmas
Uniko - Challenge #62 - 'Tis the Season (Option: Sparkle)
NBUS - Challenge #21 - First use of this stencil


Thanks so much for taking a look, back again soon :)


Monday, 28 December 2020

Snow Angels

Hi there

This evening I'm sharing a cute little Christmas card that I made for my neighbour.  I got my hands on this fab little set from a destash sale and I'm so glad I did.  My neighbour has a cat and two house rabbits so this was perfect!


I die cut a panel with a stitched rectangle die and then began by stamping the snow shapes and the footprints with pale blue ink.  Next I stamped the bunnies, the cat and the sentiment in black ink and coloured the image with Copics.  The panel was adhered to the card base on fun foam and then I finished by adding some glue to the snow shapes and footprints with a glue pen and sprinkled with super fine glitter.


Materials used:
  • Die: Create a Smile - Cool Cuts Double Stitched Rectangles
  • Stamps: Mama Elephant - Snow Angels
  • Ink: Altenew - Sea Glass; Memento - Tuxedo Black
  • Coloured with Copic markers
  • Accents: Sweet Poppy Superfine Satin Glitter - Crystalina Rainbow

Challenge entries:

Sweet Stampin' Challenge - Last Minute Christmas
NBUS - Challenge #21 - First use of new stamp set


Thanks for visiting today.  It's back to work for me tomorrow but I'll still be back to share more projects before the new year.


Related Posts Plugin for WordPress, Blogger...