Showing posts with label Valentine Cards. Show all posts

Monday, 30 January 2023

Uniko Brand Ambassador Inspiration - One Layer Love

Good morning

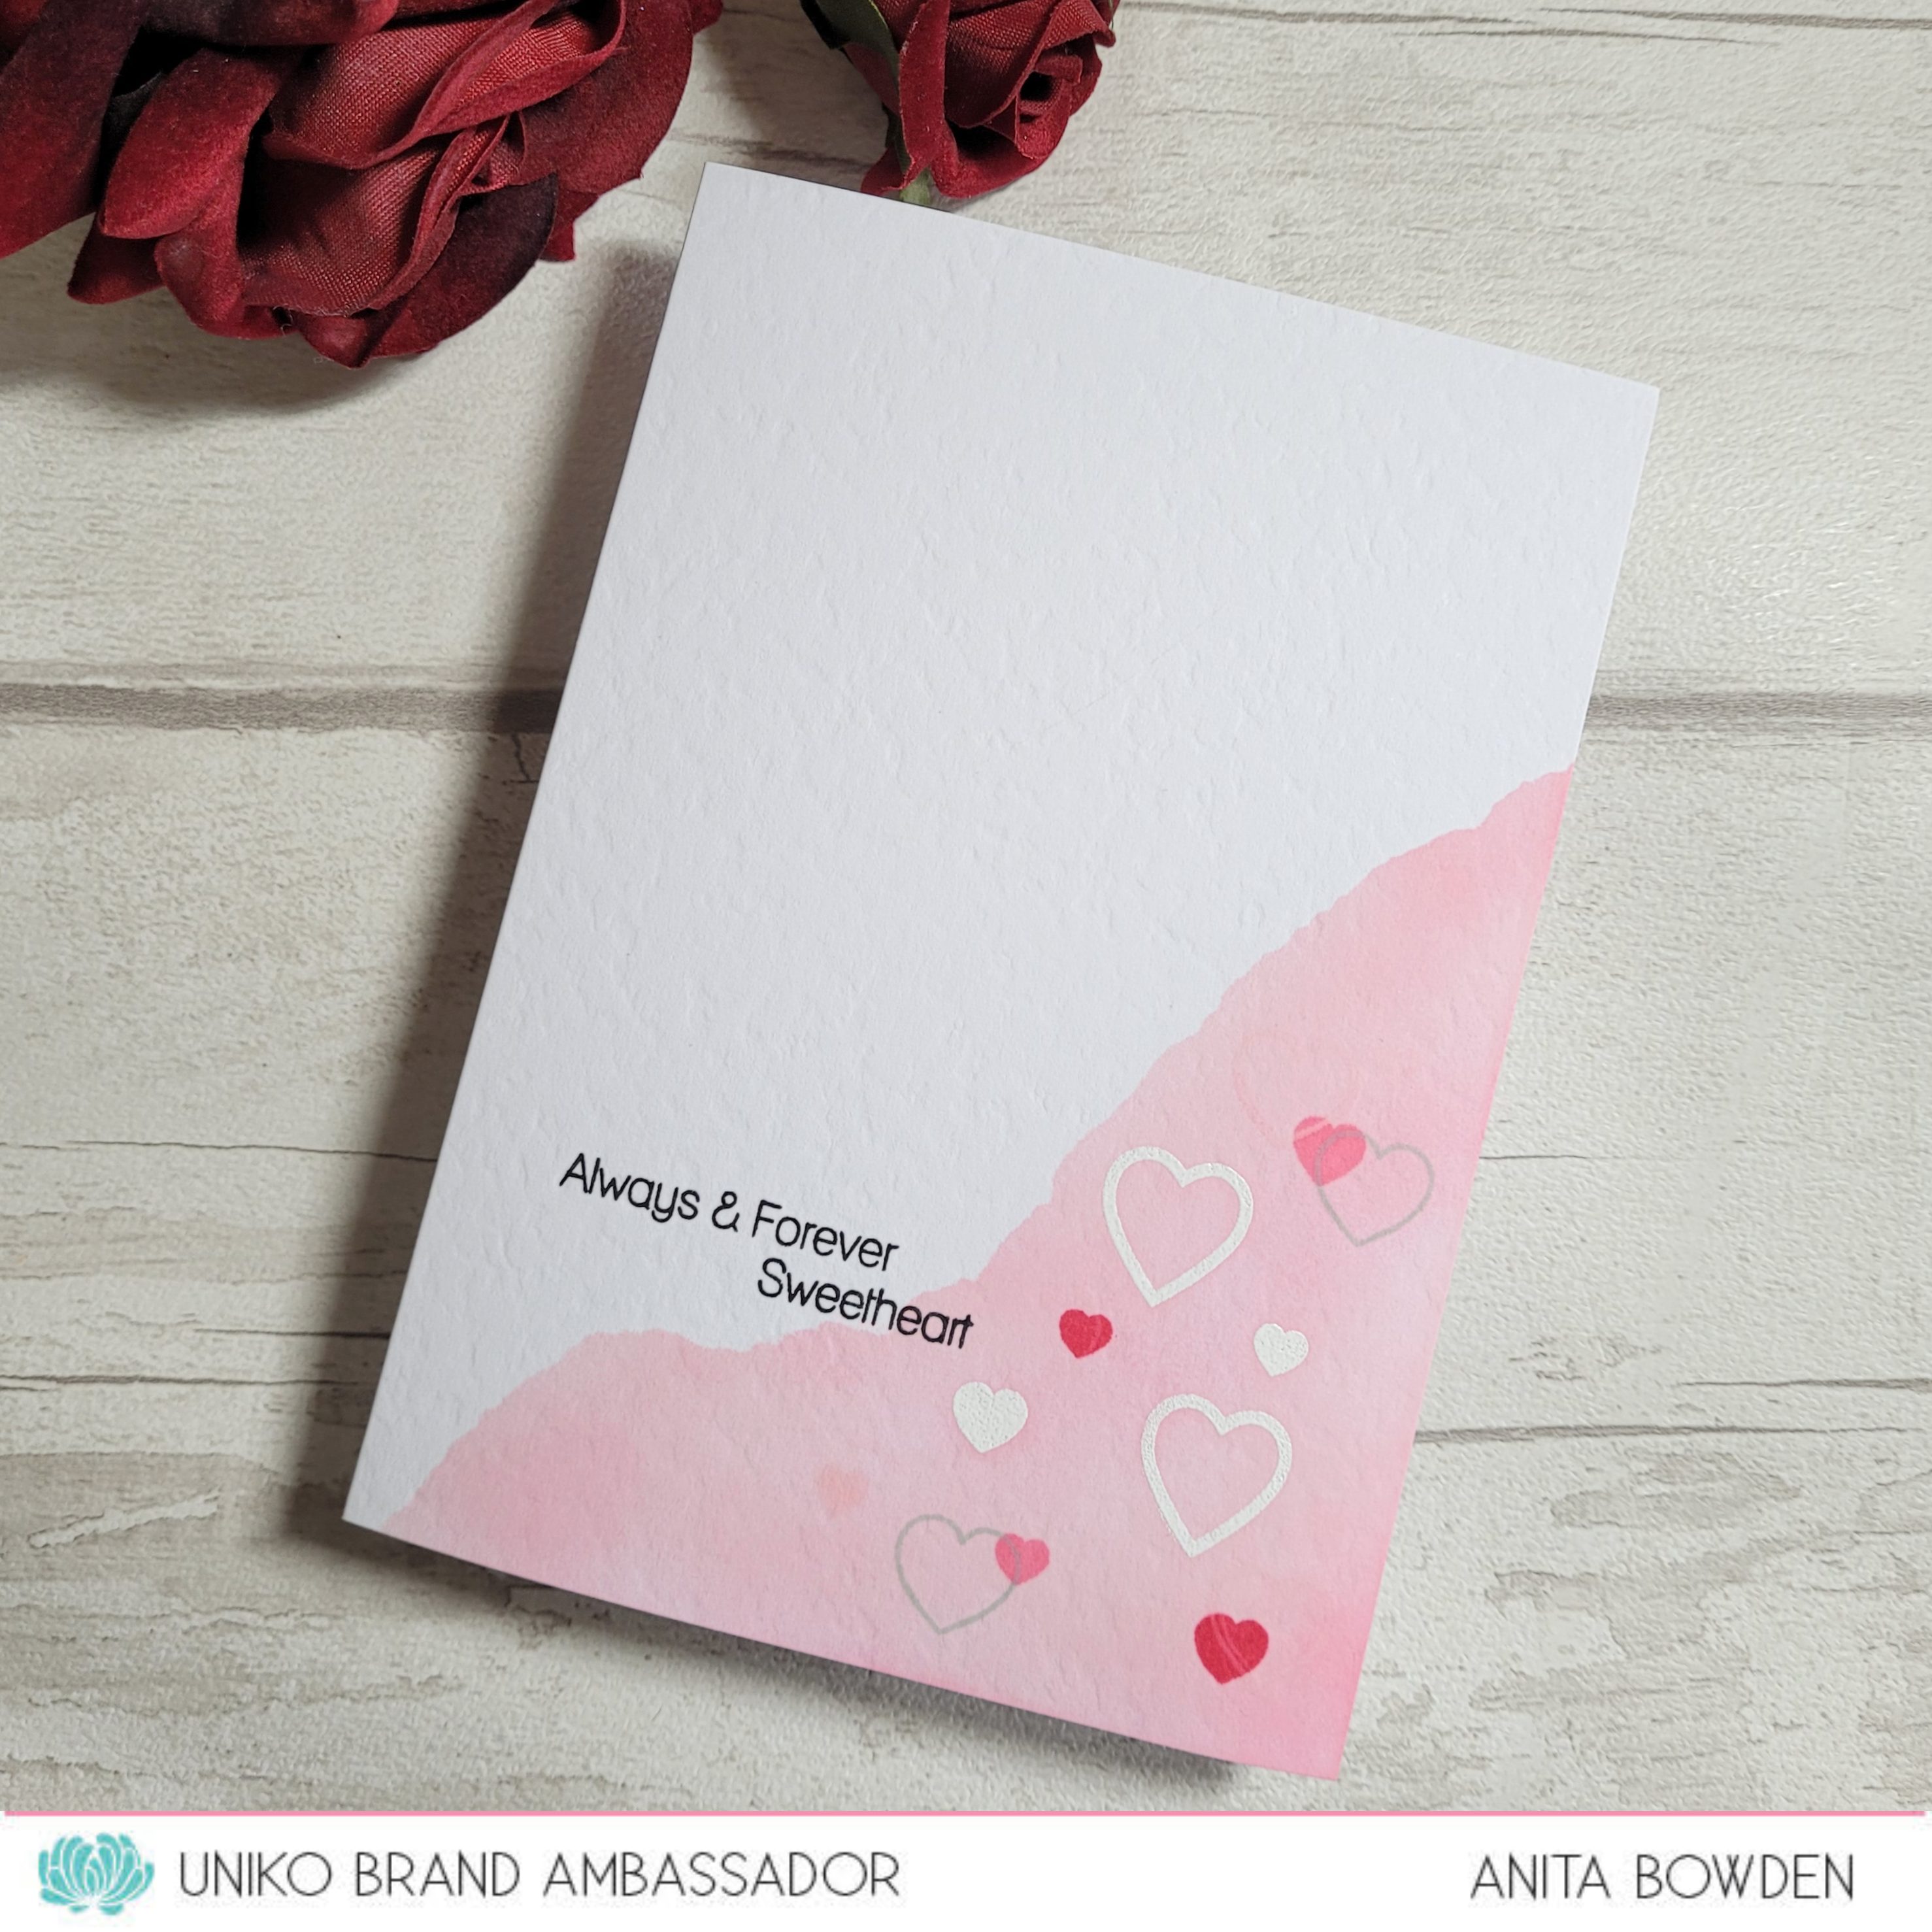
I'm over on the Uniko blog today with a trio of clean and simple, one layer cards, all with a love theme.  Valentine's Day is just around the corner so I hope I can inspire you with these.

You can find all the information about how these were made over on the Uniko blog, here, however, I have listed below the products used.

Ok, here's my first card...


Materials used:


My second card...


Materials used:

  • Stamps: Uniko - Always and Forever, Big & Bold Love
  • Ink: Altenew - Rudy Red, Coral Berry, Frosty Pink, Silver Lake; Versafine Clair - Nocturne; VersaMark
  • Embossing Powder: Brutus Monroe - Alabaster


And my final make...


Materials used:


So the above are all completely flat with just a little masking involved to create them.  Thanks for taking a look, Happy Monday and I hope you have a wonderful week! 


Sunday, 6 February 2022

Skull and Cross Buns - Valentine's New for 2022

Hi there

I finally have some cards to share with you, my first of 2022!  Better late than never, eh!

I've been having a play with some of the New for 2022 Valentine's stamps from Skull and Cross Buns Rubber Stamps, combined with some existing SACB products and some other crafty bits from my stash.

Ok, for this first card I combined a few of the heart stamps...


On some white cardstock I stamped the Solid Heart, the Mini Hearts Outline (from a previous release) and the Happy Valentine's Day Heart Shape in a repetitive pattern in various shades of pink.  One of the solid hearts I stamped in a lighter shade then over-stamped with the sentiment stamp, which fits exactly over the top.  I then die cut using a stitched heart before adding some tiny smooth silver gems.  For some interest, before adhering the heart on foam to my card base, I scored five vertical lines directly onto the card base front.


Materials used:
  • Stamps: Skull and Cross Buns - Solid Heart, Mini Hearts Set (outline), Happy Valentine's Day Heart Shape
  • Ink: Altenew - Pinkalicious, Pink Diamond, Rose Quartz
  • Die: MFT Die-namics - Stitched Heart Stax
  • Gems from stash


Next up, the first of the fun new Valentine's Gonks...


On a die cut rectangle I stamped the Heart Boy Gonk in Copic friendly red ink and then added a little detailing with my Copic markers, just a little grey shading and gave him a pink nose.  I stamped a mask, covered him up and then stencilled over the background using the Brush Heart Pattern Stencil (discontinued) fading the hearts out towards the bottom.  I then used VersaMark ink to stamp the new You're The Best! sentiment and heat embossed it in silver.  After adhering the panel I added some Glossy Accents to the central heart.


Materials used:
  • Stamps: Skull and Cross Buns - Heart Boy Gonk; You're The Best
  • Stencil: Skull and Cross Buns - Brush Heart Pattern (discontinued)
  • Ink: Memento - Lady Bug; Distress Oxide - Worn Lipstick; VersaMark
  • Die: Create a Smile - Double Stitched Rectangles
  • Embossing Powder: Wow! - Metallic Silver
  • Accents: Glossy Accents, Copic markers


And the cute second Valentine's Gonk...


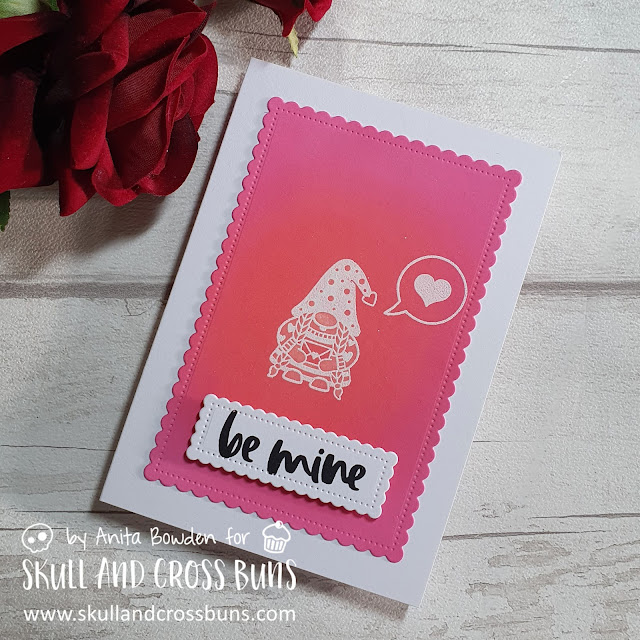
I stamped the new Envelope Girl Gonk and the new Love Heart Speech Bubble with VersaMark ink and heat embossed in white.  I then used the emboss resist technique and blended the whole background with red and pink Distress Oxide ink then buffed up the images to bring the white back.  I die cut this out using a scalloped rectangle die and adhered flat to the card base.  I die cut a smaller scalloped rectangle and stamped the sentiment from the existing Brush Hearts clear stamp set (reduced to clearance price) in black ink.  To finish, I 'painted' sections of the image using water, and blotted away the colour, leaving the envelope within the image a little more prominent.


Materials used:
  • Stamps: Skull and Cross Buns - Envelope Girl Gonk, Love Heart Speech Bubble, Brush Hearts clear set
  • Ink: VersaMark; Distress Oxide - Abandoned Coral, Picked Raspberries; Versafine Clair - Nocturne
  • Dies: Create a Smile - Scalloped Rectangles
  • Embossing Powder: Brutus Monroe - Alabaster White


And a few more of the new stamps for my final card...


A very simple stamped card here using the new for 2022 Heart Present, Solid Heart and Circle Heart stamps, together with the outline heart from the existing Mini Hearts set and a sentiment from the Contemporary Sentiments clear stamps set (reduced to clearance price), stamped in shades of blue and green.  To finish, I added some tiny hearts confetti.


Materials used:
  • Stamps: Skull and Cross Buns - Heart Present, Solid Heart, Circle Heart, Mini Hearts set (outline), Contemporary Sentiments clear set
  • Ink: Altenew - Desert Night, Volcanic Lake, Ocean Waves, Mountain Mist, Sea Glass; Versafine Clair - Nocturne
  • Accents: Little Things from Lucy's Cards - Sprinkles: Sky Blue Hearts


Challenge entries:

Card 1
Addicted to CAS - Challenge #213 - Hearts

Card 2
We Love Stamping - February Challenge - Anything Stamped with Option: Stencilling
NBUS - Challenge #35 - both new stamps

Card 4
Just Add Ink - Challenge #589 - Just Add Minimalist


Thanks for visiting today.  Please do take a look over at Skull and Cross Buns where you will find the new designs for 2022, as well as a great selection of rubber stamps, some of which can be personalised.  Also, all the clear stamp sets, stencils and embellishments are at greatly reduced prices, don't miss out!


(AD - some products kindly gifted for Design Team purposes)

Tuesday, 2 February 2021

Happy Little Stampers February 2021 CAS Challenge

Hi there

It's a fresh new month and therefore we have a a bunch of fresh new challenges over at Happy Little Stampers.  Here is the cue card for the CAS challenge which is kicking off right now...


I decided to go super CAS for this card, just a simple 'love you'...


I began by die cutting the 'love' from a piece of cardstock which I had already ink blended with a gradient of pink and red Distress Ink.  I then die cut a heart from some black textured card stock and stamped and heat embossed the 'you' in white.  I adhered the die cut to the heart and placed it on my card base.  Now, I love simple cards more than any other kind but this one did look like it needed a little something else.  So I just added some ink splatters mainly towards the bottom right corner using a mix of Distress Ink and water flicked off a small brush.  To finish I popped the heart up on 3D foam.


Materials used:
  • Dies: Lil' Inker Designs - Doodled Love Word Die; Xcut - Nesting Hearts
  • Stamp: Uniko - You Are...Sentiments Outlined
  • Ink: Distress Ink - Picked Raspberry, Candied Apple;VersaMark
  • Embossing Powder: Brutus Monroe - Alabaster White


Challenge entries:

Moving Along with the Times - Challenge #127 - Valentines/Love
NBUS - Challenge #23 - first use of the 'love' die purchased in Lil' Inker Designs closing down sale last year


As with all the HLS challenges, the linky will remain open until the end of the month.  I hope you can join us.


Sunday, 31 January 2021

Uniko - Super Sunday Guest Designer Spot


Good morning, everyone

Today I'm super excited as I'm being featured in Uniko's Super Sunday Guest Designer Spot.  I was so honoured when I received the invitation from the lovely Bev and I've had great fun creating with lots of my Uniko stamps.


This post is a bit photo heavy as I got a bit carried away and created quite a few cards, once I started I couldn't stop!  I've centred all these cards around Uniko's current themes of love, kindness and friendship, I hope you like them.


Card #1

For this first sweet card I combined stamps from Uniko's Background Builders Classics and Simply Said sets...


I die cut a heart window first in my upper panel and then marked the area on the card base that would show through the aperture, masked it off then stamped the various border designs in varying shades of pink.  The sentiment was heat embossed in white to show through the raised panel.

Materials used:
  • Stamps: Uniko - Background Builders Classics, Simply Said
  • Dies: Xcut - Heart Nesting Dies; Create a Smile - Cool Cuts Double Stitched Rectangles
  • Ink: Altenew - Frosty Pink, Coral Berry, Ruby Red, Grapevine; VersaMark
  • Embossing Powder: Brutus Monroe - Alabaster White


Cards #2 and #3

For these two love themed cards I used the Scattered Polka Hearts background stamp and sentiments from the You Are…Sentiments Outlined set...


For this first one I heat embossed the background hearts in white and used emboss resist to blend over the top with Distress Oxides in a diagonal gradient.  I then used a vellum wrap with the sentiment heat embossed in white.


Materials used:
  • Stamps: Uniko - Scattered Polka Hearts, You Are...Sentiments Outlined
  • Ink: Distress Oxide - Spun Sugar, Picked Raspberry, Festive Berries; VersaMark
  • Die: Create a Smile - Cool Cuts Double Stitched Rectangles
  • Embossing Powder: Brutus Monroe - Alabaster White
  • Vellum from stash

And an alternative using the same stamp sets...


This one is a similar design but in reverse.  I used my MISTI to stamp the polka hearts multiple times, creating a gradient of pale to deep pink.  Here I heat embossed the sentiment on a die cut heart from black cardstock and popped it up on 3D foam.


Materials used:
  • Stamps: Uniko - Scattered Polka Hearts, You Are...Sentiments Outlined
  • Dies: Create a Smile - Cool Cuts Double Stitched Rectangles; Xcut - Heart Nesting Dies
  • Ink: Altenew - Frosty Pink, Coral Berry, Ruby Red; VersaMark
  • Embossing Powder: Brutus Monroe - Alabaster White


Card #4

My next make used the gorgeous Bee Happy stamp set...


I adhered some honeycomb/hexagon patterned paper to the lower half of my card base and then die cut an angled stitched edge from my upper panel.  This was then stamped in black, grey and honey shades using various stamps all from the same set, with a little Copic colouring on the bee.

Materials used:
  • Stamps: Uniko - Bee Happy
  • Ink: Altenew - Sunkissed; Hero Arts - Soft Granite; Memento - Tuxedo Black
  • Die: MFT Die-namics - Stitched Basic Edges
  • Patterned Paper - Doodlebug - Kraft in Color (kraft)


Card #5

This selection of Uniko creations wouldn’t be complete without using one of the Flower Power sets, and here I’ve combined blooms from Flower Power #2 with leaves from Natures Treasures II and the sentiment from Hello Lovely...


I used really bright summer colours here, started with the leaves and then stamped and die cut the flowers, using their co-ordinating dies, before adhering them in a cluster on glue dots.  The stamped sentiment and some vertical score lines finished off this one layer card.

Materials used:
  • Stamps: Uniko - Flower Power #2 (and companion dies), Natures Treasures II, Hello Lovely
  • Ink: Altenew - Pinkalicious, Orange Cream, Maple Yellow, Parrot; Versafine - Onyx Black


Card #6

I chose stamps from Just Because, Beautiful and Hello Lovely for this friend card...


On a pale green panel I stamped the same image in different orientations both in green and also heat embossed in white.  The sentiment was heat embossed on a green strip and a further smaller strip adhered on 3D foam.


Materials used:
  • Stamps: Uniko - Just Because, Beautiful, Hello Lovely
  • Die: Create a Smile - Cool Cuts Double Stitched Rectangles
  • Ink: Altenew - Frayed Leaf; VersaMark
  • Embossing Powder: Brutus Monroe - Alabaster White


Card #7

It wasn’t until I was making these that I realised how much the flower stem from the You Are, Yes You set resembled the flower in my blog logo!  I combined it here with the Background Builders Pinstripe II stamp and the sentiment from Originally Organic Additions.  I also thought I'd work with my blog colours too...


I stamped the flower in a pale ink before colouring with Copics and then masking it to stamp the pinstripes.  With the stem stamp still in my MISTI, I then restamped it over the original image before heat embossing in white. 


Materials used:
  • Stamps: Uniko - You Are Yes You, Background Blocks Pinstripe II, Originally Organic Additions
  • Die: Create a Smile - Cool Cuts Double Stitched Rectangles
  • Ink: Memento - London Fog; Altenew - Mountain Mist; VersaMark; Versafine - Onyx Black
  • Embossing Powder: Brutus Monroe - Alabaster White
  • Coloured with Copic markers


I'm linking up with the following challenges:

Card #1
NBUS - Challenge #22 - both stamp sets are new to my stash for this GD spot


Card #2
Alphabet Challenge - V is for Vellum

Card #7
Just Us Girls - Challenge #569 - Masking
Fusion - Flowers (using the inspiration photo)


Thanks so much for taking a look at my cards today and I hope they have given you some crafty inspiration.

And many thanks to Bev for thinking of me and for providing this Guest Designer spot.  I thoroughly enjoyed making all of these.


Saturday, 18 January 2020

Less is More Challenge #411

Good morning, everyone

Hopefully Blogger has scheduled this post for me on time this morning as I'm currently away.  I travelled up to Kent yesterday for our annual Christmas party last night (our company party is always in January) so I'll be travelling back down to Devon today.

I'm here to share the new challenge just starting over at Less is More and yes, shudder if you will, it's One Layer challenge time!  Here is the cue card, which you can interpret however you like...


Continuing as our sponsor for January is the generous Skull and Cross Buns, so please do play along as you'll automatically be in the running for the monthly prize.


I've used Skull and Cross Buns products on both of my sample cards this time.  And most of my makes usually have off centre designs anyway so this was a pretty easy challenge for me.

Here's the first, and I used the off centre rule for one of my techniques on this one...


I used a stencil to create the hearts, blending first in the pink shade, then placing the stencil 'off centre' and re-blending with the red shade.  Although this area of the stencil is fairly small, the design is continuous, allowing you to shift the stencil and continue inking with no break in the pattern.  Once the stencilling was complete I stamped the sentiment in black ink.

Materials used:

  • Stencil: Skull and Cross Buns - Brush Heart Pattern
  • Ink: Distress Ink - Worn Lipstick, Candied Apple; Versafine - Onyx Black
  • Stamp: Skull and Cross Buns - Brush Hearts

Challenge entries:

Always Fun Challenges - Challenge #145 - One Layer
STAMPlorations - January Stencil Challenge - Anything Goes


For this card I used one of the newer stamp sets to the Skull and Cross Buns range, Christmas Foxes...


This set isn't just for Christmas, it's great for sending winter wishes too.  I stamped the fox and the sentiments in black ink and then coloured the fox using coloured pencils.  To finish I used a dotted stencil to create the snow, using embossing paste, just masking off to avoid the stamped areas.


Materials used:

  • Stamps: Skull and Cross Buns - Christmas Foxes
  • Ink: Versafine - Onyx Black
  • Coloured with Faber Castell Polychromos
  • Stencil: Skull and Cross Buns - Dots and Spots Large
  • Embossing Paste: Dreamweaver


Challenge entries:

CAS on Friday - Challenge #171 - Winter
Inkspirational - Challenge #204 - Fauna
Creative with Stamps - Challenge #46 - Scarf


As usual, this challenge will remain open for the next fortnight, so plenty of time to play along and link up.  I hope you can join us.

Thursday, 2 January 2020

Happy Little Stampers January 2020 CAS Challenge

Happy New Year!

I hope you're all well rested and ready to get back into your craft rooms/spaces.  The crafty challenges of 2020 are all starting to launch and today is the turn of the CAS Challenge over at Happy Little Stampers.

Here's the cue card for this month, just remember to keep your entries clean and simple...


All the guidelines are detailed over on the main challenge post.


There are lots of options with this theme and for my DT card I decided to use a stamp set I've had in my stash for ages but not yet inked up...


On a die cut rectangular panel I stamped cupid then masked him so I could stamp the other cloud images.  With the mask still in place I ink blended the clouds using a stencil and Distress Oxide ink.  I then stamped the sentiment, coloured the images with ProMarkers and popped up the panel on fun foam.

Materials used:
  • Stamps: Clearly Besotted - Call Cupid
  • Ink: Memento - Tuxedo Black; Distress Oxide - Spun Sugar
  • Stencil: MFT - Cloud
  • Die: Create a Smile - Cool Cuts Double Stitched Rectangle
  • Coloured with ProMarkers

As with all the Happy Little Stampers challenges (many will be commencing over the next few days), the link ups will remain open for the entire month, so plenty of time to play along.  I hope you can join us.

Thanks so much for visiting.
Related Posts Plugin for WordPress, Blogger...