Showing posts with label Mirri card. Show all posts

Thursday, 30 December 2021

Micro Bead Wreath of Hearts

Good afternoon

I'm back this afternoon to share the last of my 2021 Christmas card makes.  Apologies that the selection was a little limited this year, that will teach me for leaving them even later than I usually do!

This will also be my last post of this year as I'm back to work tomorrow.  As you will have seen in my recent posts, I've also decided to step down from all the challenge blog Design Teams I've been part of for many years.  Hopefully this will give me the opportunity to put my spare time to better use and be able to craft more, without having the other commitments and deadlines that come with being on challenge blog Design Teams.  Hopefully it will be something I could reconsider in the future, it sure was fun.  I still remain a member of the Skull and Cross Buns Design Team and will introduce and showcase Emily's products when she needs me.

Ok, back to my final Christmas card, and this was the one I made for my other half...
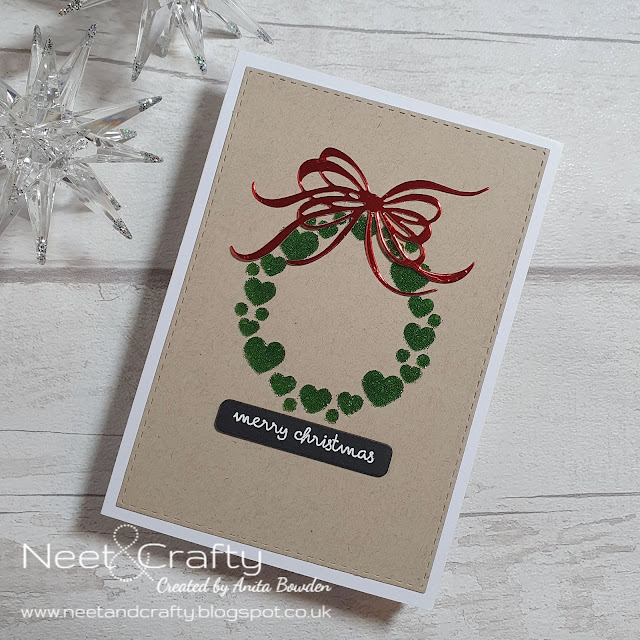

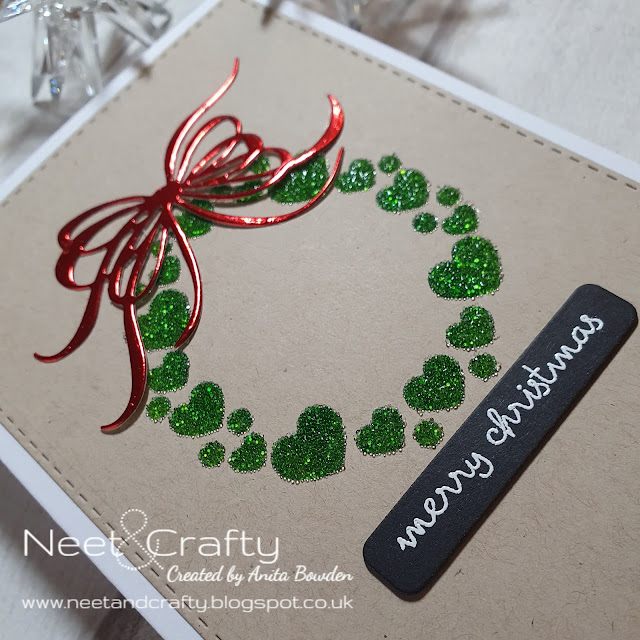
To make it a bit more masculine I began with a die cut panel of kraft cardstock.  I used the same technique as my previous trees card which used micro beads...I inked through the stencil with Distress Ink first and then cleaned the stencil before spreading translucent paste through it over the inked image and then sprinkling on the glass beads.  This was then left to dry completely before adhering the panel to a white card base.  And yes, it's the same sentiment again!  It was on my desk so it got used for pretty much every Christmas card this year!  I heat embossed it on a black die cut strip.  To finish, I die cut a bow from red glossy mirri cardstock and adhered this to the top of the wreath.

Materials used:
  • Dies: Create a Smile - Cool Cuts Double Stitched Rectangles; Altenew - Featured Sentiments Die Set; The Greetery - Fit to be Tied
  • Stencil: Clearly Besotted - Circle Around
  • Stamp: Clearly Besotted - Simple Script
  • Ink: Distress Ink - Rustic Wilderness, Pine Needles; VersaMark
  • Embossing Paste: Sweet Poppy - Stencil Dimensions:Translucent
  • Embossing Powder: Brutus Monroe - Alabaster White
  • Cardstock: Neenah - Desert Storm; red mirri card from stash
  • Accents: Sweet Poppy - Clear Glass Micro Beads

Challenge entries:

AAA Cards - Game #205 - Christmas
Happy Little Stampers - December Christmas Challenge - Anything Goes
Happy Little Stampers - December Stencil Challenge - Anything Goes
NBUS - Challenge #33 - The Greetery bow die and the wreath stencil are new to my stash
CHNC - Challenge #574 - Anything Goes Christmas
Uniko - Challenge #68 - Celebrate (Reds and Greens)
STAMPlorations - December Stencil Challenge - Anything Goes


I just love the online crafting community and want to say thank you all for your support and encouraging feedback throughout this year.  It's so great to know that I can provide lots of inspiration, and gain some back too!

So, all that's left to say is...

Saturday, 10 October 2020

Less is More Challenge #430

Hi there

We have a different type of challenge for you over at Less is More starting this morning.  It is a Theme challenge but with a twist.  Our lovely leading LIM lady, Sharon, has a birthday today so our challenge is to CASe one of her lovely creations!

Happy Birthday, and wishing you a lovely day, Sharon xx


And here is her fantastic design...


There are so many elements to Sharon's creation: stars, flowers, warm shades, gold, foliage, die cutting, repeat stamping, banner sentiment strip, the layout...and lots more!  Just take any of these elements as inspiration for your own make.


And as we've whizzed into a new month, we also have the fabulous Uniko as our sponsor for the whole of October. 


Ok, onto my card.  I focussed on the colours, stars, flowers, gold die cuts, heat embossing, faux stitched edging, focal point trio and the banner sentiment.  I also used stamps from our sponsor...


I began by stamping some repeats of the flower stamps on a scrap of white cardstock and heat embossing these in gold before ink blending over them with the three different shades.  I then used some star dies to cut these out.  I die cut the balloon strings and bow from gold mirri card and adhered these to a die cut panel together with the stars.  I used one of the same inks to colour a sentiment strip and stamped and embossed the sentiment in gold.  This was popped up on glue dots before adhering the panel to the card base on fun foam.


Materials used:
  • Stamps: Uniko - Background Builders: Flower Power, Flower Power #2
  • Ink: Distress Ink - Abandoned Coral, Carved Pumpkin, Mustard Seed; VersaMark
  • Dies: Create a Smile - Cool Cuts Double Stitched Rectangles; Wplus9 - Whole Lotta Happy; MFT Die-namics - Blueprints 26, Stitched Sentiment Strips
  • Embossing Powder: Wow! - Metallic Gold Rich
  • Mirri card from stash


The teamies have provided lots more inspiration which you can find over at the main challenge page.  Why not play along?  I'd love to see your twists on Sharon's design, and as always, the linky will be open for two weeks :)


Saturday, 12 October 2019

Challenge Me a Christmas Card with Michelle Lupton

Hi guys

I'm honoured to share that the super talented and lovely Michelle Lupton has invited me to join her again this year for her 'Challenge Me a Christmas Card' series.


She asked me to choose any style, theme, technique or product for us both to use on a Christmas card.  I chose Inlaid Die Cuts.

I love this technique.  Not only does it look great, it often leaves you with excess to do a twofer!  That's exactly what happened with mine...


I wanted to go with non-traditional colours as I was using a modern style Christmas tree die.  I began but die cutting two pierced squares, one from white glitter cardstock and the other from rose gold mirri cardstock.  I die cut the tree from each and then inlaid the positive part of the die in the opposite panel, and the negative bitty bits back into the gaps of each original panel, adhering on the back with some paper covered with dry adhesive.  The panels were then mounted on 3D foam onto larger square die cut panels and adhered to the card bases, and a very simple sentiment stamped below in black ink on each card.


I would love to know which version you prefer.  I think I'm leaning towards the glittered panel with the mirri inlay, that may be because mirri card is so difficult to photograph! lol


Materials used:

  • Dies: MFT Die-namics - Pierced Square Stax; Clearly Besotted - Christmas Tree Die
  • Stamp: Clearly Besotted - Tiny Type
  • Ink: Versafine - Onyx Black
  • Cardstock from stash


Challenge entries:

Just Us Girls - Challenge #509 - Trend Week - Frame It
Happy Little Stampers - October Anything Goes with Dies Challenge
Happy Little Stampers - October Christmas Challenge - Anything Goes (option: twinkle)
Always Fun - Challenge #131 - Dies or Punches
Dream Valley - Challenge #211 - Clean and Simple


Please do pop over to Michelle's blog which you can find here, to see what she created with the same technique.

Thanks again, Michelle, for inviting me to join you and your friends for this fantastic card series :)

Saturday, 31 August 2019

Less is More Challenge #403

Hi there

Apologies for the lack of posts lately, I have been crafting away behind the scenes but haven't been able to share those makes yet.  Lots to come over the next few days though so stay tuned :)

Back to the purpose of today's post, and of course it's new challenge day over at Less is More.  And as August has an extra Satuday we have a Lucky Dip challenge for you this time.  Here is the cue card...


Funky Fossil Designs continues as our sponsor for this challenge so please do play along for a chance to win our monthly prize!


I only have one card to share with you this time but I'm excited to say...I have my first 2019 Christmas card in the bag! 

Here it is...


This was very simple to make.  I started with a stitched circle die cut and heat embossed the sentiment in copper.  This was then popped up on fun foam.  I then die cut the pine needles from green cardstock, the bells from silver mirri card and the bow from gold mirri card, and layered and adhered these in a cluster.

Materials used:

  • Stamp: Happy Little Stampers - Mixed Christmas Sentiments
  • Ink: VersaMark
  • Embossing Powder: Wow! - Metallic Copper
  • Dies: MFT Die-namics - Double Stitched Circles; Clearly Besotted - Tag Along Die Collection (bow); Marianne Design Creatables - Petra's Larix Larch; Xcut - Jingle Bells
  • Cardstock from stash

I really appreciate your visits, thanks so much for stopping by.  Please do pop over to the main Less is More challenge post for more inspiration from my teamies and to see how they've incorporated metallics into their CAS creations.  And the challenge, as always, is open for a fortnight so there's plenty of time to link up in our gallery.  Hope to see you there :)

Sunday, 13 January 2019

Rays of Love

Hi guys

I was busy cataloguing some of my stash recently and came across a die that has been in my stash for some time but only used once I think, and that was for a card I don't think made it to my blog.

There's usually someone shouting for a last minute Valentine's Day card so I thought I'd make another for my stash.

Here's it is...


I started by die cutting a white cardstock panel using a stitched rectangle.  I then die cut the heart rays detail.  I added some adhesive behind the panel, and after cutting the same detail from some red mirri card, I filled the apertures in the panel with the red hearts.  I then simply stamped the sentiment in black ink and adhered the panel to the card base popped up on fun foam.


Materials used:
  • Dies: Create a Smile - Cool Cuts Double Stitched Rectangles; Memory Box - Heart Rays
  • Stamp: Clearly Besotted - Lovely Lilies
  • Ink: Versafine - Onyx Black
  • Accents: Red mirri card from stash

Challenge entries:

Happy Little Stampers - January Anything Goes with Dies Challenge
Time Out - Challenge #126 - Loving
Alphabet Challenge - U is for Use Some Stitching - Real or Faux


Thanks for visiting today, wishing you a fun week ahead.

Saturday, 2 December 2017

Happy Little Stampers December 2017 CAS Challenge

Good evening

And welcome to our last batch of challenges for 2017 over at Happy Little Stampers.  The Watercolour challenge is already up and running, and the rest will kick off over the next few days.  But today it's the turn of the CAS Challenge, and here's our cue card for this month...


And don't forget, there's a $20 coupon for the HLS shop for one lucky winner!


I don't often make New Year cards but they are certainly handy to have in your stash.  I have a friend who is always away in December and at Christmas, and always goes before I'm organised enough to get my cards sent out, so this one will be winging it's way to her on her return.

Here's my card...


On a panel of white cardstock I blended an ombre background with Distress Inks.  It's actually a little darker than it appears in these photographs as I wanted to portray an evening sky.  I stamped the London skyline from HLS in black ink and then stamped the fireworks and heat embossed in different powders.  The panel was die cut with a stitched rectangle die, and some gold mirri card cut from the next size up die from the same set.  I simply adhered the two together, mounted on my card base and stamped the sentiment below.  The embossing can be seen more clearly in the photo below...


Materials used:
  • Stamps: Happy Little Stampers - Wish You Were Here; Clearly Besotted - Dandelion Dreams; Reverse Confetti - Clink
  • Ink: Distress Ink - Faded Jeans, Wilted Violet; Versafine - Onyx Black; VersaMark
  • Embossing Glitter: Wow! - Metallic Gold Sparkle, Metallic Silver Sparkle; All Night Media - Crystal Sparkle
  • Die: MFT Die-namics - Stitched Rectangle Stax
  • Gold mirri card from stash

Thanks for stopping by.  Please do pop over to the main HLS blog where you'll find lots more inspiration from my fab teamies and don't forget to check back over the coming week to check out the rest of the challenges for December.  All of the challenges are open to link up until the end of the month.

Saturday, 25 July 2015

Happy Birthday, Chrissie!

Hi there

At Less is More this week we have a very special challenge.  Our lovely 'boss', Chrissie, is celebrating her birthday this weekend and will be 70 years young tomorrow!


So our challenge this week is dedicated to her and our theme is...

Snippets for Chrissie!

We want you to use bits and pieces, leftovers on your cards this week.  We all have those sitting on our craft desk or popped in a box somewhere so here's a great opportunity to put them to good use.


We also have a fabulous Guest Designer joining us this week, and who better for this challenge than the wonderful Di of Pixie's Crafty Workshop.  Over at Pixie's Crafty Workshop Di runs a regular challenge called Pixie's Snippets Playground where the idea is exactly this, to create something by using up any little bits from your stash.


So onto my card...


I matted and layered a white cardstock panel onto some bright pink to create a frame.  I also stamped a banner in pink on a snippet of white cardstock and die cut this using it's co-ordinating die.  The 'flower' actually started its life as a butterfly die!  I saw this die at a craft show last month and loved how intricate it was.  I've die cut the butterfly four times from snippets of silver mirri card I've had in my stash for as long as I can remember.  The lower wings were then snipped off and arranged before being adhered together to create the flower petals.

This is what the two part die cut looked like before I trimmed it up...


This took quite some time to figure out the best layout but I'm really happy with the final result.  Each set of two lower wings were then adhered to the card base to create the flower and the banner was popped up on 3D foam over the top.

Materials used:
  • Dies: Britannia Dies - Large Elvendene Butterfly; Clearly Besotted - Mini Basic Banners Die
  • Stamps: Clearly Besotted - Mini Banners
  • Ink: Versa Color - Raspberry

I'd like to link up at the following challenges:

CAS(E) this Sketch - Challenge #133


A Gem of a Challenge - Challenge #149 - Birthday Wishes
Seize the Birthday - Anything Goes

Edit:
Pixie's Snippets Playground - Week 186 (I wasn't sure on the timings of Di's challenge but I can just about sneak in the door before this week's linky closes. Phew!)


I hope you'll join us this week to celebrate Chrissie's special day and I hope you have a wonderful day tomorrow, Chrissie xx


Wednesday, 6 May 2015

A Little Note with A Little Gold

Hi there

Today I'm sharing a clean and simple card I made last night for a few challenges.

I've had this stamp set from Clearly Besotted for ages but never inked it up, it's really great for some quick cards like this one...


I took a panel of white cardstock and die cut a hole using the flower die.  I then adhered some gold mirri card to the back of the aperture.  On the die cut piece I stamped the co-ordinating flower, first in black, then after using my embossing buddy to remove any static, stamped the flower centre in VersaMark and heat embossed with gold powder.  I then stamped the stem and again, after removing any static, stamped the leaves in VersaMark and also heat embossed these in gold.  The die cut flower was then adhered over the gold aperture, but rotated so the gold would show through.  The sentiment was then stamped and the panel was adhered to the card base using 3D foam.  I usually shy away from metallic cardstock as it reminds me of my early days of cardmaking when my creations were, quite honestly, shocking!  But used in minimal amounts I think it can look great.  I knew I kept it in my stash for a reason!

Materials used:

  • Stamps and Die: Clearly Besotted - Pretty Petals Plus
  • Ink: Versafine - Onyx Black; VersaMark
  • Gold mirri card from stash

Challenge entries:

Addicted to CAS - Challenge #62


Happy Little Stampers - May CAS Challenge


AAA Cards - Game #38 - There's a Hole in my Card


Thanks so much as always for visiting.


Related Posts Plugin for WordPress, Blogger...