Thursday, 3 September 2020

Skull and Cross Buns - September 2020 - Selection Three

Good morning

I'm back with more makes for Skull and Cross Buns.  Some Christmas ones for you this morning.


For this first card I've used the new Christmas Jumper stencil and a sentiment from the new Contemporary Sentiments set, along with the Elf Stockings stencil already available...


Lots of masking was involved to ink up this background.  I masked off alternate sections of the Christmas Jumper stencil so I could use the two colours, and the same principle was applied to the Elf Stockings stencil where I've just inked up one section of it for my focal image.  I finished by stamping and heat embossing the sentiment in gold sparkle and added two gold glitter enamel dots.


Materials used:
  • Stencils: Skull and Cross Buns - Christmas Jumper, Elf Stockings
  • Stamp: Skull and Cross Buns - Contemporary Sentiments
  • Ink: Distress Ink - Candied Apple, Lucky Clover; VersaMark
  • Embossing Powder: Wow! - Metallic Gold Sparkle
  • Die: MFT Die-namics - Pierced Square Stax
  • Enamel dots from stash


For this next card I combined two of the existing stamp sets, Christmas Baubles and Scandi Christmas...


I began by stamping and heat embossing the baubles in white on red cardstock and fussy cut them out.  I die cut a frame using two stitched rectangle dies and popped this frame up on 3D foam, adhering to the card base whilst trapping some red twine at the top.  The baubles were then popped up on foam as if hanging from their strings.  I finished by stamping the snowflakes in silver and the sentiment in red, and added some sequins to the baubles.


Materials used:
  • Stamps: Skull and Cross Buns - Christmas Baubles, Scandi Christmas
  • Ink: VersaMark; Versa Color - Silver; Altenew - Crimson
  • Embossing Powder: Wow! - Opaque Bright White
  • Dies: Create a Smile - Cool Cuts Double Stitched Rectangles
  • Accents: Red twine and sequins from stash

Finally, I've used the Christmas Santa Workshop set, along with the Stars and Sparkles stencil and the new Contemporary Sentiments set to create a gift tag...


The elf was stamped and coloured first then I created a mask to enable me to then ink blend the background and ink the stars through the stencil.  The sentiment was then stamped and the reinforcement ring and ribbon added to the tag.

Materials used:
  • Stamps: Skull and Cross Buns - Christmas Santa Workshop, Contemporary Sentiments
  • Stencil: Skull and Cross Buns - Stars and Sparkles
  • Coloured with Copics
  • Ink: Memento - Tuxedo Black; Distress Ink - Stormy Sky, Chipped Sapphire
  • Dies: Clearly Besotted - Tag Along


I'll be back with my final few makes, more than likely this evening.  All these products by Skull and Cross Buns will be showcased on Hochanda TV at 7am this Saturday, 5 September 2020.  


Wednesday, 2 September 2020

Skull and Cross Buns - September 2020 - Selection Two

Hi guys

I'm back with my next batch of samples using products from Skull and Cross Buns.  And if you can, don't forget to tune in to Hochanda TV at 7am this coming Saturday, 5 September 2020 for a closer look at the new products and some existing ones too.


My first card uses two new stencils, Giant Dots and Polka Dots, as well as a new stamp set, Contemporary Sentiments...


On a piece of white cardstock I began by ink blending with Distress Oxides through the Giant Dots stencil.  With the stencil still in position I placed the Polka Dots stencil over the top and added white pigment ink, I then shifted the stencil and added the darker dots.  The panel was then die cut with a double stitched circle die, as well as two co-ordinating shades of textured cardstock die cut with slightly smaller circles from the same set.  I stamped the sentiment then adhered the circles and trimmed away the excess, with the stencilled piece being popped up on 3D foam.


Materials used:
  • Stencils: Skull and Cross Buns - Giant Dots, Polka Dots
  • Stamp: Skull and Cross Buns - Contemporary Sentiments
  • Ink: Distress Oxide - Cracked Pistachio, Peacock Feathers, Mermaid Lagoon; Hero Arts - Unicorn; Versafine - Onyx Black
  • Dies: MFT Die-namics - Double Stitched Circle Stax

Challenge entries:

Allsorts Challenge - Week 587 - Going Around in Circles
NBUS - Challenge #18 - new stencils


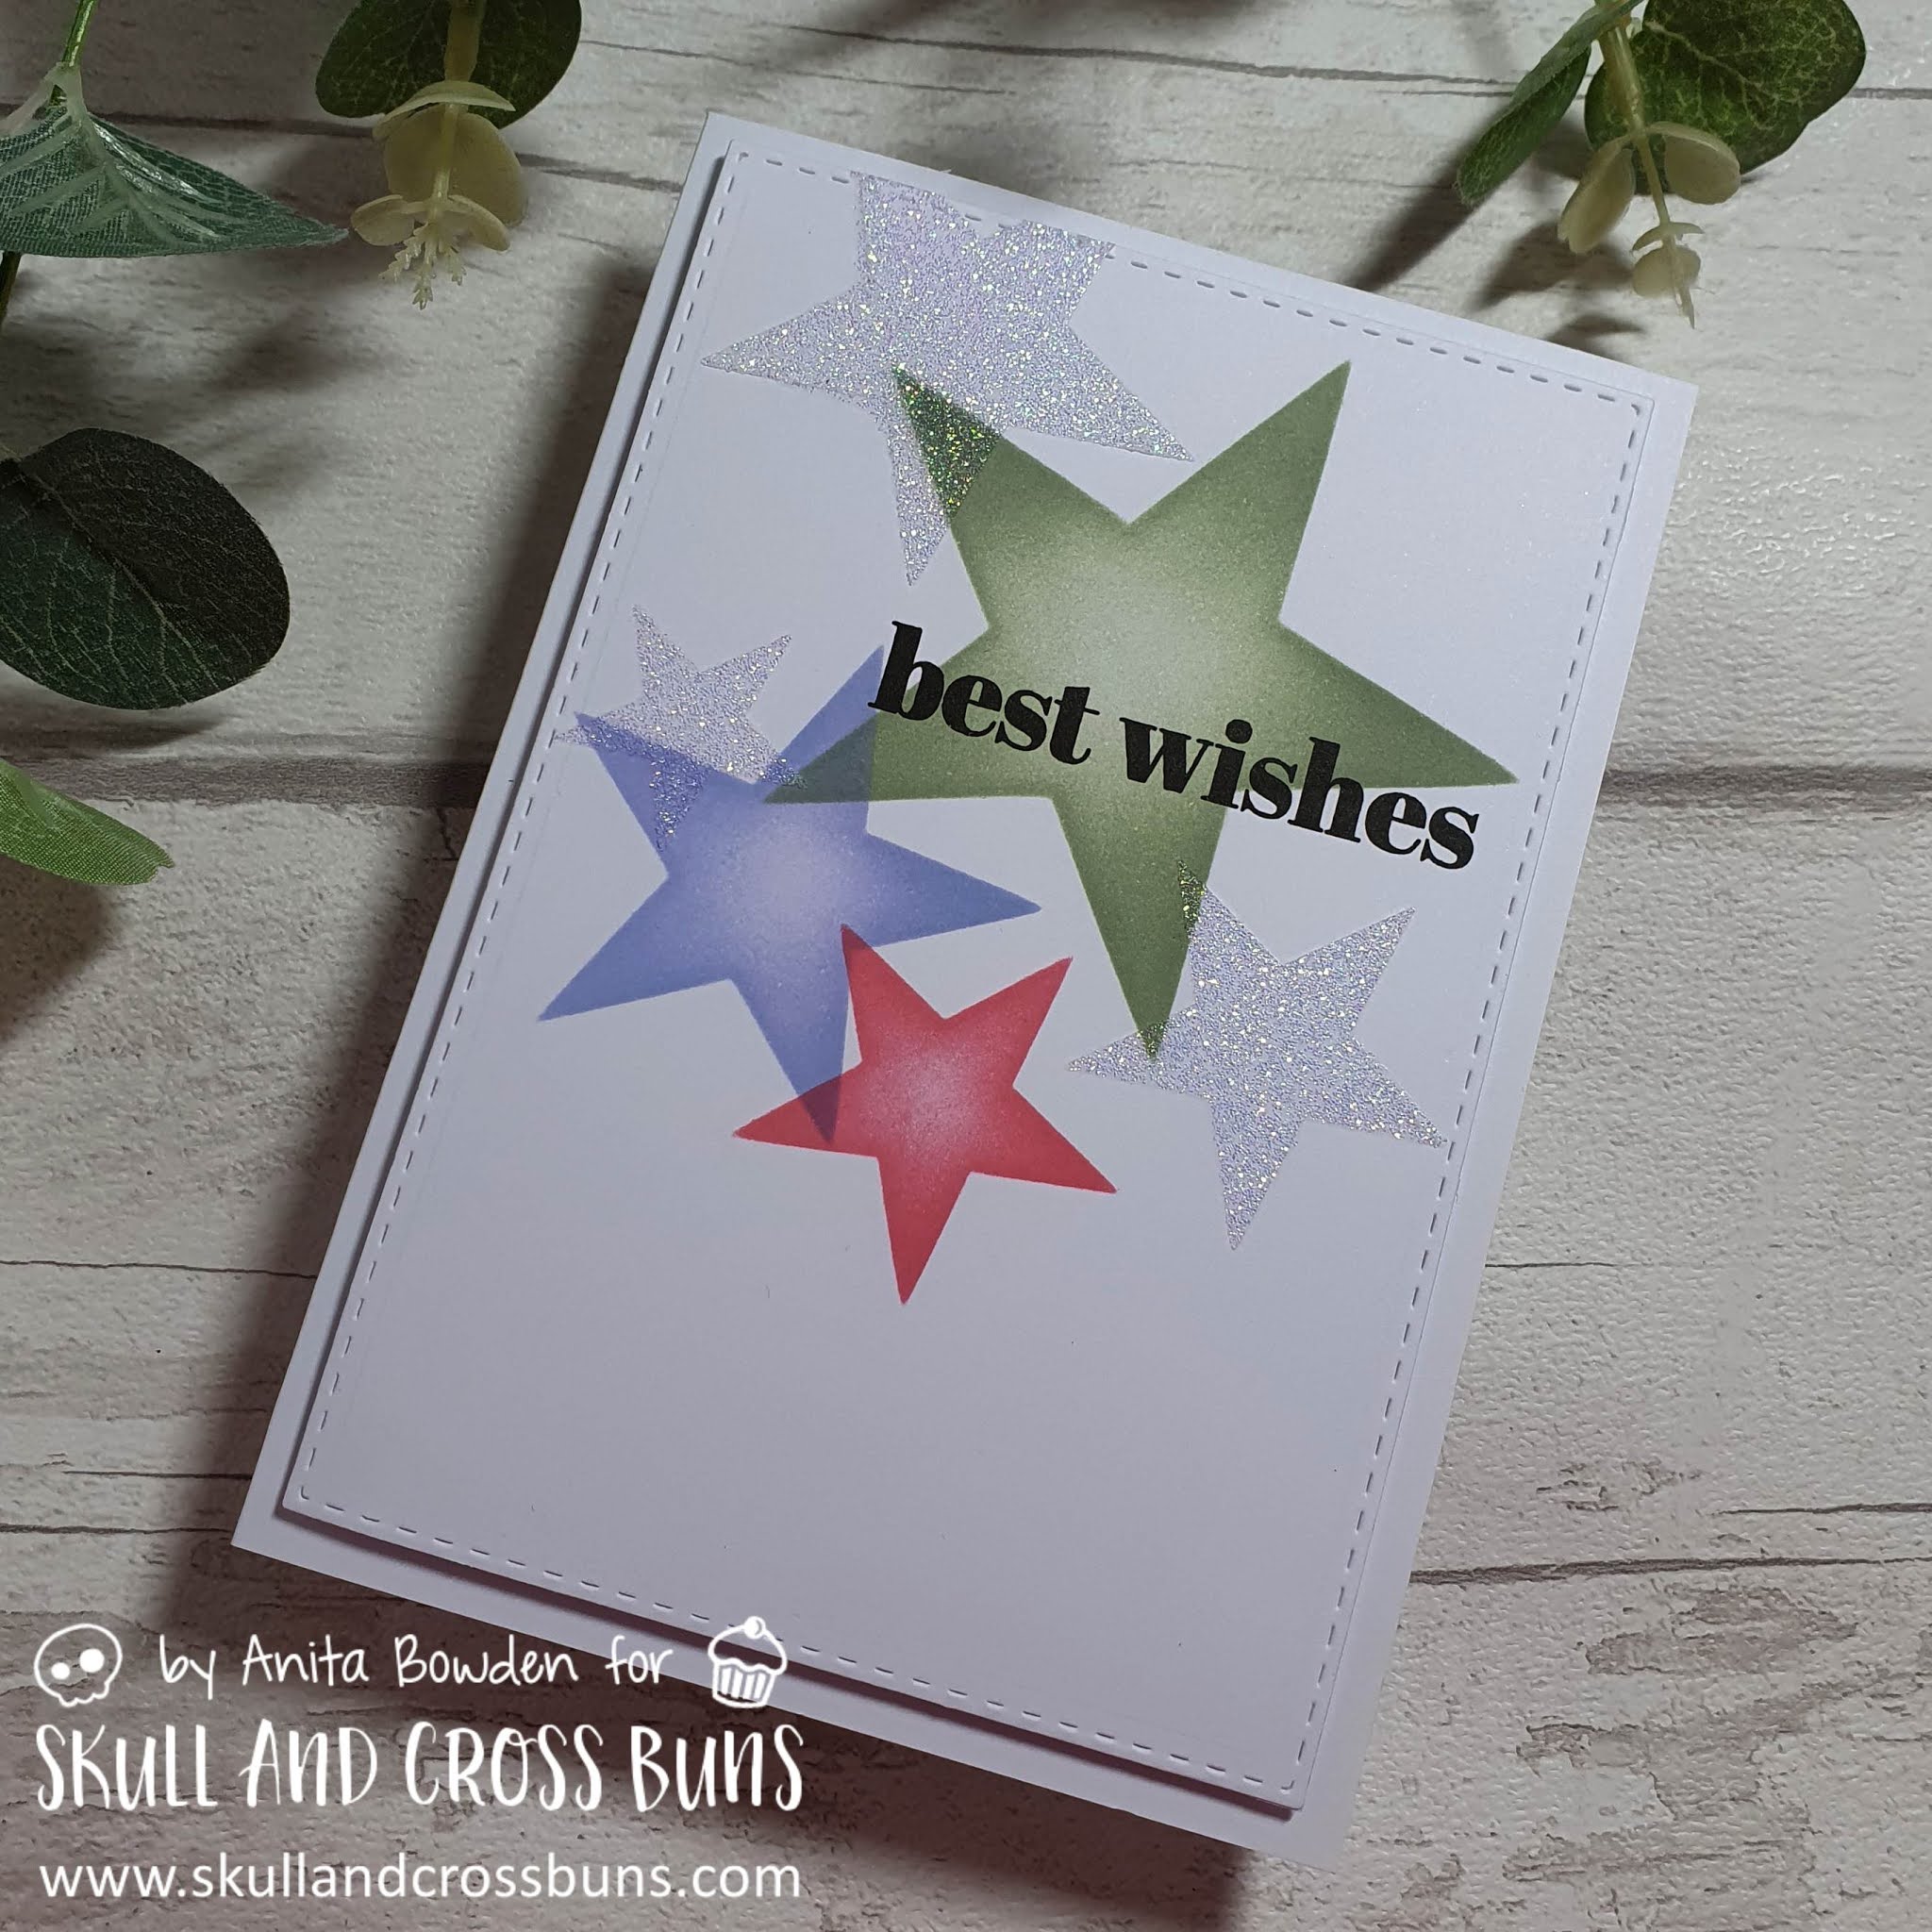
Another new stencil for the next card, Giant Stars and Masks...


On a stitched die cut panel I ink blended through three different stars of the stencil, each positioned separately to overlap slightly.  I cleaned the stencil and then spread some iridescent paste through three more stars.  To finish the sentiment was stamped in black and the panel adhered on fun foam.


Materials used:
  • Stencil: Skull and Cross Buns - Giant Stars and Masks
  • Stamp: Skull and Cross Buns - Contemporary Sentiments
  • Ink: Distress Ink - Bundled Sage, Shaded Lilac, Worn Lipstick; Versafine - Onyx Black
  • Embossing Paste: Nuvo Glimmer Paste - Moonstone
  • Die: Create a Smile - Cool Cuts Double Stitched Rectangles

And for my final card of this post I used the Giant Dots stencil to create some Christmas baubles...


I began by stamping the snowflakes from the existing Scandi Christmas set and heat embossing in clear before ink blending through the stencil so that the snowflakes resisted the ink.  I die cut the piece with a pierced square die and added some hand drawn strings and bows before adhering on foam over a slightly larger die from the same set.  The sentiment from the Christmas Foxes set was then stamped in black to finish.


Materials used:
  • Stamps: Skull and Cross Buns - Scandi Christmas, Christmas Foxes
  • Stencil: Skull and Cross Buns - Giant Dots
  • Ink: Distress Ink - Picked Raspberry, Shaded Lilac, Mermaid Lagoon; Versafine - Onyx Black
  • Embossing Powder: Wow! - Clear Gloss
  • Dies: MFT Die-namics - Pierced Square Stax


I will be back tomorrow with more makes using products which will be featured on the show.  Here's another peek of what's coming up on Saturday...


Tuesday, 1 September 2020

Skull and Cross Buns - September 2020 - Selection One

Hi guys

This week I will be sharing lots of new makes using products from Skull and Cross Buns, ahead of their show on Hochanda TV at 7am (BST) on Saturday 5 September 2020.

Exclusive to the show there will be lots of new stencils launching, along with a new stamp set, as well as some existing products being showcased.


On the three cards in this post I've used the Geometric Christmas Trees stencil, together with some other products in the range...


Here I've blended a background with Distress Oxide inks and blotted away some of the ink after spritzing with water through the stencil.  Once dry I once more laid the stencil over the panel and spritzed with shimmer spray.  The sentiment was stamped and heat embossed on a strip of vellum, and wrapped around the panel before adhering onto the card base using fun foam.


Materials used:
  • Ink: Distress Oxide - Twisted Citron, Iced Spruce; VersaMark
  • Stencil: Skull and Cross Buns - Geometric Christmas Trees
  • Die: Create a Smile - Cool Cuts Double Stitched Rectangles
  • Stamps: Skull and Cross Buns - Christmas Foxes
  • Embossing Powder: Wow! - Metallic Gold Rich
  • Vellum from stash
  • Accents: Cosmic Shimmer Mist - Pearl


This next card uses the Geometric Christmas Trees stencil together with the new Polka Dots stencil...


I began by stamping the sentiment in the centre of the panel then used some translucent paste to create the row of trees from part of the trees stencil.  I sprinkled over some fine green glitter and left to dry.  I then masked off the sentiment before using the Polka Dots stencil to create snow drops using matte embossing paste.  The panel was then simply adhered on foam.


Materials used:
  • Stencils: Skull and Cross Buns - Geometric Christmas Trees, Polka Dots
  • Stamp: Skull and Cross Buns - Scandi Christmas
  • Ink: Versafine - Onyx Black
  • Embossing Paste: Sweet Poppy - Stencil Dimensions Translucent; Dreamweaver - white
  • Accents: Sweet Poppy - Moss Green Superfine Satin Glitter
  • Die: Create a Smile - Cool Cuts Double Stitched Rectangles

Challenge entries:

My Time to Craft - Challenge #439 - Clean and Simple
NBUS - Challenge #18 - (new stencils)


For my final card of this post, I masked of a section of the stencil...


I placed the stencil over the panel and masked off a section to create a tree of trees, before ink blending which I faded out at the top.  The star and sentiment were stamped and heat embossed in silver, before adhering the panel on foam.


Materials used:
  • Stencil: Skull and Cross Buns - Geometric Christmas Trees
  • Stamps: Skull and Cross Buns - Scandi Christmas (star), Merry Christmas Script Font
  • Ink: Distress Ink - Chipped Sapphire; VersaMark
  • Embossing Powder: Wow! - Metallic Silver


Thanks so much for visiting.  I'll be sharing more of my samples throughout the rest of the week prior to Satuday's show so please do check back if you have time.  Emily is also sharing sneak peeks over the on the Skull and Cross Buns Facebook Group, here.

If you can't wait for the show, here's a quick look at the products which will be available...


Saturday, 29 August 2020

Less is More Challenge #427

Good morning

As there are three Saturdays in August today we have a Lucky Dip challenge for you over at Less is More.  Here is the cue card...


If you're unfamiliar with this technique there are a couple of video links included over on the main Less is More challenge post to help you.

I have two sample cards for you today, here's the first...

I die cut a piece of black cardstock using a stitched rectangle.  There are a few different ways to create a chalkboard effect.  I started by dabbing a paper towel into a white ink pad and then swiping it across the panel, then to smooth the ink out a little I swiped across it with a baby wipe.  Once dry I then stamped and heat embossed my sentiment and images in white.  I added a little shading to the holly leaves with a white pencil and finished with some red glitter enamel dot accents.  The panel was then layered up onto a white panel cut with a larger die from the same set.


Materials used:
  • Ink: Hero Arts - Unicorn; VersaMark
  • Stamps: Clearly Besotted - Hang Around; 12 Days of Christmas (holly) - free set with Creative Stamping Magazine
  • Die: Create a Smile - Cool Cuts Double Stitched Rectangles
  • Embossing Powder: Wow! - Opaque Bright White
  • Accents: Enamel dots from stash


I thought that this technique would also work well with a Halloween theme, here's my second card...


This card was created in the same way.  The panel was then simply offset on an orange panel and adhered onto a purple card base.


Materials used:
  • Ink: Hero Arts - Unicorn; VersaMark
  • Stamps: Clearly Besotted - Sweet Little Sentiments; Autumnal Treasures - free set with Creative Stamping Magazine
  • Embossing Powder: Wow! - Opaque Bright White


As always, the challenge linky will remain open for two weeks so there's plenty of time to play along.  And you can find lots more inspiration from my teamies over on the main Less is More blog too.

Saturday, 15 August 2020

Less is More Challenge #426

Good morning

At Less is More our new challenge is all about...


I never feel confident enough to hand draw anything directly onto my card but I had a go here and after practicing a few times on some scrap paper I'm quite pleased with the result.

Here's what I did...

A simple one layer card this time where I've used a stencil to create the background pattern with ombre inking.  I then used a black fineliner pen to hand draw the botanicals.  A simple sentiment stamped in black and it was finished.

Materials used:

  • Stencil: Clearly Besotted - Pretty Petals
  • Ink: Distress Oxide - Cracked Pistachio, Peacock Feathers; Versafine - Onyx Black
  • Stamp: Clearly Besotted - Mini Messages

Challenge entries:

CAS on Friday - Challenge #186 - Nature
NBUS - Challenge #17 (new stencil)
Make My Monday - Challenge #128 - Clean and Simple


This challenge is open for a fortnight so why not join us, grab those pens and add some hand drawn detailing to your projects!


Saturday, 1 August 2020

Less is More Challenge #425

Good morning

Happy Saturday and welcome to August!

And with another Saturday morning comes a brand new challenge over at Less is More.  This time it's the turn of our Theme challenge which is...


Joining us for this fortnight's challenge as our Guest Designer is the fabulous Meghan who was our June winner.  Please do stop by her blog to check out her lovely card and to say hi.


Ok, I have two sample makes for you this time, here's the first...


Apart from the inks, everything I used here from Clearly Besotted was being given it's first outing on my craft desk!  I began by stamping and die cutting this lovely hibiscus set with layered stamping, and did some spotlight inking where you see the dark pink areas.  I ink blended the background flag through a stencil and stamped the sentiment in black.  The die cuts were then adhered in a cluster, some flat and some on glue dots.

Materials used:
  • Stamped: Clearly Besotted - Aloha Too (and co-ordinating dies), Mini Messages
  • Stencil: Clearly Besotted - Flagged Down
  • Ink: Altenew - Buttercream, Warm Sunshine, Ruby Red, Hunter Green, Evergreen; Distress Ink - Worn Lipstick; Versafine - Onyx Black

Challenge entries:

Alphabet Challenge - I is for Island Fun (Anything Tropical)
CAS on Friday - Challenge #185 - Summer
STAMPlorations - Summer Challenge


There is a hydrangea in my front garden which is in full bloom so that was the ideal choice for my second card...


I ink blended Distress Inks through a stencil then die cut the panel with a faux stitched curve.  Before adhering this panel to the card base I manipulated the sentiment stamp to follow the curve of the leaf and stamped in black.

Materials used:
  • Stencil: Hydrangea (free with a set from Simply Cards and Papercraft magazine)
  • Ink: Distress Ink - Spun Sugar, Shaded Lilac, Mowed Lawn; Versafine - Onyx Black
  • Stamp: Clearly Besotted - Mini Messages
  • Die: MFT Die-namics - Stitched Basic Edges

Challenge entries

Always Fun Challenges - Challenge #173 - Use Stencils
Uniko - Challenge #60 - In My Garden


Thanks so much for visiting.  If you need more inspiration please do pop on over to the main Less is More challenge page where you will see some lovely projects from my teamies and links to their personal blogs.  I hope you can join us and I'm looking forward to seeing lots of summer flowers in the gallery this month :)

Saturday, 18 July 2020

Less is More Challenge #424

Good morning and happy Saturday

Less is More has a new challenge beginning today and it's the turn of their One Layer challenge.  Lots of options for this one and time to get ahead as the challenge is all about...


Continuing as our generous sponsor for July is

and remember, just by playing along will put you in the running for our monthly prize.


A little ink blending and stamping for my sample card this time...


I began by die cutting a circle from a post-it note to use as a mask to create a moon.  I then ink blended with Distress Inks to create a wintery dusk sky.  I removed the mask and then stamped the branch and bauble in black to create silhouettes.  The string was hand drawn with a fibre tip pen.  I finished by stamping the sentiment in a co-ordinating shade and added some Glossy Accents to the bauble for some shine.  Apart from the drying time of the gloss, this was a pretty quick card to make.


Materials used:
  • Die: Hero Arts - Infinity Circle Dies (for the mask)
  • Ink: Distress Ink - Tumbled Glass, Shaded Lilac, Spun Sugar; Versafine - Onyx Black; Versa Color - Heliotrope
  • Stamps: Fancy Foliage (free with Creative Stamping magazine); Card-io Majestix - Zendangles; Clearly Besotted - Sing It's Christmas
  • Accents: Fibre tip pen, Glossy Accents
Challenge entries:

AAA Cards - CAS Game #169 - Made in Minutes (Christmas in July)
Time Out - Challenge #166 - Peaceful


Thank you as always for taking a look.  Don't forget, you can find lots more inspiration over on the main challenge blog where my teamies are sharing some great makes.  

Related Posts Plugin for WordPress, Blogger...