Saturday, 30 January 2016

Less is More - Lucky Dip Week!

Good morning crafters

Hopefully Blogger has been nice to me and published this scheduled post for me.  Right now I'll be sitting down to a much needed brekkie after my works Christmas bash last night (unseasonably late I know!), before heading off on a four hour journey back down to Devon from Kent (my employer's Head Office is in Kent so the other branches travel there from all over the UK).

So, while I'm probably nursing an inevitable hangover (no doubt after a free bar!), I'll introduce this week's challenge over at Less is More.  As we have a fifth Saturday this month it's the turn of our Lucky Dip challenge.  And as we have Aussie Kylie bringing Happy Little Stampers as our sponsor this month, our theme is...


Down Under
Feel free to interpret this however you like, just remember to keep your creations clean and simple


I struggled with this challenge for a while as I had nothing Australia themed in my stash like koalas, kangaroos and didgeridoos to name a few, but then an idea popped in my head.......sun, sea, sand and surfing!  Obviously you can go off in a completely different direction with how you interpret the challenge if you wish.  Here's what I came up with...


I didn't have anything resembling a surfboard so I popped into MS Word, created an elongated oval with two vertical lines going down the centre, printed it on some patterned paper and....voila, one surfboard!  I then made a beach scene using a variety of dies.  The sky, sea, sand and sun all started from round dies which I then cut using scallop dies to create the layered up scene.  I nestled the surfboard in between the sand layers, with the top popped up on 3D foam, then adhered the whole circular scene to the card base slightly overlapping the edge, then trimmed off the excess.  I then manipulated the sentiment stamp into a curve on my acrylic block before stamping around the curve.  I'm actually really pleased with how this one turned out as I was having brain block for days before this idea materialised!

Materials used:

  • Patterned Paper: Echo Park - Sweet Day
  • Dies: MFT Die-namics - Double Stitched Circles; Clearly Besotted - Scalloped Edges Die Collection; X-Cut - Nested Circles
  • Coloured Cardstock: Papermania - Capsule Solid Cardstock; Neenah - Desert Storm
  • Stamp: Happy Little Stampers - Mix Mash
  • Ink: Versafine - Onyx Black

Challenge entries:

Creative Card Crew - Challenge #105 - Anything Goes
Crafty Cardmakers - Challenge #156 - Punches and/or Dies
Creative Inspirations - Challenge #343 - Anything Goes
Stamping Sensations - January Challenge - Anything Goes with a Die(s)


So, get your thinking caps on and we would love to see your creations in our gallery this week.

Bye for now


Tuesday, 26 January 2016

Addicted to Stamps and More #178

Hi crafters

Another week has whizzed by and it's time for another new challenge over at Addicted to Stamps and More.  Our sequence of challenges has moved on to the next theme which means we're back with...


Addicted to Holidays
(create a project relating to a holiday such as Christmas, Easter, etc. or create a vacation themed project)


Our sponsor this week is DRS Designs who are offering a prize of a $10 gift certificate to our lucky winner.

I've used one of its designs on my DT card this week...


I started by printing the digi image onto some white cardstock.  I then masked off the snow banks at the base and blended various colours of Distress Inks to create a Northern Lights effect.  I only have one type of cardstock that will successfully go through my printer which, unfortunately, isn't the best for blending, it was a bit 'squeaky' and not fun to use at all.  But for the effect I was trying to create I think the uneven blend actually works ok.  I stamped the sentiment then mounted the panel onto a black frame before adhering to the card base.  I finished by adding some 'stars' using a white pigment pen and added some Stickles to the snow banks for that all important Christmas sparkle.  And there you have it, my first Christmas card of 2016 in the bag!

Materials used:
  • Stamps: DRS Designs - Triple Tree with Snow; Happy Little Stampers - Mixed Christmas Sentiments
  • Ink: Distress Ink - Twisted Citron, Broken China, Festive Berries, Squeezed Lemonade, Black Soot; Versafine - Onyx Black
  • Accents: White Signo Uni-ball pen; Stickles - Crystal

Challenge entries:

Crafty Hazelnut's Christmas Challenge - Challenge #265 - Use a sentiment
Creative Inspirations - Challenge #343 - Anything Goes
Inkspirational - Challenge #100 - Blast from the Past (previous colour challenge) - Neons


AAA Cards - Game #56 - Winter Wonderland


My teamies have created a wonderful selection of different projects for you this week so why not pop over and grab some inspiration. And as this is a holiday challenge, why not take the opportunity to get an early start on your Christmas cards! ;)


Saturday, 23 January 2016

Less is More Week #260

Good morning

Where do the weeks go?  Can you believe it's time for another new challenge at Less is More?  Well, it is and this week we have a Recipe challenge for you which is to...


Include a Silhouette
Please remember to keep you creations clean and simple.


I have three sample cards to whet your appetite this morning so let's get to it.


Some Distress Ink blending for my first card...


I used a circle die to create a mask and then blended Distress Inks to create the sun.  I then stamped the bird and branch silhouette in black ink.  I then messed up with my sentiment stamping, I tried to re-stamp it to create a sharper impression but didn't line it up exactly right (can't wait to get my hands on a Misti!).  So to correct it I embossed the sentiment in white onto a strip of black cardstock, adhered this over my blunder and then added some smooth clear gems to finish.

Materials used:

  • Ink: Distress Ink - Squeezed Lemonade, Dried Marigold, Abandoned Coral; Versafine - Onyx Black; VersaMark
  • Stamps: Card-io Combinations - Christmas Scenery 2; Clearly Besotted - April Showers
  • Embossing Powder: Wow! - Opaque Bright White


Challenge entries:

Creative Inspirations - Week 343 - Anything Goes


I tried a different approach with Distress Inks for this next card...


I masked off a horizontal section on a panel of white cardstock and used a circle mask for the moon.  I then blended with Distress Inks but instead of building up the colour to a smooth finish I kind of swiped back and forth horizontally to build up the blend.  I then removed the mask and used a wet wipe to swipe across, to gently remove some colour and to spread it across the moon to (hopefully) give the impression of a cloudy dusk sky.  I then simply stamped the dove and sentiment in black before matting and layering onto the card base with a black frame.

Materials used:

  • Ink: Distress Ink - Milled Lavender, Dusty Concord, Faded Jeans; Versafine - Onyx Black
  • Stamps: Clearly Besotted - Paired Up; Uniko - Flower Power #1


Challenge entries:

613 Avenue Create - Challenge #159 - Anything Goes


And my Brushos had a little outing for my third card...


On a piece of white cardstock I sparingly sprinkled some Brusho crystals (and I mean sparingly - you only need the lightest sprinkling), spritzed with water to reveal these gorgeous colours and left it to dry.  Next I die cut a section of the cardstock with a stitched rectangle die and also die cut the dragonfly, before placing some black cardstock behind the negative space.  I stamped the sentiment, added some small black gemstones to create the flight trail and then mounted to the card base using 3D foam.

Materials used:

  • Ink: Brushos - Purple and Emerald Green; Versafine - Onyx Black
  • Dies: MFT Die-namics - Stitched Rectangles; Clearly Besotted - Dragonfly Die
  • Stamp: Clearly Besotted - Just Fabulous
  • Accents: Hobbycraft - 2mm black gemstones

Challenge entries:

Stamping Sensations - January Challenge - Anything Goes with a Die(s)
Happy Little Stampers - January CASE the Designer


Inkspirational - Challenge #100 - Blast from the Past - Previous colour challenge (Purple, White, Green)


There are lots of solid stamps out there so I'm sure you have something in your stash that fits our challenge.  We'd love for you to join us this week.

Bye for now


Saturday, 16 January 2016

We're Kissing at Less is More

Good morning, crafters!

So, there's a new challenge for this coming week just kicking off at Less is More and we have an interesting one for you.  Our theme for this week is a technique, which is...


Stamp Kissing!
This involves inking up a solid stamp and a detailed stamp and then 'kissing' them together before stamping onto your project.  There is a more detailed description over at Less is More or you can find lots of tutorials over on YouTube.


I've got two examples for you today.  I won't lie, I dragged LOTS of stamps out of my stash before I found some which worked together.  And a little tip for you, I find this technique works best with pigment ink, the sticky consistency seems to help in keeping hold of the detail of the images.

So, here's my first...


For this one I chose leaves as my solid images and a distressed grid image for my detail.  For each leaf I inked it up with the lightest ink, then inked up the grid stamp with a darker shade, 'kissed' them together then stamped on my card base.  I stamped a few leaves in different shade combos directly on my base.  I embossed the sentiment in white on a black strip of textured card, adhered this flat and then added some enamel dots.

Materials used:

  • Stamps: Paper Smooches - Leafy Greens; Kaidercraft - Grid; Sentiment from Hero Arts set (unknown name)
  • Ink: Versa Color - Green Tea, Evergreen, Bamboo, Olive, Umber; VersaMark
  • Embossing Powder: Wow! - Opaque Bright White
  • Accents: Doodlebug Sprinkles - Limeade

Challenge entry:

Daring Cardmakers - Leaf it Alone!


I decided to go with a fun feel for my second card...


Again, I stamped the solid images, this time the balloons, with the lightest shades and then inked up a circles background stamp with the darker co-ordinating shades.  These were kissed together, stamped, and then die cut with the co-ordinating balloon die.  I stamped the balloon strings on a white cardstock panel and adhered the balloons flat to this.  I added the fun style sentiment and then popped the panel up on 3D foam.

Materials used:
  • Stamps: Wplus9 - Whole Lotta Happy; Uniko - Balloon Bash (strings); Pink Cat Studio - Background Stamps
  • Ink: Versa Color - Cyan/Royal Blue, Heliotrope/Violet, Pink/Opera Pink; Versafine - Onyx Black
  • Die: Wplus9 - Whole Lotta Happy

Challenge entries:

Cute Card Thursday - Challenge #408 - A Bit of Fun
Seize The Birthday - Clean and Simple
Simply Create Too - Challenge #100 - It's Party Time
Stamping Sensations - January Challenge - Anything Goes with a Die(s)
Time Out Challenges - Challenge #47 - Birthdays with Optional Twist (I didn't twist for this one)


If you are new to this technique why not have a go, I've only done it once before so this was also a challenge for me this week.  I hope you'll join us.


Tuesday, 12 January 2016

Addicted to Stamps and More #176

Hi there

There's a new challenge just starting over at Addicted to Stamps and More and we're back with everyone's favourite challenge, the super easy...


Anything Goes
Just have fun and link up any crafty project you've been working on


Our sponsor for this week's challenge is the fantastic STAMPlorations and one lucky winner will receive a $10 gift certificate!


For my DT card I decided to have a play with a stamp set which has been waiting patiently to be inked up...


I stamped the floral image and the sentiment in black ink, before colouring in the image using my Derwent Coloursoft pencils.  The panel was then popped up on 3D foam before I added a few irridescent sequins to finish.

Materials used:

  • Stamps: Clearly Besotted - Fairytale Ending
  • Ink: Versafine - Onyx Black
  • Coloured with Derwent Coloursoft Pencils
  • Accents: Sequins from stash

Challenge entries:

Crafty Cardmakers - Challenge #155 - New (marriage)
Creative Inspirations - Challenge #342 - Florals
Crafty Catz - Challenge #306 - Flowers


Why not pop over to ATSM and see what my teamies have created to inspire you this week.  As it's an Anything Goes week there's a really fantastic diverse selection.

We would love to see you in our gallery this week.


Monday, 11 January 2016

Muse #148 - Ditsy Floral Get Well

Hi there

It's time for a new weekly challenge over at Muse and I'm delighted that it's my turn to be your muse again.

The idea at Muse is to use the Designer's card as the inspiration for your creation.  You can interpret it as you wish; using the colours, layout, techniques, etc.  You can find out more about the challenge guidelines here.

I decided to create a really clean and simple design for you this week, with little pops of colour.


On a horizontal strip I embossed the floral image in VersaMark before heat embossing with black powder.  I then coloured in the flowers with some brightly coloured FlexMarkers.  As it was a cheerful design I chose a get well sentiment (from the same set) which I also stamped on the same strip before mounting on some black cardstock and adhering flat to the card base.

Materials used:

  • Stamps: Wild Rose Studio - Flower Doodles
  • Ink: VersaMark; Versafine - Onyx Black
  • Embossing Powder: Stampin' Up - Black
  • Coloured with FlexMarkers

I am linking up this card at the following challenges:

Creative Inspirations - Challenge #342 - Floral
Crafty Catz - Challenge #306 - Flowers 


I'd love for you to play along at Muse this week and to see where my design leads you.

Bye for now


Sunday, 10 January 2016

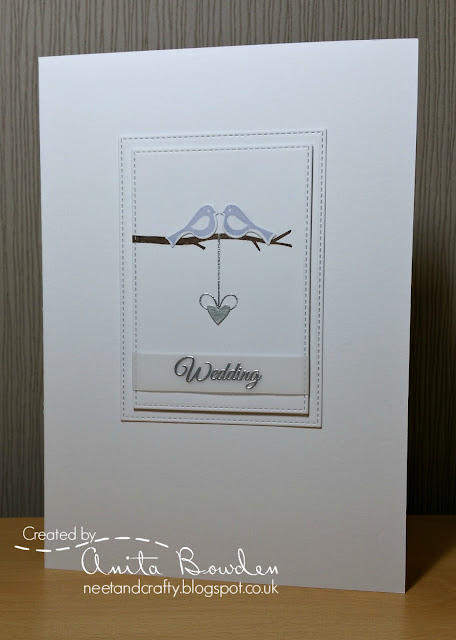
Love Birds Wedding Invitation

Hi there

I've been wanting to share this for a while.

I recently made a set of wedding invitations for my brother, Glenn, and his fiancee, Sarah, who are getting married in April.  I wanted to make sure the invitations had gone out before I shared the design here, and as I was recently the happy recipient of one of them (and very nice it is too! lol) I can now show you.

Glenn and Sarah love nature, particularly birds, so that's the theme we chose together for the design of the invitations.  These invitations were A5 and I thought I might struggle to fill the card front but I think these central layered die cuts work just fine for this CAS design.


I made a number of these so worked on each element at a time.  I die cut all the panels first then on the smaller of the two I stamped the branches.  I then stamped and die cut the birds with their co-ordinating dies - there were a lot of birds!  Next I stamped the hanging bows in VersaMark and heat embossed with silver embossing powder.  On some strips of clear vellum I stamped the sentiments, also in Versamark and heat embossed in silver.  These strips were then wrapped around the panels and adhered to the back.  I die cut some mini hearts from some shimmery silver cardstock, adhered these over the bows and adhered the birds on the branches.  These panels were then adhered to the larger panels on 3D foam before adhering flat to the card bases.  Glenn and Sarah wanted to create their own inserts so these were popped in later.

Materials used:

  • Stamps: Clearly Besotted - Paired Up (birds and branch), Ornamental Style (hanging bow), Happily Ever After (sentiment)
  • Ink: Versa Color - Pinecone, Smoke Blue; VersaMark
  • Embossing Powder: Wow! - Metallic Silver
  • Dies: MFT - Stitched Rectangles; Clearly Besotted - Paired Up; Lawn Fawn - Mini Hearts

Challenge entries:

Stamping Sensations - January Challenge - Anything Goes with a Die(s)
House of Cards - January Challenge - Embossing and/or Color Inspiration
Just Us Girls - Week #325 - Trend Week - Metallics


Stamplorations - January CAS Card Challenge


{PIN}spirational Challenges - Challenge #156 - picture challenge


Thanks so much for popping by.  I'll be back tomorrow with details of the next Muse challenge.


Saturday, 9 January 2016

One Layer with a Flourish

Good morning

Saturday morning at 8am can only mean it's time for another new challenge over at Less is More.  Our sequence of challenges has whizzed around again so this week we are back with our One Layer challenge and the theme is...


Flourish


I've got two cards to share with you this week, here's the first.  And with February not far away I thought I'd go with a Valentine's Day theme...


I started by stamping the flowery flourish off the top edge of the card base with black ink.  I then found a stamp which co-ordinated perfectly and used part of this to create the vertical line of dots to suspend my die cut heart which was cut from a scrap of deep red cardstock.  I then added some Wink of Stella for some shimmer, stamped the sentiment along the top edge and finished by adding some clear smooth gemstones to the centres of the flowers.

Materials used:

  • Stamps: Inkadinkado - Modern Flower Flourish; Penny Black - Salutations (line of dots); Clearly Besotted - Happy Anniversary
  • Ink: Versafine - Onyx Black; Versa Color - Cardinal
  • Die: Lawn Fawn - Mini Hearts
  • Accents: Wink of Stella - Clear; Smooth gemstones from stash


Challenge entries:

613 Avenue Create - Challenge #157 - Anything Goes (option - CAS card)
CASology - Week 179 - Simple


I chose a coloured card base for my second card...


I stamped the flourish and butterfly in VersaMark ink and heat embossed with white embossing powder.  I love that the butterfly also has flourishes on its wings!  I coloured in the butterfly with ProMarkers to add a touch of tone on tone detail.  I then simply finished with a sentiment stamped in green ink and some glitter enamel dots.

Materials used:

  • Stamps: Honey Doo Crafts - Flowers for Design and Beautiful Butterflies; MFT - Peaceful Wildflowers
  • Ink: VersaMark; Versa Color - Evergreen
  • Embossing powder: Wow! - Opaque Bright White
  • Accents: ProMarkers; Glitter Enamel Dots from stash

Challenge entries:

Passion for ProMarkers - Challenge #327 - Monochrome (little use of ProMarkers but they are there!)
House of Cards - January Challenge - Embossing and/or Color Inspiration (I chose embossing here)


One layer cards are fast becoming one of my favourite types to make, I don't know what I was so afraid of before.  My teamies are sharing some great projects this week, if you get the chance please pop over to their personal blogs, I know they will appreciate your visit.  I can't wait to see your creations in the gallery this week.

Bye for now!


Saturday, 2 January 2016

Happy Little Stampers January 2016 CAS Challenge

Good evening, crafters

The beginning of the month marks the start of lots of challenges over at Happy Little Stampers, and today there is a new CAS challenge just starting.  We have a new technique challenge for you which is...
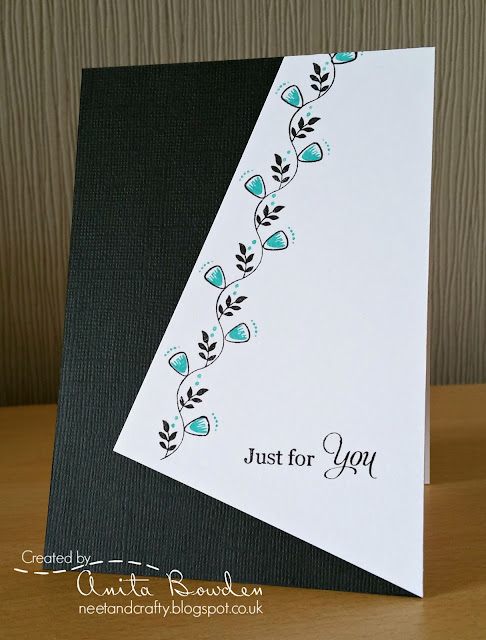


Happy Little Stampers are sponsoring this challenge and one lucky winner will receive a stamp set!

If you are unfamiliar with the smooshing technique there are lots of video tutorial links over at the challenge blog to give you some ideas and inspiration.

We also have a Guest Designer joining us this month who is Joyce from Cards by the Sea.  So, if you can spare a few moments, please drop by and say hi and give her some love :)

Here's my smooshed card...


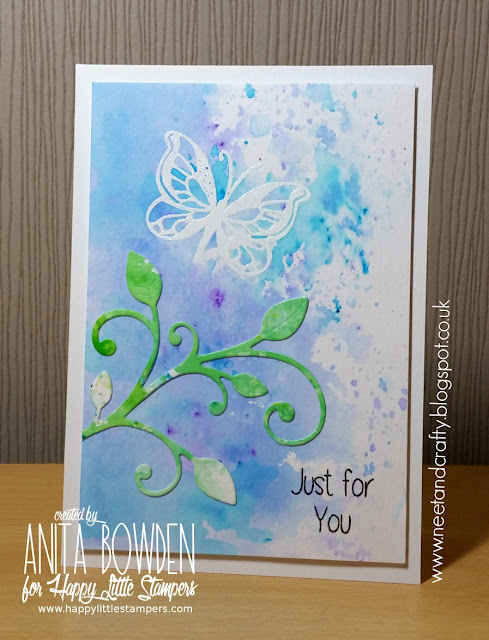
On a panel of watercolour cardstock I stamped and heat embossed the butterfly using white embossing powder.  I sprinkled some Brusho crystals in two colours onto a craft mat, spritzed with water and then smooshed my card panel onto it, picking up the colour.  On another piece I smooshed two shades of green Brushos then when dry die cut the leaf flourish.  I stamped the sentiment in black, adhered the leaf flourish, trimming the excess from the edge, and mounted onto a card base using 3D foam.

Materials used:

  • Stamps: Happy Little Stampers - Butterfly Birthday
  • Ink: VersaMark; Versafine - Onyx Black; Brushos - Ultra Marine, Turquoise, Emerald Green and Leaf Green
  • Embossing Powder: Wow! - Opaque Bright White
  • Die: MFT Die-namics - Leaf-filled Flourish

We would love for you to have a play and join in the challenge which will run until the end of January.  Smooshing is great fun and you're guaranteed to get a unique card every time.

Thanks so much for popping by today and there is plenty more inspiration over at HLS where my teamies are also sharing their lovely projects with you.


CAS Neutrals

Hi there

I'm here to let you know that the first challenge of 2016 is just going live over at Less is More.  We're continuing with our sequence of themes and, therefore, as it's the first Saturday of the month we are bringing you a Colour challenge.  And our colour theme is...


Neutrals

Please remember to keep your creations clean and simple and be aware that a maximum of 5 challenges may be combined including ours.


I have two sample cards to share with you today, here's the first...


A super simple card but these are the kind I love more and more.  Just card and ink, with lots of white space.  On a panel I stamped the tulips in two neutral shades.  I then stamped the sentiment in black.  The panel was then popped up on 3D foam.  

Materials used:

  • Stamps: Stampin' Up - Both Way Blossoms; MFT - Peaceful Wildflowers
  • Ink: Versa Color - Cement and Bisque; Versafine - Onyx black


And my second card, I think neutrals are a great option for sympathy cards...


I used kraft cardstock for the base and panel here.  All the foliage stamps are from the same set.  The flowers in the foreground were heat embossed using white powder and the ferns behind were stamped using pigment ink, the darker was stamped off first to make it less intense.  The sentiment was stamped in the same dark brown.  The panel was then adhered to the base on 3D foam.

Materials used:
  • Cardstock: Neenah - Desert Storm
  • Stamps: Inkylicious - Meadow Breeze; Clearly Besotted - Many Messages
  • Ink: VersaMark; Versa Color - Umber and Pinecone
  • Embossing Powder: Wow! - Opaque Bright White

Challenge entries:

House of Cards - January Challenge - Embossing and/or Colour Inspiration (I chose just embossing)
Creative Inspirations - Challenge #341 - Anything Goes
Creative Card Crew - Challenge #103 - Anything Goes
Crafty Creations - Challenge #305 - Anything Goes


So, if you haven't started getting crafty since the Christmas/New Year break, now is a good time to start.  We would love to see your neutral creations in the gallery this week.

Thanks so much for stopping by.


Friday, 1 January 2016

2015 - Year in Review and Some Favourites

Hi there

May I start by wishing you all a very Happy New Year!

I was planning to write this post yesterday but was working all day and then completely ran out of time so I suppose New Year's Day is a good enough day to reflect on the previous year.  I've also been crafting today, catching up on Design Team commitments so have finally got my essential stash back out where no doubt it will remain until I need the table again next Christmas!


Design Teams

So, during 2015 I have remained on and love being part of the Design Team at Addicted to Stamps and More.  It's been sad to see some great teamies go but also great to have new members join the friendly team.

In May I was asked to be Guest Designer for a few weeks at Less is More and was then delighted when I was invited to join the team as a permanent member, alongside some lovely ladies.  Clean and Simple designs are my absolute favourites so I'm so lucky to be on this team creating CAS cards on a weekly basis.

July saw me join the CAS team at Happy Little Stampers.  Having worked with 'boss lady' Kylie at ATSM for some time I was delighted when I was chosen to join one of her teams and thrilled for her when she launched her very own stamp company.  I can't wait to see what new designs are coming up this year.

And finally, I had to pinch myself when Queen of Clean and Graphic, Ardyth, emailed me asking if I'd like to join the team at Muse. Er, helloooo!  Of course, I bit her hand off and started creating for Muse in July.  I love that there are no rules, I can create any type of card I want and love seeing how it inspires the participants.

So, to all my bosses and teamies at the above teams I would like to say a massive THANK YOU for having me, I'm having a blast!


Guest Design Work

At the beginning of the year I was lucky enough to be invited by the lovely Stephanie, owner of Clearly Besotted Stamps, to be a Guest Designer for the second time, this time for the January Release.  I absolutely LOVE Clearly Besotted and have soooo many CBS stamps and dies in my stash so this was an absolute honour to showcase her products.

I also had the pleasure of guest designing for Less is More, Uniko Challenge and twice for CASology.


Stash

I played around with a few new techniques last year, and the main reason for this was that I discovered and purchased my first Distress Inks!  I don't know how I managed without them and now plan to add a few more colours to my collection.

As usual, I purchased a lot more than I used so hopefully this year (!!!) I'll use more of what I already have and spend less....hmmmm, not very likely is it?  We crafters are all the same so I know you'll understand our need to have new happy mail....if only to stroke it before storing it away in a nice new storage system! haha


Favourites

Now to share some favourites.  These aren't a card per month, just the ones I've enjoyed creating or was really happy with the result.


Loved this combo of stamps and a digi

Really enjoyed this stacked inlaid die technique

A simple one layer card but I absolutely loved it, and you did too

One of my first attempts at blending with Distress Inks = hooked!

Loved working with this little touch of gold and I won some challenges with this CAS card

More Distress Ink blending and I was so pleased with this super simple card

My first of many cards using the ghosting technique with Distress Inks, stencils and water
 
One of my GD cards for Uniko, loved building the design with these tiny stamps

A one layer card, digi, colouring, masking and stencilling - loved how this turned out
 
I think this is my absolute favourite

I adore this Altenew stamp set, perfect for colouring

Tone on tone colouring - this won a few challenges and had so many lovely comments

Took some planning but was really pleased with the result - and was delighted when fellow bloggers wanted to CASE it too

I've done very little paper piecing but this one was great fun to create
 
My GD card for CASology and one of the simplest cards I've ever made!


If you're still with me, thank you so much for stopping by.  I hope you've enjoyed my blog throughout 2015 and that you'll continue to visit, I just love your visits and overwhelming comments.

I'll be back in the morning to tell you about the new challenge at Less is More :)


Related Posts Plugin for WordPress, Blogger...