Sunday, 27 January 2013

Have a Beautiful Day!

Hi guys

I was having a lazy Sunday afternoon so decided to have another little play with the gorgeous Clearly Besotted Stamps and also the Butterfly Wishes dies I bought to co-ordinate with the stamps.

This is my first attempt with co-ordinating stamps and dies so I want to send massive thanks to Michelle at the Card Grotto for her brilliant video explaining how best to align them, and so what I thought was going to be a difficult task was actually easy peasy!  So thanks Michelle, you're a star!  You can find the video here.

I am entering this card into the latest challenge at Less is More, to produce a card based on this sketch:


And here is my card...
 
 
I started by masking off a panel and then used a tinted embossing stamp pad to stamp the butterflies and leaves and then heat embossed using a sparkly embossing powder.  I wanted the background panel to be subtle but as usual, my photography isn't great, so hopefully the next photo shows the embossed panel a little better...


I then stamped three more butterflies with coloured ink and heat embossed with the same powder, die cut these with the matching die and popped them up on 3D foam.  I finished off by stamping the sentiment in the bottom corner. 
 
Materials used:
  • Stamps: Clearly Besotted Stamps - Butterfly Wishes and Leafy Accents sets; Sentiment: Personal Impressions - Mix & Match set
  • Ink: Tsukineko - Embossing Stamp Pad Tinted; Versacolor - Lavender and Lilac; Versafine - Onyx Black
  • Embossing Powder: All Night Media - Crystal Sparkle
 
Thanks for visiting today, I hope you've had a lovely weekend.
 
Neet x
 

Friday, 25 January 2013

Let's Go Fly a Kite

Hi guys

I've got a bright and cheerful card to share with you tonight.  I made this for my friend's son who is celebrating his 5th birthday.  I struggle with children's cards, especially for boys, so I'm glad I bought this little kite stamp to add to my collection.

I am entering this card into the following challenge:


And here's my interpretation of the sketch
 
 
I cut a strip of blue card and embossed the numbers using a brass stencil and a light box.  I then cut the yellow card into a triangle and stamped the sentiment.  I stamped the kite image using Impress ink in Jet Black and coloured with ProMarkers.  I used an oval die to cut around the image and popped this up on 3D foam. 
 
I decided to use three different primary colours and three different shapes.
 
Materials used:
  • Stamps: Kite - Hobbycraft (from the £1 range of stamps); Sentiment - Papermania 'Stamping for Him'
  • ProMarkers: Poppy, Tulip Yellow, Azure
  • Ink: Impress - Jet Black; Versafine - Onyx Black
  • Cardstock: Kanban 300gsm Brilliant White Cardstock; Bazzill Basics Premium Cardstock (blue and yellow)
  • Die: Spellbinders Nestabilities - Classic Ovals Large
  • Brass Stencil - Papermania
 
Thank you for visiting today, I appreciate you taking the time.
 
Neet x


Wednesday, 23 January 2013

Best Friend Hugs

Since starting my blog I think this has to be my favourite card so far, I'm really pleased with the result.

I am entering this card into the following two challenges:

 
Clean & Simple Sketch


Week 103 Theme - Friends
 
 
So here it is
 
 
 a closer view...


When I saw that the latest Less is More theme was 'Friends' I knew exactly which stamp I wanted to use, its called 'Best Friends' by Wild Rose Studio.  Its such a fun and girlie stamp, I love it!  I stamped the image and coloured with ProMarkers and although still a novice I really enjoyed colouring this one.  I chose the patterned paper I wanted to use before I started colouring the image.  I still only have a few ProMarkers in my collection but managed to match it up ok.  The design paper I used is from a paper pad by First Edition Paper and has glossy, glittered accents.  I took the following photo using the flash to try to pick up on the glitter.


I die cut the image and popped it up on 3D foam and then finished off the card with some peach grosgrain ribbon, an extra large brad with a rub-on sentiment and an adhesive pearl.
 
Woohoo, actually really chuffed :)
 
Materials used:
  • Design Paper: First Edition Paper - Spring Feast Paper Pad
  • Cardstock: Kanban 300gsm Brilliant White Cardstock
  • Stamp: Wild Rose Studio - Best Friends
  • Ink: Impress - Jet Black
  • Coloured with ProMarkers
  • Die: Spellbinders Nestabilities - Reverse Wonky Rectangles
  • Brad and Rub-On: Hot Off The Press - Words, Hearts & Flowers
  • Ribbon and pearl from stash
 
Thanks so much for visiting, I really appreciate your interest.
 
Neet x


Monday, 21 January 2013

Passion for ProMarkers - Week 181

Hi guys

I'm here today after having another attempt at colouring with my very limited stock of ProMarkers and thought I would enter this week's challenge at Passion for ProMarkers.  The Week 181 theme is 'whatever the weather' so I remembered this little stamp I bought not long ago. 


I opted to stamp the mouse image using Memento London Fog.  Its quite a small image so I didn't want to overpower it by using black.  I chose to stamp the sentiments with the same ink to tie in with the quite muted shades.  I thought the colours I used for the image would be great matched with a kraft card and I found a pad of papers I've had in my stash for a long time and found that the colour tones worked really well.  I finished it off with some grosgrain ribbon and a few pearls.
 
I couldn't decide what occasion this card could be used for so chose some sentiments to create a note card, I love the fonts of these.  Promarkers are difficult to get used to but I'm sure I'll be able to do better once I build up my collection of colours.  Saying that, I'm quite proud of this little chap :)
 
Materials used:
  • Stamps: Mouse - unknown brand; Sentiments - Personal Impressions 'Mix and Match'
  • Ink: Memento - London Fog
  • ProMarkers: Satin, Tan, Shale, Denim Blue, Powder Blue
  • Die: Spellbinders Nestabilities - Reverse Wonky Rectangles
  • Papers: Hot Off The Press Cardmaker's Ultimate Pack
  • Cardstock: Kanban 300gsm Brilliant White Cardstock; Bazzill Basics Premium Cardstock (blue)
  • Ribbon: Grosgrain by American Crafts
  • Pearls from stash
 
Thanks for visiting today, I'm thoroughly enjoying this little world of blogging.  My housework seems to have taken a back seat...oops! :)
 
 
Neet x

Sunday, 20 January 2013

CASology Week #27 & CAS-ual Fridays CFC86

Hi guys

Well here I am with my next attempt at blog challenges. 

I'm entering the following card into the following two challenges:

 
This challenge is to make a card using a Blue theme
 
 
This challenge is to make a CAS card with one long and one short side.


I've always enjoyed using tall cards but on this occasion I decided to use it with a landscape orientation rather than portrait. 

I started by ripping a plain piece of paper and laying this over the white card base.  I then used cotton wool to swirl on some chalk to create the blue background.  Next I stamped the large flower and heat embossed with clear embossing power.  I then made a mask over this image and stamped the leaves so that they appeared to be behind the flower.  This was also then heat embossed.  I then created the sentiment, butterfly and small flower in the same way.  I then finished with a few glazed gems.

I've not used this chalking technique or heat embosssing for a while so thought I'd give it another go and I'm quite happy with the finished result.  Apologies again for the dark photos, although its daylight I still needed the light on!

Materials used:
  • Chalk: Decorating Chalks by Craf-T Products
  • Stamps: Hero Arts - Share Laughter stamp set
  • Ink: Versacolor - Sky Blue, Baby Blue, Royal Blue, Turquoise
  • Embossing Powder: Rubber Stampede - Clear
  • Gems: Papermania - Glazed Gems (Iridescent)

Thanks for visiting me today.


Neet x


Saturday, 19 January 2013

Oldies...When Peel-Offs Ruled!

Hi guys

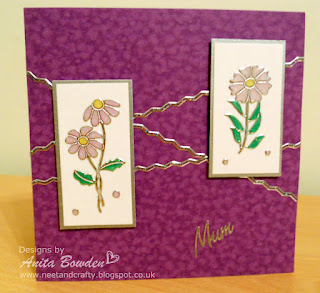
Today I thought I would share with you some of my cards from back in the day, when I first started creating.  I used to work in a large office and colleagues would buy cards from me so I always kept a stock of cards with me.  I now wish I'd taken photos of them all because I can now only share the ones that nobody wanted! :)

I was a bit scared of stamping back then so used to use many peel-offs.  I still have hundreds which have now been pretty much abandoned since I've discovered how beautiful cards can be when using stamps.  That said, these cards are quite handy to look back on as I really like some of the layouts.

So here we go:
No. 1
I actually love this little card.


I used a slim pearlescent card base and glittered transparent peel-offs which I adhered to clear vellum and coloured from behind and matted on mirri card
 
 
No. 2
Same peel-offs as No. 1 matted onto a mottled base card, with yes you've guessed it, more peel-offs behind the mats to add interest.  I secretly quite like this one too!


No. 3
A bit of ripping and tearing, metallic peel-offs coloured with permanent pens and a few quilled toppers
 
 
No. 4
I trimmed the edge of this card and overlapped the topper over the outside edge.  The image is a glossy embossed rub-on
 
 
No. 5
This is a textured silver card base with a debossed panel.  I added a topper, gem, bow and of course a peel-off!
 
 
No. 6
Simple slim card with die cut shapes and peel-offs
 
 
No. 7
A peel-off matted and layered over mulberry paper
 
 
No. 8
Another glossy embossed rub-on as in No. 4, layered over adhesive ribbons
 
 
No. 9
 Embossing using brass stencils over a light box then basic matting and layering, and vellum secured with brads 
 
 
No. 10
This is a tiny little notecard and on this occasion not a peel-off in sight!  I stamped with black ink and embossed with clear embossing powder before colouring with glaze pens
 
 
No. 11
Coloured metallic peel-off and again, the edge of the card was trimmed to show the back inside edge
 
 
No. 12
An attempt at creating a masculine card.  The ribbon on the tag was tied through an eyelet
 
 
No. 13
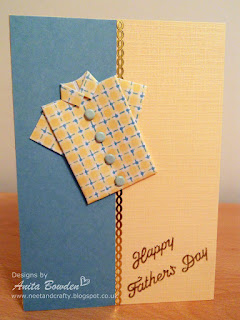
I was shown how to fold this little shirt by a demonstrator at a local craft exhibition.  I have my 'master' copy in a safe place so I can always refer back to it.  I used brads to create the shirt buttons.  And yes, more peel-offs!


Well there you have it, I hope you didn't find these too cringeworthy! 
 
I still can't part with my many peel-off sheets, perhaps they'll make another appearance on my blog, watch this space!
 
Thanks as always for visiting.
 
Neet x 

Tuesday, 15 January 2013

You Are In My Thoughts

Hiya

Today I would like to share a quick card I made last night for a bereaved close friend.  I sometimes feel that 'with sympathy' isn't what I would like to say, I just merely wanted to let her know I was thinking of her.

Apologies for the photography, the pics didn't come out too well in artificial light and I needed to post the card today so didn't get a chance to take another photo.

 
And a close up


I took this opportunity to use my new Clearly Besotted Stamps.  They are gorgeous and such fantastic quality.  I started by using a three-fold aperture white linen card.  On the inside section which would appear through the aperture I stamped the leaves using the Leafy Accents stamp set and then stamped the butterflies from the Butterfly Wishes set, one on the main face of the card.  I think this would have worked better if I'd used the Butterfly Wishes Die for the top butterfly but my Big Shot is currently at the back of a cupboard and I was running out of time....oh to be able to buy a big house and have a craft room so that everything is to hand!
 
I then stamped the sentiment which is from the Mix & Match set by Personal Impressions.  There are some really nice sentiments in this set and I felt this one was perfect for this card.  I finished off by adding a few clear rhinestones and some twine.  I made a small slit on the fold at each side and threaded the twine through and as this is a three-fold card it can't be seen on the inside.
 
I purposely chose a pale ink to stamp the leaves so that the butterfly would stamp over it, or so I thought!  That's the only part I'm not entirely pleased with as the leaf can be seen through the butterfly's wing but you learn by your mistakes, eh :)
 
Materials Used: 
  • Stamps: Clearly Besotted Stamps - Leafy Accents and Butterfly Wishes; Personal Impressions - Mix & Match
  • Ink: Versacolor - Sage, Amethyst, Heliotrope; Versafine - Onyx Black
  • Twine: Doodlebug - from the Bright Assortment
  • Aperture card and rhinestones from stash
 
Thank you so much for visiting today, I'm getting the hang of the whole Blogging world now and I'm loving it.
 
Neet x


Sunday, 13 January 2013

Less is More Challenge - OLC Sport or Exercise

Hiya

So, being a complete newbie to the blogging world I've been hopping around to see what its all about and came across the Less is More Challenge Blog.  So I thought why not give it a go.  The current challenge is to create a One Layer Card using the theme Sport or Exercise.

I'm still quite limited with my stock of stamps (I always seem to get drawn to the pretty girlie ones!) but managed to find this little guy and I'm quite pleased with the result :)


I started by scoring some lines on the top and bottom of the card just to add a some interest.  I then stamped the image with Versafine Onyx Black.  I wanted to create some interest behind the image so I drew the lines of the goal net using a Whispers Embossers pen then gently dabbed on some grey chalk with a cotton wool pad.  I coloured the image using a waterbrush and some Marvy Le Plume and Whispers Strokes pens.  I finished by stamping the 'Man of the Match' image and adding a few gems to tie it all together.

I don't think I've ever created a one layer card so all in all I'm pretty chuffed with it.  Lets hope I've followed the brief correctly!

Materials used:
  • Stamps: Footballer - unknown brand; Man of the Match - Papermania Its a Man's World, For Love of Sport
  • Ink: Versafine Onyx Black
  • Colouring: Marvy Le Plume II and Whispers Strokes pens - used with water brush
  • Whispers Embossers pen
  • Chalk: Decorating Chalks by Craf-T Products
  • Gems: Papermania Mosaics - Sapphire & Topaz set

Thanks for taking the time to visit.

Neet x


Wednesday, 2 January 2013

First Attempt with Promarkers!

Hiya

I thought I would share this Christmas card with you as it was my first attempt at colouring with Promarkers, I quite clearly need a lot more practice but I was very pleased with the overall card so don't mind sharing! :)

Apologies for the quality of the photos, the lighting wasn't great...

 
And a close up...


I started with a plain white base card and rounded two of the corners with my decorative scissors.  I then fixed a paper strip to one side of the base card using the red and white snowflake paper from the Boofle Christmas A4 Paper Pack.  I then used my Sizzix Big Shot and embossed a strip of white cardstock using a snowflake embossing folder I received free with a craft magazine, which I then fixed over the red and white paper.  I next stamped the image, 'Pickle with Gift' by Wild Rose Studio, using an Impress ink pad in Jet Black onto Kanban 300gsm Brilliant White Cardstock.  I've read that the best ink pads to use with Promarkers are either Impress or Memento as the ink won't bleed.  I then had my first experience of colouring with Promarkers, its not as easy as it looks!  Halfway through I also realised that my limited stock of Promarkers didn't contain a black or a grey so I had to colour poor Pickle in pale blue!  I then die cut the image using the largest of the Xcut Nesting Circle Dies.  I used 3D foam to fix this to the right hand side of the card.  I added a silver foiled sentiment from Craftwork Cards Festive Messages and balanced the card with a bow tied using stitched blue grosgrain ribbon from my stash.  I then finished off by adding touches of Stickles Glitter Glue in Star Dust to the image and the embossed snowflakes.
 
Materials used:
  • Cardstock and Paper: Kanban 300gsm Brilliant White Cardstock; Boofle Christmas A4 Paper Pack
  • Stamp: Wild Rose Studio 'Pickle with Gift'
  • Die: Xcut Nesting Dies Circle (5pcs)
  • Sentiment: Craftwork Cards Festive Messages
  • Promarkers: Poppy, Denim Blue, Powder Blue, Leaf Green, Tulip Yellow
  • Glitter Glue: Stickles 'Star Dust'
  • Ribbon and Embossing Folder from stash
Thank you for taking the time to visit my blog, its very much appreciated.
 
Neet x


Recent Makes

Hiya

I thought I would start by sharing a couple of cards I made at the end of 2012.  I treated myself to a Sizzix Big Shot so these were my first creations.

The first was this card I made for my Mum's birthday in October.  I'm not too happy with the layout as I didn't really plan this one well but I'm pleased with the stamped and die cut image.

 
And a close up...


I started by matting and layering some embossed dotted white cardstock onto some pink Papermania Premium Textured Cardstock to create the background base.  I then tied some lilac grosgrain ribbon around this.  I then stamped the vase and flower from the Penny Black Salutations stamp set using Versa Color ink cubes in Orchid, Fresh Green and Baby Blue on Kanban 300gsm Brilliant White Cardstock.  I then stamped the sentiment in Versafine Onyx Black from the Marion Emberson Designs 'On your special day' stamp set.  I then used my Big Shot machine to die cut and emboss the stamped image using Spellbinders Classic Ovals Large, then mounted this onto the matching pink Papermania textured card using Spellbinders Classic Scalloped Ovals Large.  This was then offset and secured with 3D foam.  I then added three lilac gems from my stash and trimmed the top corner of the base card with my decorative scissors. 
 
Materials used:
  • Cardstock: White embossed dots from stash; Papermania Premium Textured Cardstock; Kanban 300gsm Brilliant White Cardstock
  • Stamps: Penny Black 'Salutations' set; Marion Emberson 'On your special day' set
  • Ink: Versa Color in Orchid, Fresh Green and Baby Blue; Versafine in Onyx Black
  • Dies: Spellbinders Nestabilities Classic Ovals Large and Classic Scalloped Ovals Large
  • Lilac grosgrain ribbon and gems from stash
 
 
The following card I made in a hurry so chose a layout very similar to the first one.  This was for a man's birthday and I'm still very limited with craft items to use for masculine cards but I was fairly happy with the result.
 
 
I used a pearlescent card base for this one and rounded all four corners with my decorative scissors.  I then used my Big Shot machine to diecut some blue Sherbert Pips cardstock using Spellbinders Labels One.  I then tied around some Doodlebug Gingham ribbon in Beetle Black/Blue Jean.  This was then fixed to the card as a background.  I then stamped the 'Hanging Presents' clear stamp by Hobbycraft onto some Kanban 300gsm Brilliant White Cardstock using Versa Color ink cubes in Royal Blue and Turquoise and the sentiment from Wild Rose Studio 'Everyday Greetings' stamp set in Versafine Onyx Black.  This image was then diecut using Spellbinders Classic Rectangles Large and mounted onto some royal blue Papermania Premium Textured Cardstock.  I then added three small square blue gems to finish.  I had to post this card abroad so didn't want to add too much dimension.
 
Materials used:
  • Cardstock: Blue 'Sherbert Pips' from my stash; Kanban 300gsm Brilliant White Cardstock; Papermania Premium Textured Cardstock
  • Stamps: Hobbycraft 'Hanging Presents' from the £1 range; Wild Rose Studio 'Everyday Greetings
  • Ink: Versa Color in Royal Blue and Turquoise; Versafine in Onyx Black
  • Dies: Spellbinders Nestabilities Classic Rectangles Large
  • Ribbon: Doodlebug Gingham in Beetle Black/Blue Jean
  • Gems from stash
 
Thank you so much for taking the time to visit my blog.
 
Neet x
 
Related Posts Plugin for WordPress, Blogger...